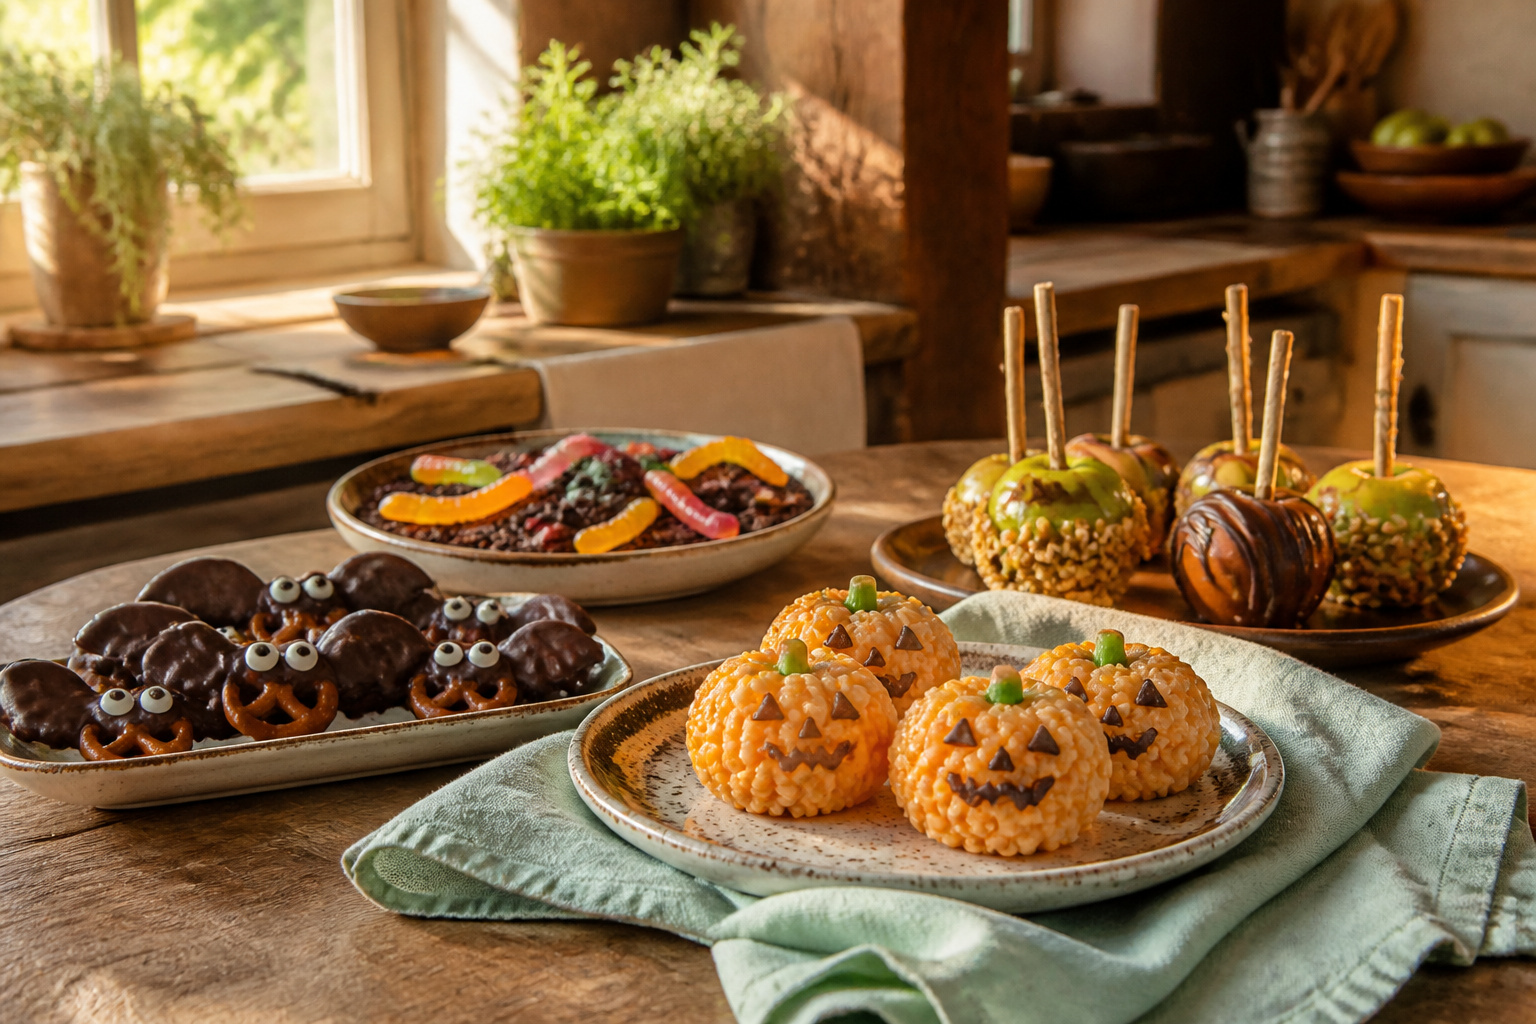
The effort ranges from fifteen minutes of stovetop work to an hour and a half of low oven drying, and the deciding factor is whether you need the treat to hold through a school day or disappear the moment the tray hits the table.
What trips most people up is timing: rice cereal stiffens as it cools, meringue ghosts turn sticky in humid kitchens, and dirt cups lose their crumbly texture if you add the cookies before chilling.
Even naturally gluten-free bases like caramel apples hide gluten in malt syrup or shared equipment, so the label check is never optional.
1. Pumpkin Crispy Rice Treats
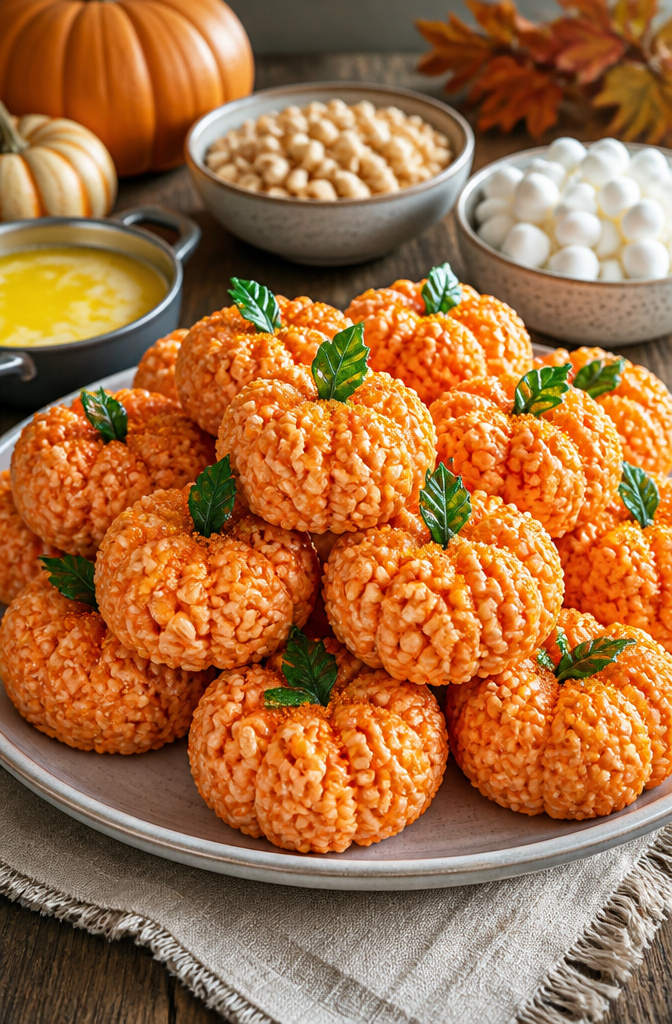
Melt 3 tablespoons of butter in a heavy pot, then add 12 ounces of marshmallows and stir until you have a smooth, stretchy base.
Drop in orange food coloring now; gel works better than liquid because the extra moisture can make the cereal soggy. Fold in 4 cups of gluten-free crispy rice cereal and work fast, since the mixture stiffens as it cools.
Buttering your hands is the only way to shape these without a fight.
Scoop out portions while they are still warm, roll them into tight balls, then flatten the top and bottom slightly and press the sides with a spoon to make the pumpkin ridges.
Spearmint leaf candy, the kind carried at Walgreens, makes a believable stem if you press it into the top while the treat is still tacky. Orange sanding sugar hides any fingerprints and adds a little crunch.
These take maybe twenty minutes from pot to plate. Cleanup is just the pot, the spoon, and whatever butter you smeared on your hands.
2. Mummy Rice Krispies Treats
You probably already know how Rice Krispies treats behave at room temperature: stiff on day one, then steadily chewier until they’re projectiles by Friday. The fix is the same for mummies as for plain squares.
Pull them from the fridge about twenty minutes before the party, or they will crack a tooth.
The base is standard: gluten-free Rice Krispies cereal, marshmallows, butter. Melt, stir, press into a pan.
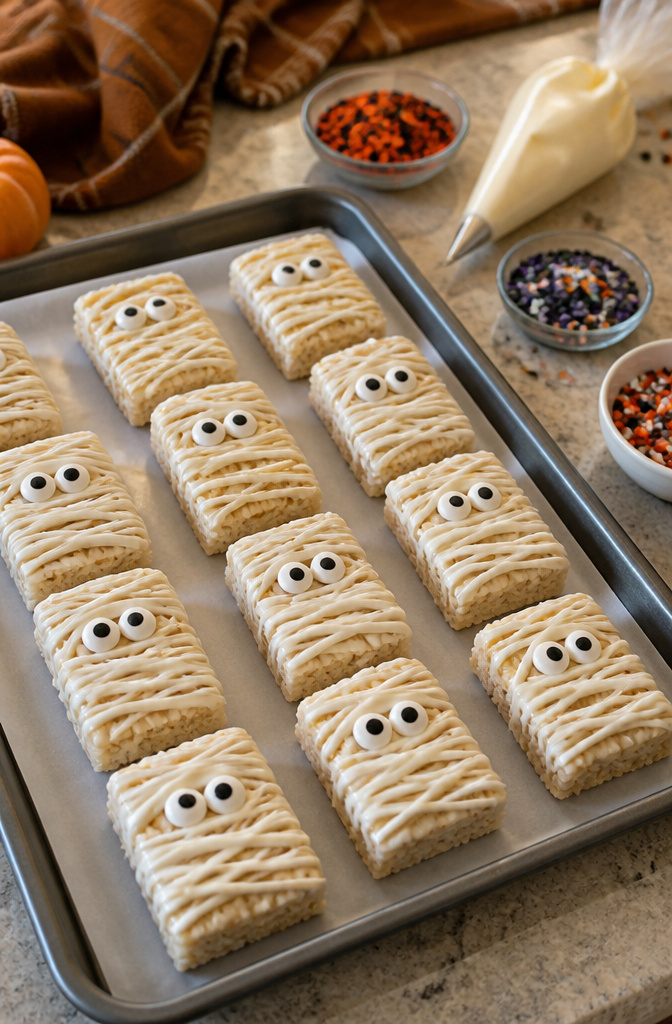
The decoration is where the mummy happens. Spread or pipe white icing in strips across each cooled square, leaving gaps so the "bandages" look wrapped rather than painted on.
Press two candy eyes into the wet icing near the top third. The eyes are the whole expression; place them too centered and the mummy looks surprised, too low and it looks ill.
White candy melts pipe cleaner than buttercream if you want sharp edges, but buttercream tastes better at room temperature. Either way, the icing sets firm enough to stack in a container for transport.
These rank high on the kid-participation scale. The base is already cool by the time you decorate, so younger children can handle the piping bag without burning fingers or melting the cereal.
3. Halloween Ghost Cupcakes
Ghost cupcakes are the treat you assemble in minutes without a piping bag. Bake any white or vanilla gluten-free cupcake base, from a boxed mix or a one-bowl recipe with rice flour and xanthan gum.
Let them cool fully, warm frosting slides.
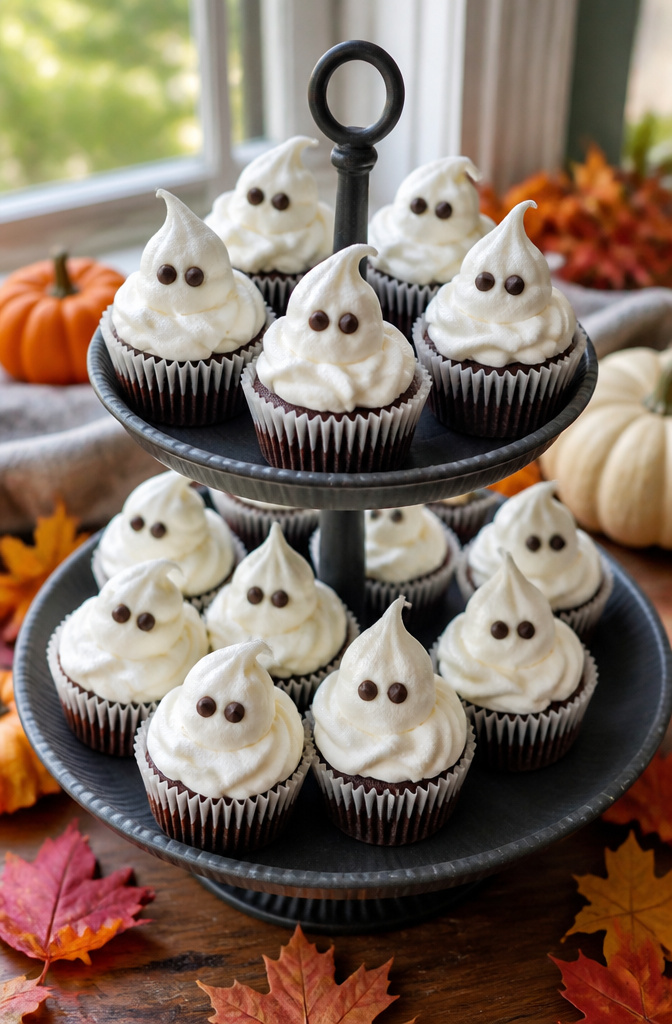
Spread white buttercream thick with an offset spatula or the back of a spoon, keeping the shape tall and rounded rather than flat. The uneven surface actually looks more like a sheet.
Press two mini chocolate chips in for eyes, point side down, while the frosting is still soft. Add a third chip for a mouth if you want expression, though two eyes alone read instantly as ghost.
The work is in the frosting temperature. Too stiff and it tears; too soft and the chips sink.
Room temperature buttercream holds the chip without swallowing it.
For school, these travel well in a cupcake tin with a foil tent. The chips rarely smudge because they sit on top rather than pressing into the surface.
If you need nut-free, check that your chocolate chips are processed in a dedicated facility; many brands carry the label now.
4. Pumpkin Spice Snickerdoodles
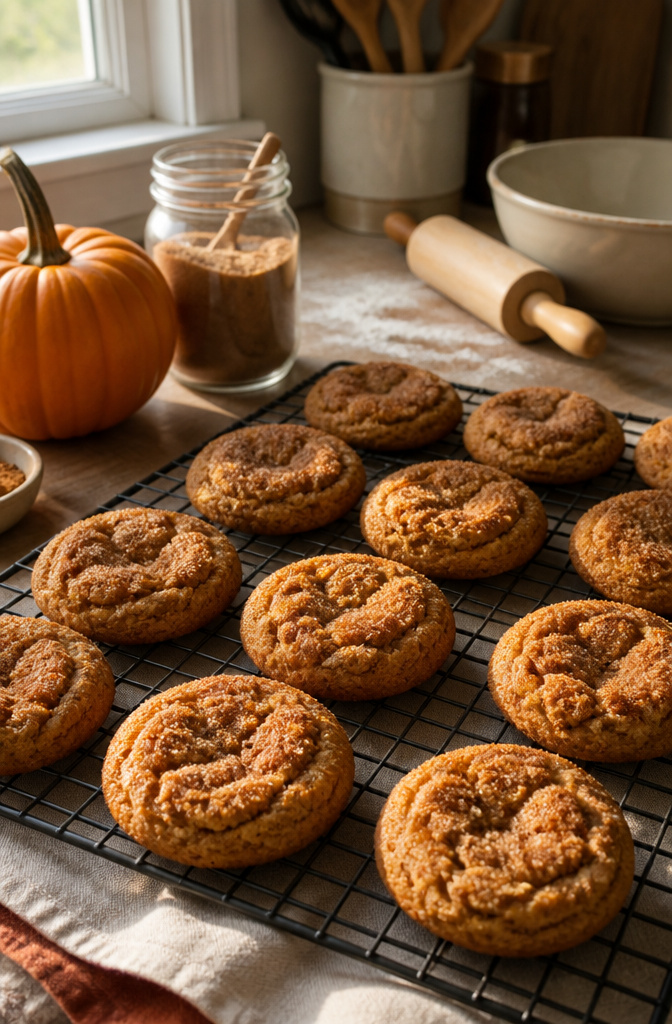
Pumpkin spice snickerdoodles bring the cinnamon-sugar crackle you expect, with pumpkin puree keeping the centers soft through day two.
The dough comes together in one bowl, though it needs a solid hour in the refrigerator before you shape it; otherwise it spreads into puddles.
A 1-to-1 gluten-free flour blend with xanthan gum already in the mix is what holds the ridges and keeps these from baking up like pancakes.
Bob’s Red Mill and King Arthur both work here, but avoid blends that lean heavily on rice flour alone, which turns sandy once cooled.
Roll the chilled dough in cinnamon sugar spiked with a pinch of cloves, then bake just until the tops crack. They will look underdone at the edges; pull them anyway.
The carryover finish sets the centers without drying them out.
For a Halloween plate, dye half the sugar coating orange or press a candied pumpkin stem into the tops while warm. Cleanup is a single mixing bowl and one baking sheet, assuming you line it with parchment.
The dough also freezes well in scooped rounds, so you can bake a half-dozen fresh on a weeknight without thawing.
5. Apple Monster Mouths
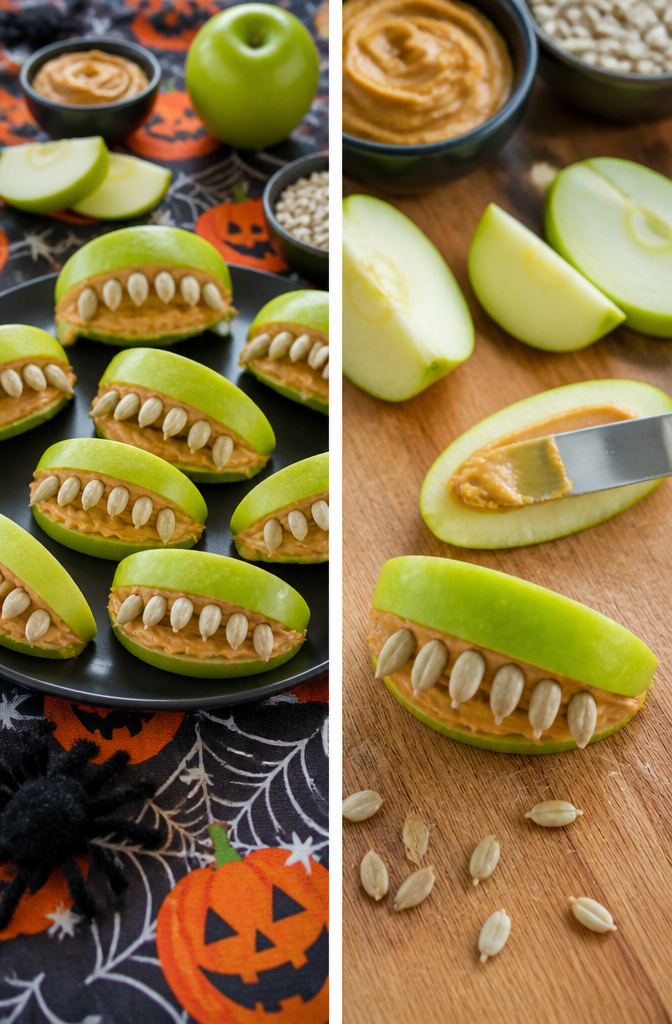
Apple Monster Mouths give you two ways to build the same joke, and the wedge version is the one that actually looks like a mouth.
Cut a green apple into quarters, core out the center, then slice a wedge from the skin side so the piece opens like jaws.
Spread peanut butter on both cut faces, press them together, and line the seam with sunflower seeds tip-out so they read as teeth.
The slice version is faster: sandwich two flat apple rounds with peanut butter in between, then add the seeds. It looks more like a sandwich cookie than a monster, but it holds together better in a lunchbox.
You can swap in any nut butter, or use sunflower seed butter if you need a nut-free option for school. Mini marshmallows work instead of seeds if you want a sweeter bite, though they soften faster than seeds do.
Green apples give the best color pop, but yellow or red work fine if that is what you have.
6. Dirt Cups
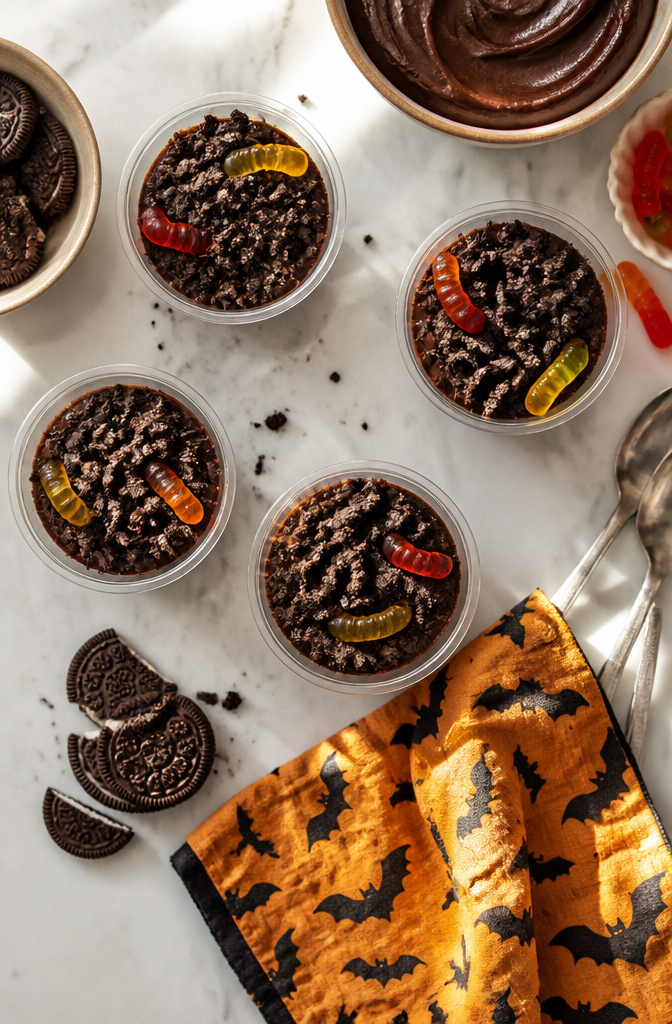
Dirt cups work because the layering order is doing the visual work for you. Start with two cups of dark chocolate almond milk whisked into corn starch, cocoa powder, and coconut sugar, then cook until it thickens into pudding.
That 15-minute cook time is the only real effort; after that, the setup is about patience.
Spoon the warm pudding into small cups first, chill it for the full three hours so it sets firm, then top with crushed gluten-free chocolate sandwich cookies and gluten-free gummy worms.
Put the cookies on last, after the chill, or they soften into the pudding and you lose the crumbly dirt texture entirely. Five cups is a modest yield, so scale up for a classroom or party table.
The finished cups hold fine for a day, which matters when you are prepping between school pickup and the event itself.
7. Olive Cream Cheese Spider Bites
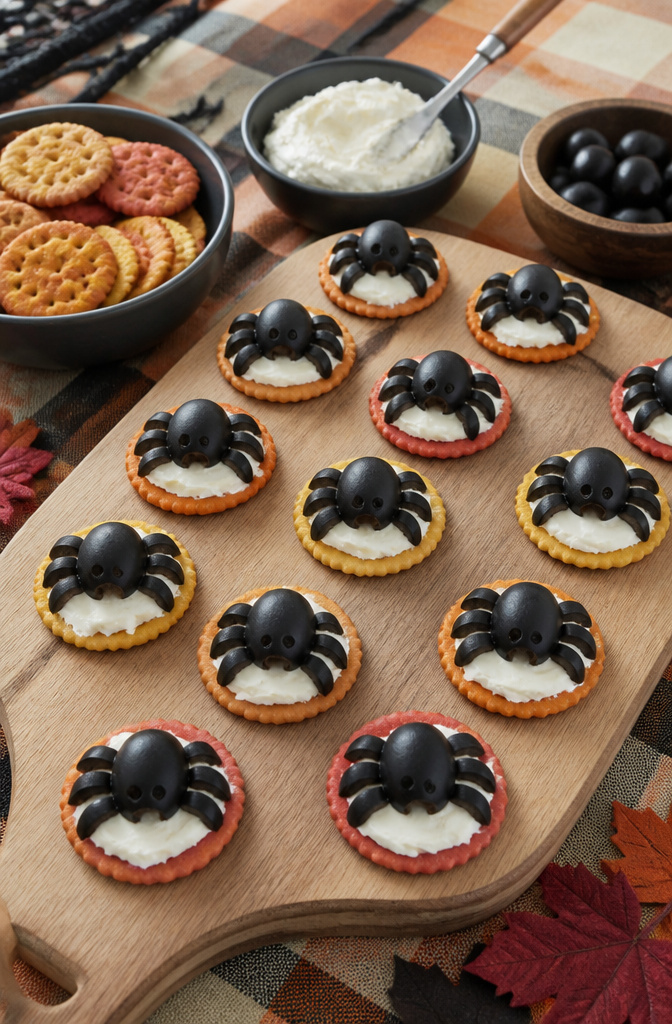
Large pitted black olives turn into spiders with one straight cut down the middle, stopping before you reach the hole. Open the olive so it lies flat like a body with eight legs splayed out.
Another olive stays whole for the head. You press both onto a cracker already spread with cream cheese, and the cheese acts like glue.
A small piping bag or a zip-top bag with the corner snipped off makes laying down the cream cheese faster and neater than a knife, especially if you are assembling two dozen for a classroom party.
Gluten-free crackers with some color, like sweet potato ones, push the Halloween angle harder than plain rice crackers. For dairy-free needs, softened dairy-free cream cheese from brands such as Kite Hill spreads the same way.
These hold up fine on a platter for a couple of hours, though the olives will weep slightly and soften the cracker underneath if you build them too far ahead.
8. Bell Pepper Olive Monster Eyes
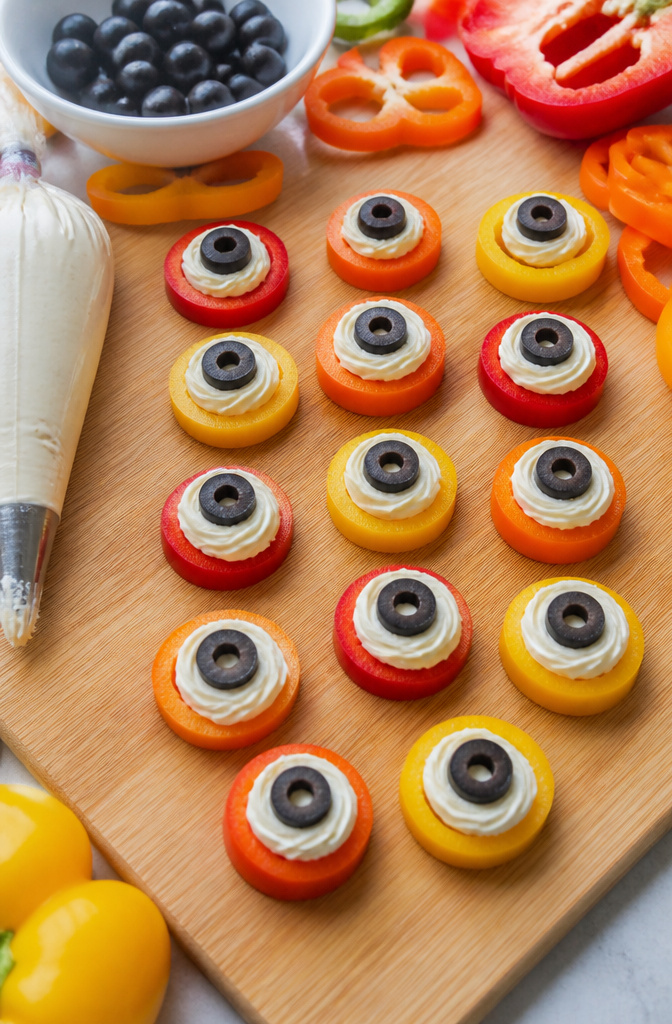
Bell pepper olive monster eyes are the kind of snack you can assemble while the oven preheats for something else. Cut a bell pepper into four flat pieces, then punch out circles with a small circle cutter.
Red, green, or orange peppers all work, so buy whatever looks crisp at the store that week.
Pipe softened cream cheese onto each circle using a piping bag with a large circle tip, or use a Ziploc with the corner snipped if you do not keep piping bags on hand.
Slice olives into 1/4-inch wide pieces and press one into the cream cheese. The olive slice sticks where you put it, and the whole thing holds together in the fridge until party time.
If you need these dairy-free too, a brand like Kite Hill substitutes straight across without changing the method.
9. Peanut Butter Apple Monster Teeth
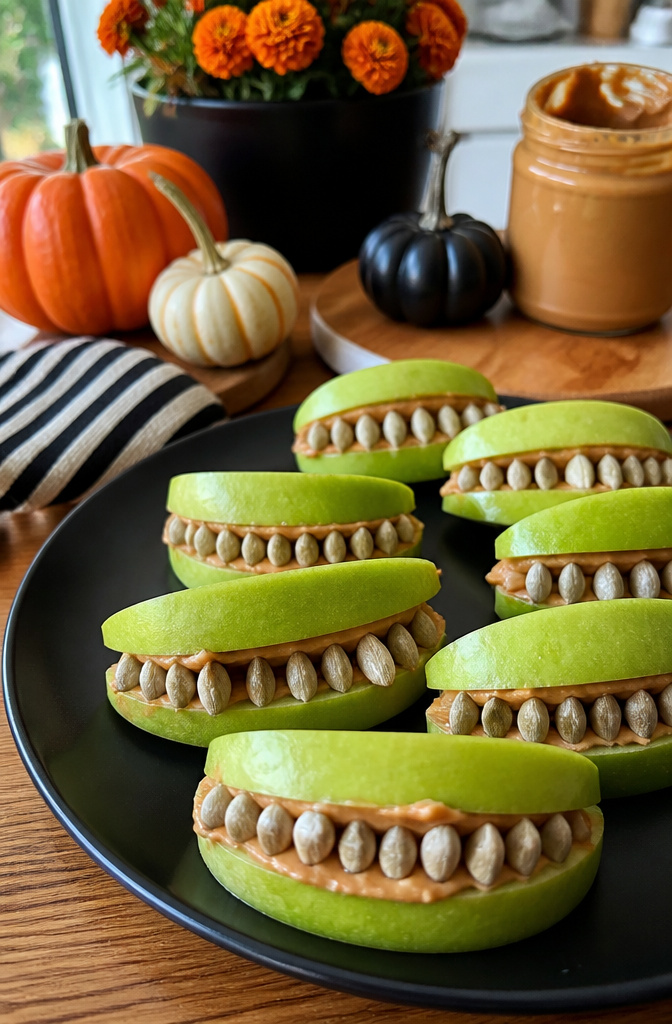
Apple slices cut into wedges work better here than the half-moon shape used in most monster mouth recipes.
You lay two wedges flat, spread peanut butter on the cut sides, then sandwich them so the curved skin faces out like gums. Sunflower seeds press into the exposed peanut butter edge to look like teeth.
A small Ziploc with the corner snipped makes the spreading cleaner than a knife, especially if you are assembling thirty of these for a classroom party.
Green apple gives the brightest color against the brown spread, though yellow or red work fine. You can swap in sunflower seed butter for nut-free schools, and some versions use mini marshmallows instead of seeds for a sweeter bite.
The whole thing stays naturally gluten free with no label-checking required, which matters when you are the parent asked to bring the "safe" snack.
10. Pretzel Cheese Stick Witch Brooms
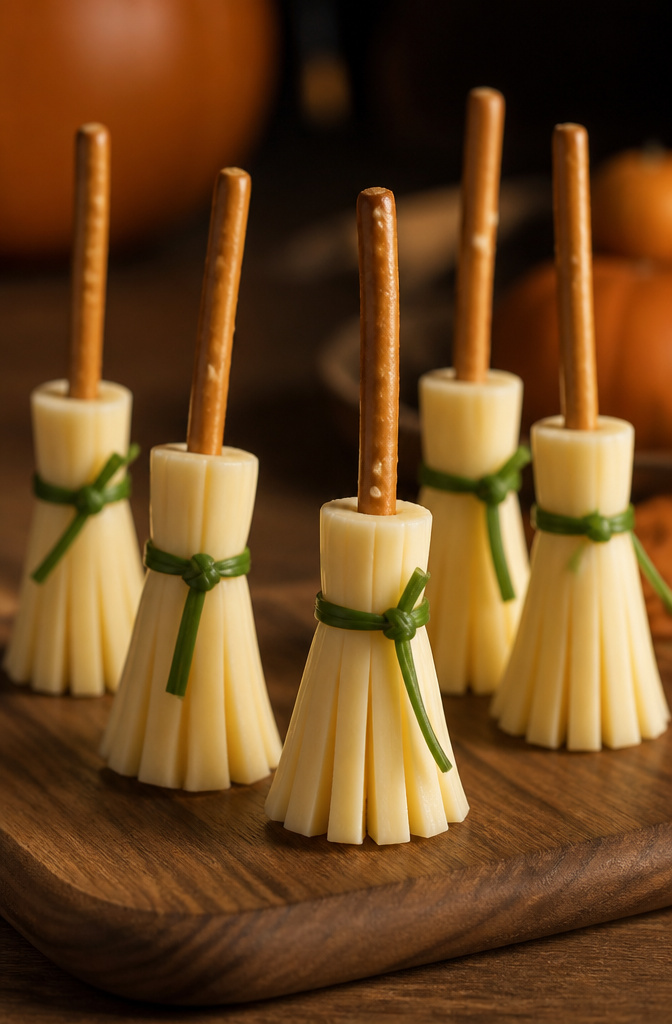
Cheese sticks and pretzel brooms check every box for a classroom party: no oven, no knife skills, and assembly moves fast once you set up a little station.
Cut each cheese stick into thirds, then peel the bottom half into thin strips so it frays like straw. Push a pretzel into the solid end for the handle, tie a chive around the junction, and trim the knot.
Gluten-free pretzel sticks from Snyder’s of Hanover or Glutino hold up well here, both sturdy enough to push through cold cheese without snapping.
Kids tend to pull the chive off and ignore it, but it sells the illusion for the adults taking photos, and that’s half the battle at a school event.
Make these the day before and keep them cool in a sealed container; they hold for at least a day without the cheese drying out or the pretzels going soft.
The real risk is over-handling the cheese while you peel it. Warm fingers smudge the surface, so work straight from the fridge and don’t pull the whole package out at once.
11. Caramel Apples
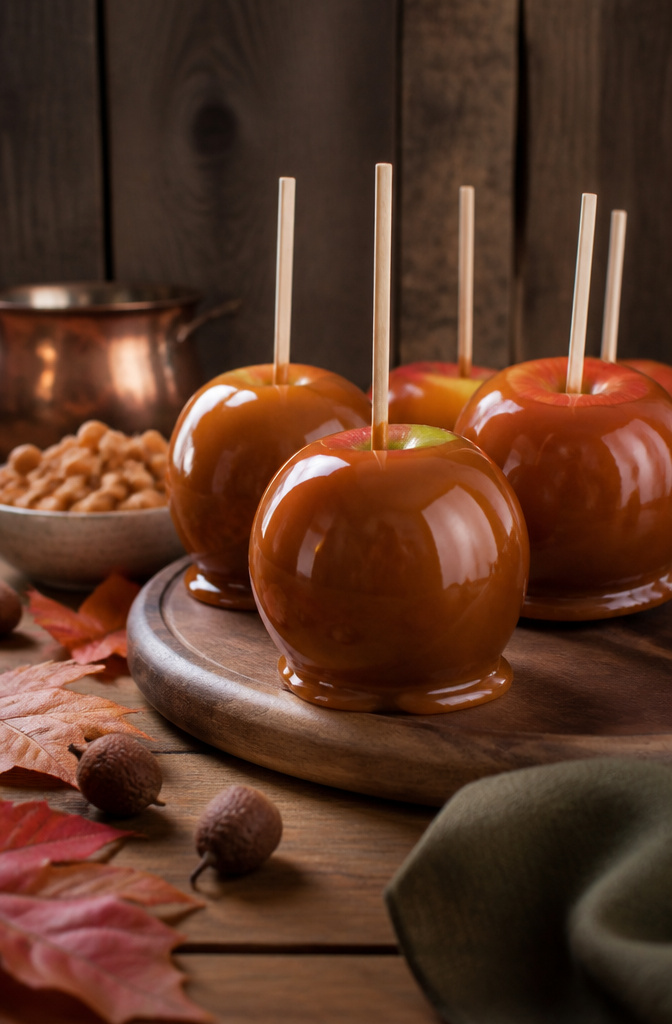
Caramel apples are one of the simplest gluten-free Halloween snacks you can put together, since the two main ingredients, apples and caramel, are naturally free of gluten. The risk shows up in the caramel itself.
Check the label for malt syrup, wheat starch, or "natural flavorings" that list barley as a source; those are the hidden gluten sources most likely to slip past a quick read.
Some brands also process caramel on shared equipment with cookies or pretzels, so look for a certified gluten-free mark if celiac disease is in the picture.
For apples that hold their structure under hot caramel and a stick, Honeycrisp and Granny Smith are the varieties to grab.
Both stay crisp for hours after dipping, where softer types like McIntosh or Golden Delicious can weep and split by the time the party starts.
If you are making these for a school event, keep the prep area clean and use separate utensils, since cross-contact from a shared cutting board or knife is enough to turn a safe treat into a problem.
12. Pumpkin Brownie Bites
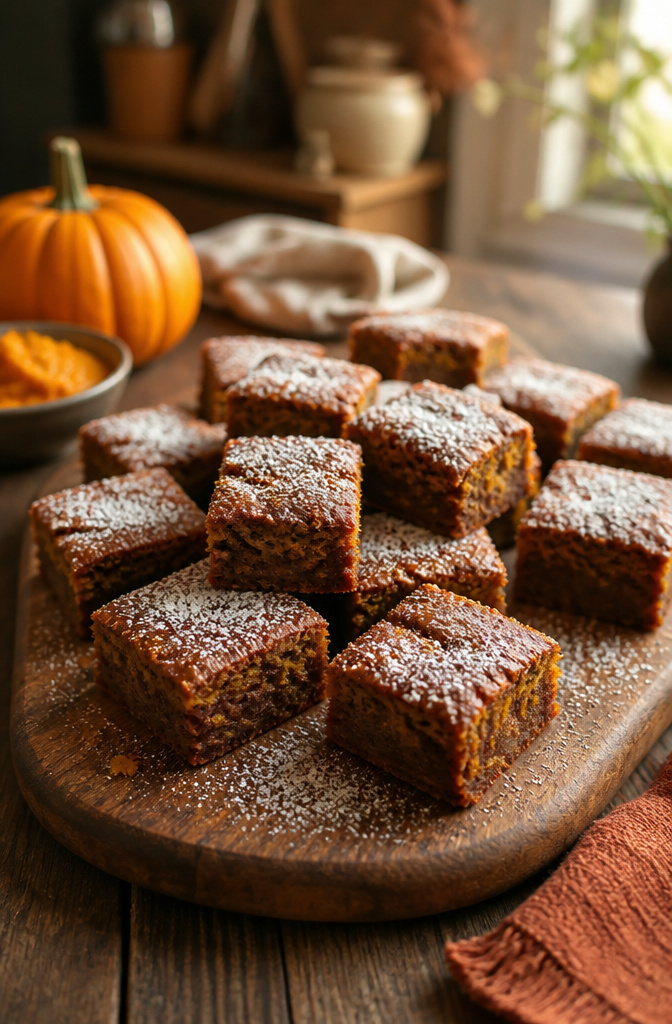
Pumpkin puree turns a standard brownie base into something that actually feels seasonal, and the moisture it adds means you need less fat in the batter.
A fifteen-ounce can of puree is the right amount for a nine-by-thirteen pan’s worth of bites, though they take longer to bake.
The center stays wet longer than plain brownies would, so start testing at the twenty-five-minute mark with a toothpick and expect to pull them between thirty and thirty-five minutes depending on your oven.
Gluten-free flours vary in how they absorb moisture, so almond-based mixes will set faster than a rice-flour blend; the toothpick should come out with a few moist crumbs clinging rather than completely clean, since carryover cooking finishes the job.
For Halloween, a mini muffin tin shapes these automatically and controls portion size for school rules. Spray the wells thoroughly; the pumpkin makes these stickier than typical brownies.
Dust with powdered sugar through a bat-shaped stencil, or skip decoration entirely and let the orange-tinted crumb speak for itself.
They keep covered at room temperature for two days, which matters when you are assembling treats the night before a classroom party.
13. Ghastly Tortilla Chips and Ghoul-camole
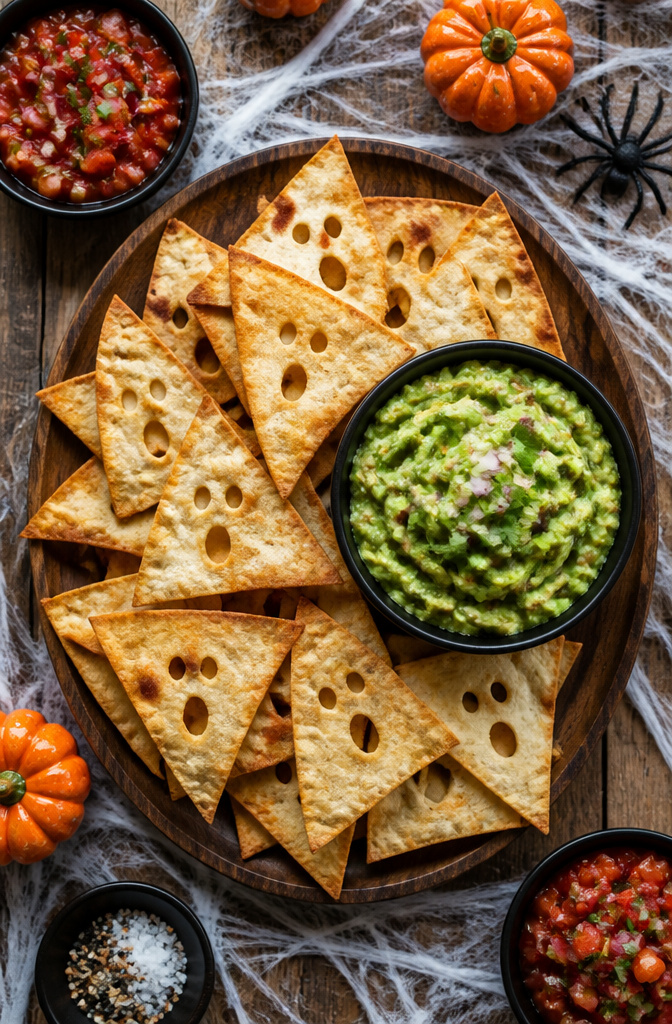
Store-bought corn tortillas are already gluten-free by nature, so any brand works for these chips. Cut each tortilla into six wedges, brush both sides with oil, and spread them in a single layer on a baking sheet.
Bake at 350°F for about 10 minutes until they are crisp and just starting to color at the edges. Watch them closely; they turn from golden to burnt in roughly a minute.
The guacamole is standard until you fold in finely chopped broccoli, which the original recipe uses to bulk it up without changing the flavor much.
You need a food processor to get the broccoli fine enough that kids will not pick it out. The result is a green dip that looks the part for Halloween without any food coloring.
Serve the chips warm or at room temperature. They stay crisp for several hours if left uncovered, but seal them in a container too soon and the trapped steam softens them.
14. Meringue Ghost Cookies
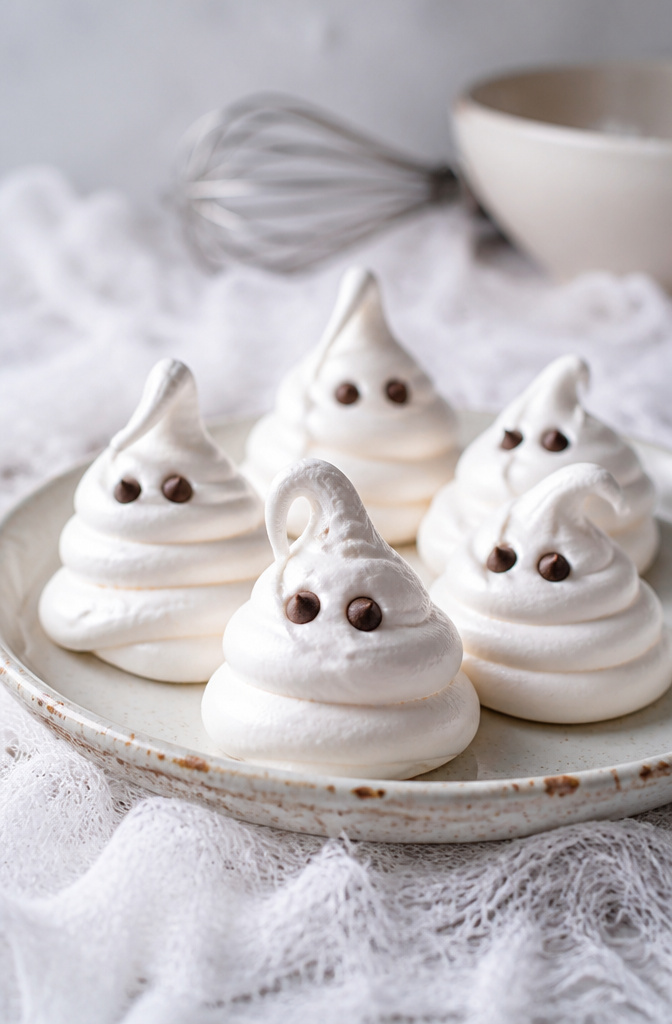
Meringue ghost cookies start with stiff egg whites and sugar whipped to a glossy finish. Pipe the mixture through a round tip in a continuous upward spiral, building a body that tapers to a point for the head.
Two dots of melted chocolate add eyes after baking.
Set the oven low, around 200°F, and leave the door closed for the full hour and a half.
The slow dry-out gives you what you are after: a shell that shatters when you bite, then a center that stays chewy and marshmallow-soft. Higher heat cracks them or turns the outside brown before the inside sets.
These keep for days in an airtight container, which makes them practical for school treats you need to pack ahead. One note: humidity is your enemy here.
If your kitchen runs damp, bake them the same morning you serve them or they turn sticky on the surface.
15. Witch Finger Cookies
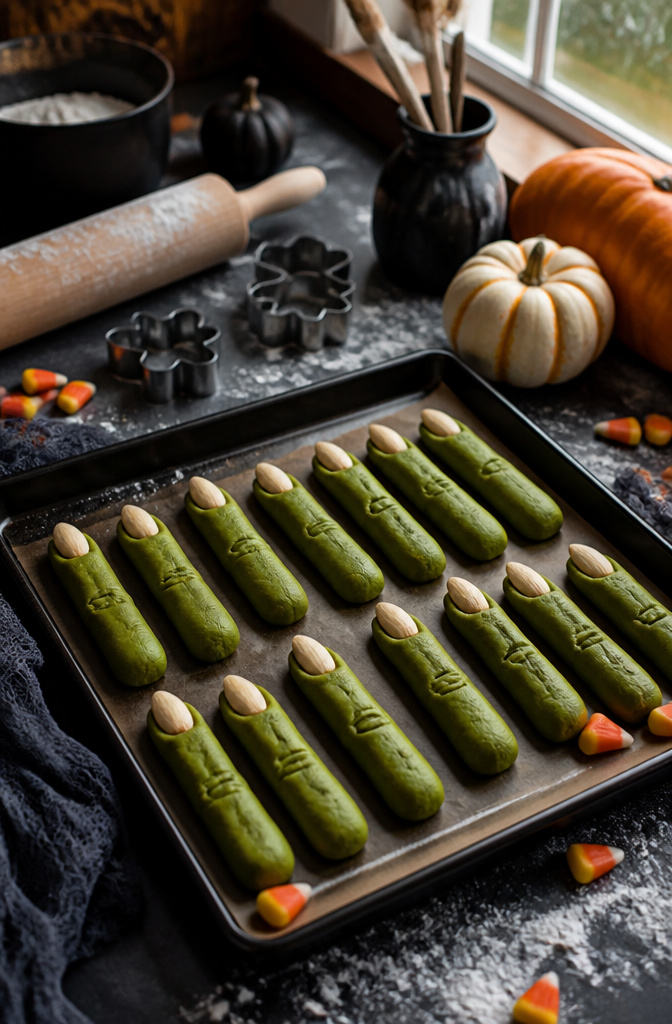
Almond slivers press into the blunt end of each cookie to make the nail, and that detail is what sells the whole gag.
You tint the dough with gel food coloring, about three drops of green per batch, kneading it in before the flour fully hydrates so the color stays even and doesn’t streak.
The shaping is the part you need to get right: roll a walnut-sized piece into a log slightly thinner than your actual finger, then pinch in two places to make knuckles.
Score lines across those knuckles with the back of a butter knife so they bake in. The dough spreads more than wheat-based dough, so keep the logs under four inches or you end up with witch thumbs instead of fingers.
Press the almond sliver on before baking; it toasts in the oven and stays put. A single batch yields about two dozen, which is enough for one classroom or a corner of your party tray.
Store-Bought Gluten-Free Candies
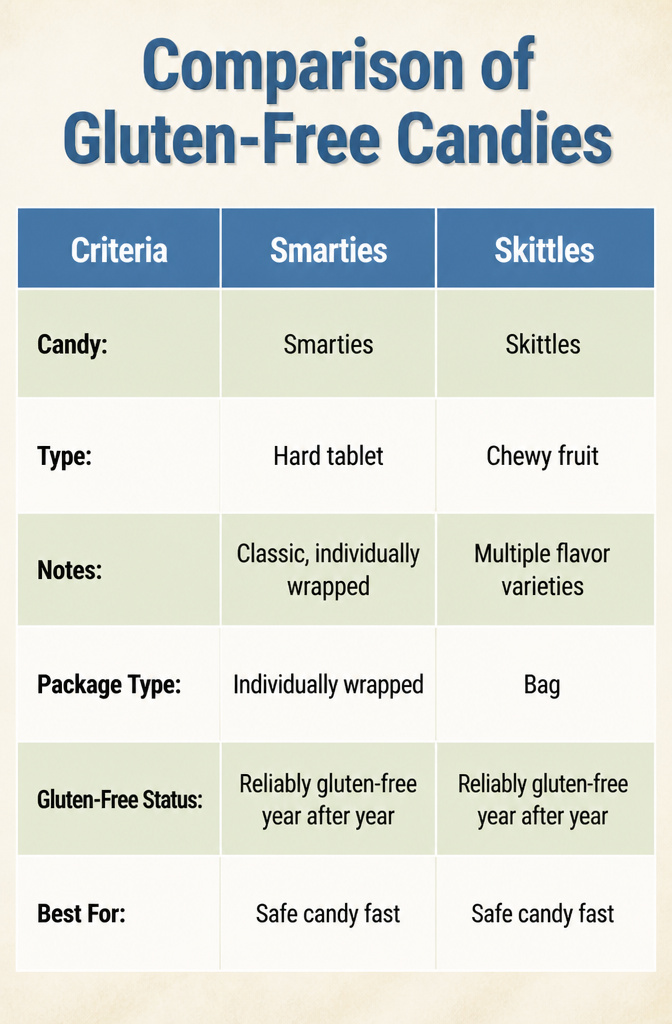
Smarties, Skittles, and Swedish Fish are reliably gluten-free year after year, which makes them easy defaults when you need safe candy fast. Tootsie Roll Pops and Hershey’s Milk Chocolate Bars join that list.
Formulations shift, sometimes without announcement. A brand that was safe last October might not be this one, so check the label every single season even for candies you have bought before.
| Candy | Type | Notes |
|---|---|---|
| Smarties | Hard tablet | Classic, individually wrapped |
| Skittles | Chewy fruit | Multiple flavor varieties |
| Swedish Fish | Chewy | n/a |
| Tootsie Roll Pops | Lollipop | Hard candy with soft center |
| Hershey’s Milk Chocolate Bar | Chocolate bar | Standard size |
For newer options, YumEarth Organic Halloween Candies and YumEarth Organic Chewys Fruit Chews are labeled gluten-free, as are UNREAL Dark Chocolate Peanut Butter Cups and Alter Eco Salted Caramel Truffles.
Partake Foods Crunchy Birthday Cake Cookies and Blake’s Seed Based Crispy Treats work for classroom settings where you want something that looks more like a baked snack than pure candy.
The safest move is to look for "gluten-free" printed on the package itself rather than trusting memory or online lists from past years.
Allergy-Friendly Recipe Swaps
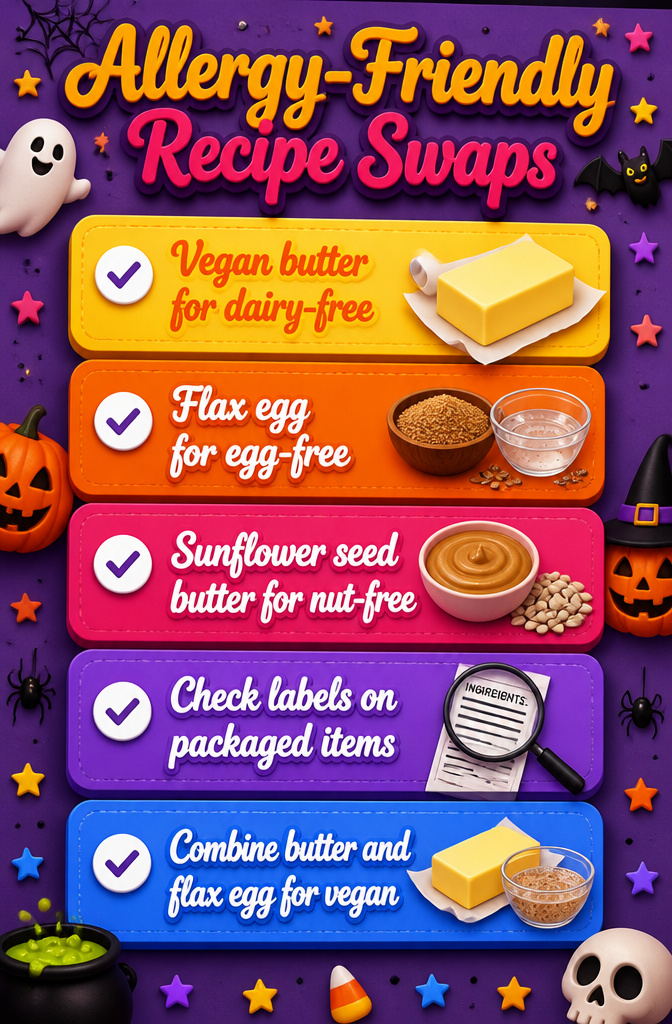
Most of the snacks in this list adapt easily to other allergies if you swap smartly.
- For dairy-free: Use a vegan butter stick in place of regular butter in crispy treats, cookies, and brownie bites. Skip cream cheese in spider bites and sub a dairy-free cheese stick for witch broom handles. Check that your chocolate chips are dairy-free; many brands are not.
- For egg-free: A flax egg (one tablespoon ground flaxseed plus three tablespoons water, left to gel for five minutes) works in brownie bites and snickerdoodles. Applesauce, at one-quarter cup per egg, keeps cupcakes moist but can make cookies cakey; use it only when you want that texture.
- For nut-free schools: Sunflower seed butter replaces peanut butter in monster teeth and any dip. Read labels on packaged gluten-free items; some substitute almond flour and will trigger the same policy that bans peanuts.
- For vegan: Combine the butter swap with a flax egg or a half-mashed banana. Banana adds sweetness, so cut sugar slightly.
Label Checking and Cross-Contamination
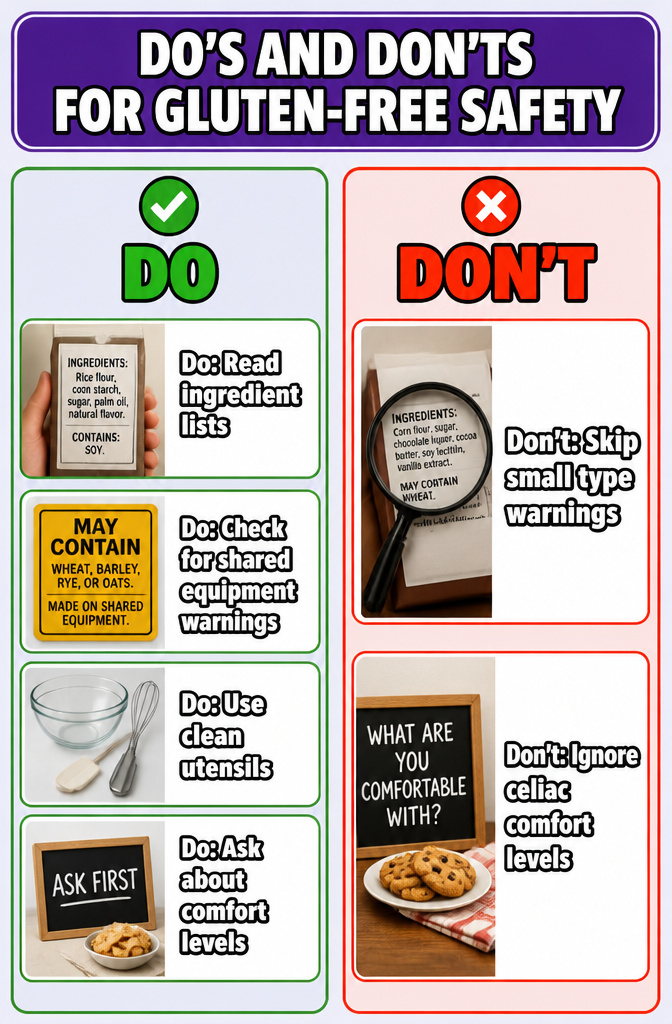
- Read the ingredient list for wheat, barley, rye, and malt before anything goes in your cart. "Wheat-free" does not mean gluten-free, and holiday varieties sometimes use different formulas than the standard versions.
- Check for shared-equipment warnings on the label. Some brands print this in small type near the ingredient list, and the risk level varies by person.
- Use clean utensils and a separate prep area when you assemble treats at home. Gluten-free serving bowls keep crumbs from regular crackers or bread off the snack table.
- Ask the person with celiac disease or gluten sensitivity what they are comfortable with. They have usually done their homework and can tell you whether label-reading alone is enough for them, or if they need brands that call the manufacturer about cross-contamination practices.
Frequently Asked Questions
What are some gluten-free Halloween treats?
Pumpkin crispy rice treats, mummy Rice Krispies treats, ghost cupcakes, pumpkin spice snickerdoodles, apple monster mouths, dirt cups, olive cream cheese spider bites, and pretzel cheese stick witch brooms are all easy options you can make at home.
Most use everyday ingredients and simple techniques like melting marshmallows or cutting fruit into shapes.
Are there store-bought gluten-free candies?
Smarties, Skittles, Swedish Fish, Tootsie Roll Pops, and Hershey’s Milk Chocolate Bars are reliably gluten-free, though you should check labels every season since formulations can change.
Newer labeled options include YumEarth Organic Halloween Candies, UNREAL Dark Chocolate Peanut Butter Cups, and Partake Foods Crunchy Birthday Cake Cookies.
How can I make Halloween treats safe for kids with allergies?
Check labels for wheat, barley, rye, and malt every time, even on familiar brands, and watch for shared-equipment warnings near the ingredient list.
Use clean utensils and separate prep areas at home, and ask the person with celiac disease or gluten sensitivity what level of precaution they need.
What Halloween candy is celiac-friendly?
Smarties, Skittles, Swedish Fish, Tootsie Roll Pops, and Hershey’s Milk Chocolate Bars are generally safe, but look for malt syrup, wheat starch, or barley-sourced natural flavorings on caramel and chocolate labels.
For stricter needs, choose candies with a certified gluten-free mark rather than relying on memory from past years.
What to give out instead of candy for Halloween?
Pretzel cheese stick witch brooms, olive cream cheese spider bites on crackers, and bell pepper olive monster eyes all work as non-candy treats that still fit the holiday theme.
For packaged options, Blake’s Seed Based Crispy Treats, Thrive Market Organic Veggie Sticks, and GoGo squeeZ pouches are labeled gluten-free alternatives.