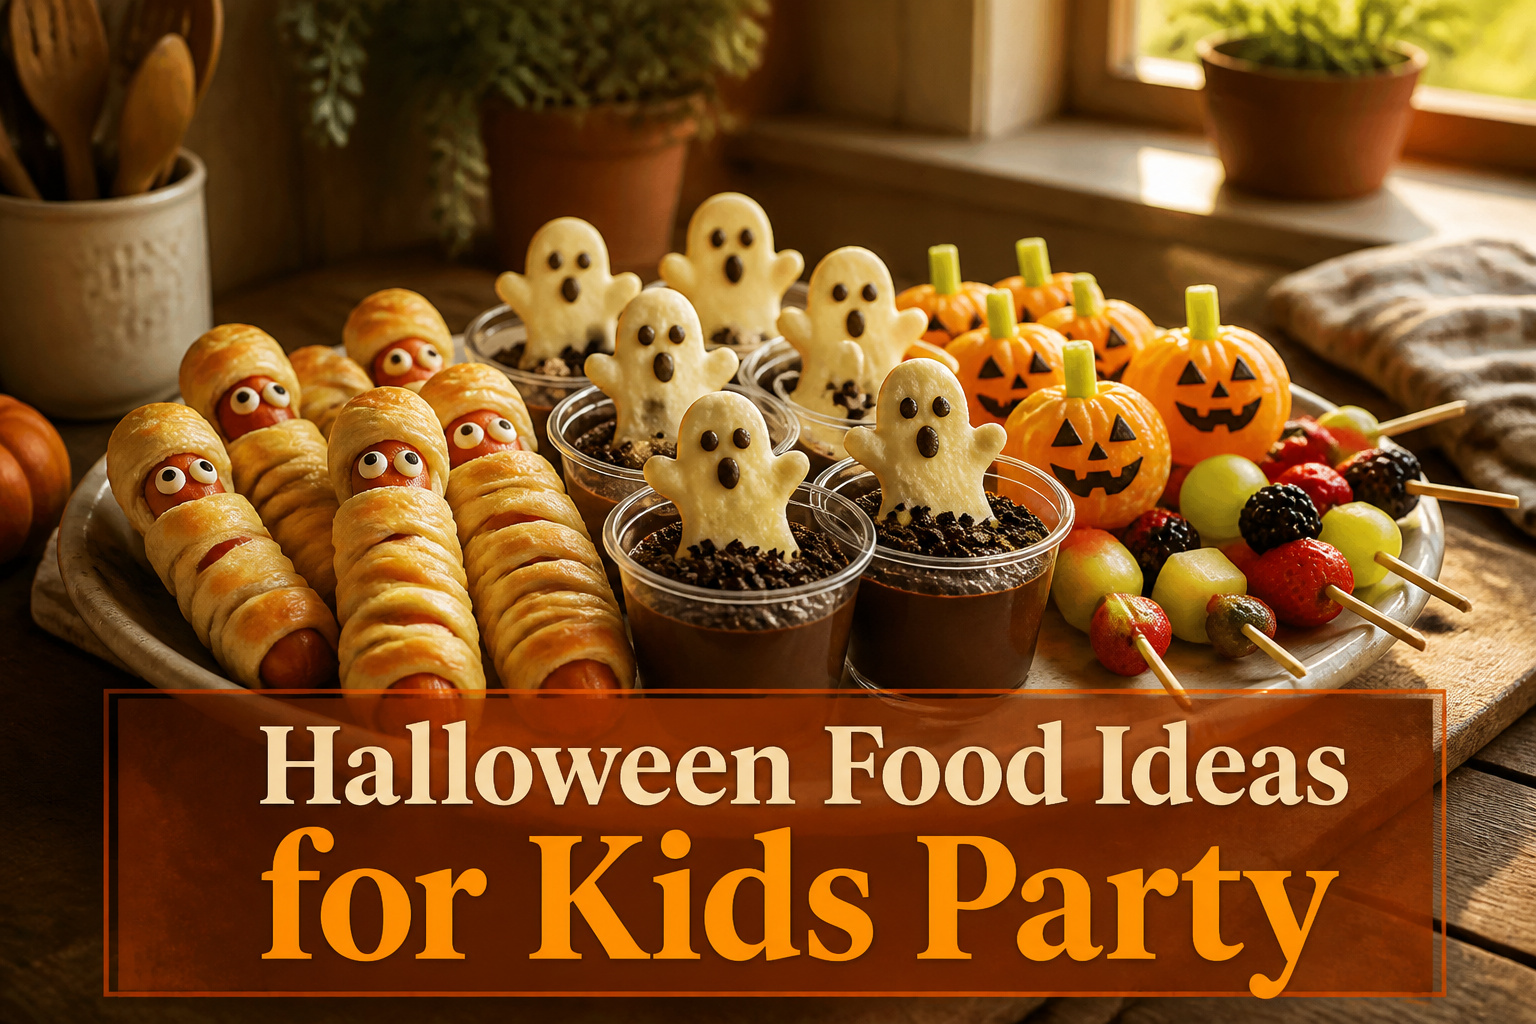
The best Halloween food ideas for kids party spread from ten-minute assembly to full afternoon projects, and the deciding factor is whether the treat needs to hold its shape until pickup time or can be eaten the moment it leaves the plate.
Three strips of crescent dough per hot dog is the workable number for mummy wraps: fewer leaves gaps that deflate, more and the layers steam instead of crisping.
That same attention to structure separates the ghost cookies that stand upright in pudding cups from the ones that tilt and sink.
1. Crypt Kreeper Crescents
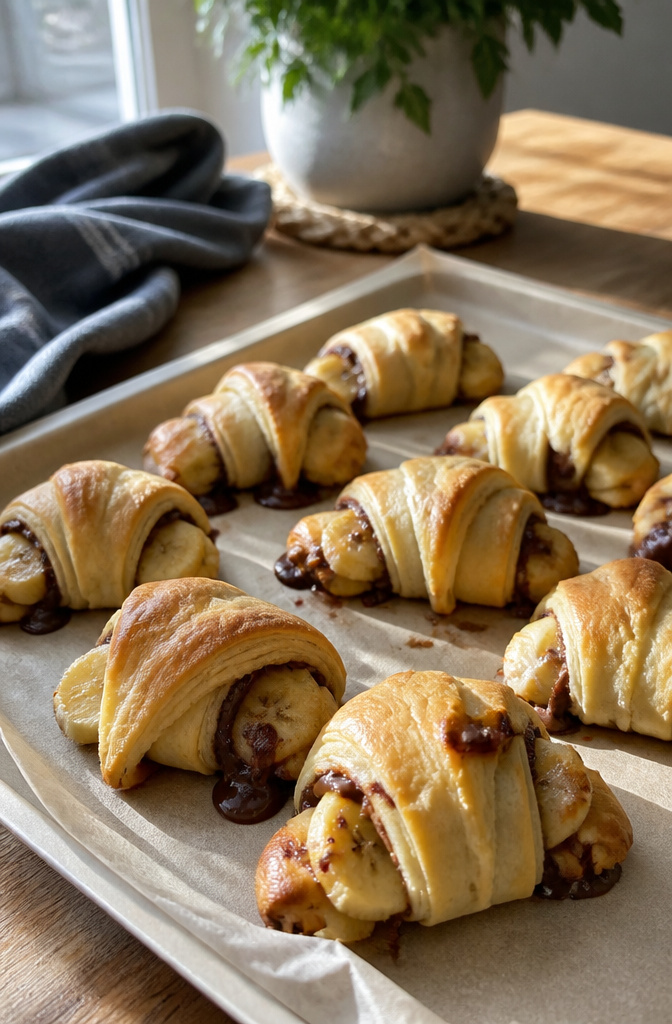
Ripe bananas with just a few brown spots work best here. Too green and they stay stiff and bland; too brown and they turn to mush that seeps through the dough before it sets.
Spread about a tablespoon of Nutella across each crescent triangle, leaving a clean border at the edges. Lay a banana chunk at the wide end and roll toward the tip, tucking the dough around the fruit rather than stretching it.
A stretched edge is the one mistake that makes them leak in the oven, because the thinned dough tears under steam pressure and sends molten Nutella onto your sheet pan.
Place them seam-down on parchment with space between each one. Bake until the tops are deeply golden, not just pale blonde; the color tells you the interior dough has cooked through and absorbed the fruit juices.
Cool five minutes before serving, or the filling will run out the first bite.
2. Ghosts in the Graveyard
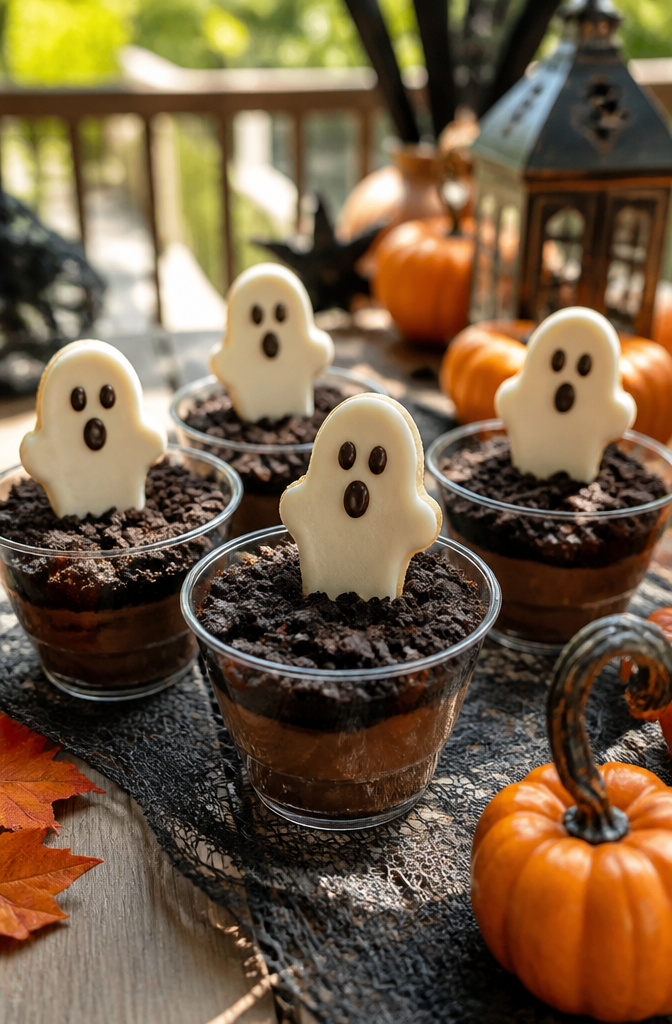
Chocolate pudding sets firm enough to hold the layers in these cups, which matters more than flavor when you are standing the ghost cookie upright. Instant is fine; cook-and-serve sets even stiffer if you have the extra ten minutes.
Bury the cookie two-thirds deep, so the white frosting face and the rounded top stay visible above the crumbled Oreos without tilting.
Store-brand chocolate sandwich cookies crumble better than name-brand Oreos because the cookie is drier and thinner. That sounds like a flaw until you need a fine, even dirt that does not gum together in the food processor.
You want loose crumbs, not clumps, for the full graveyard effect. Press them on while the pudding is still soft so the layer sticks.
3. Mummy Dogs
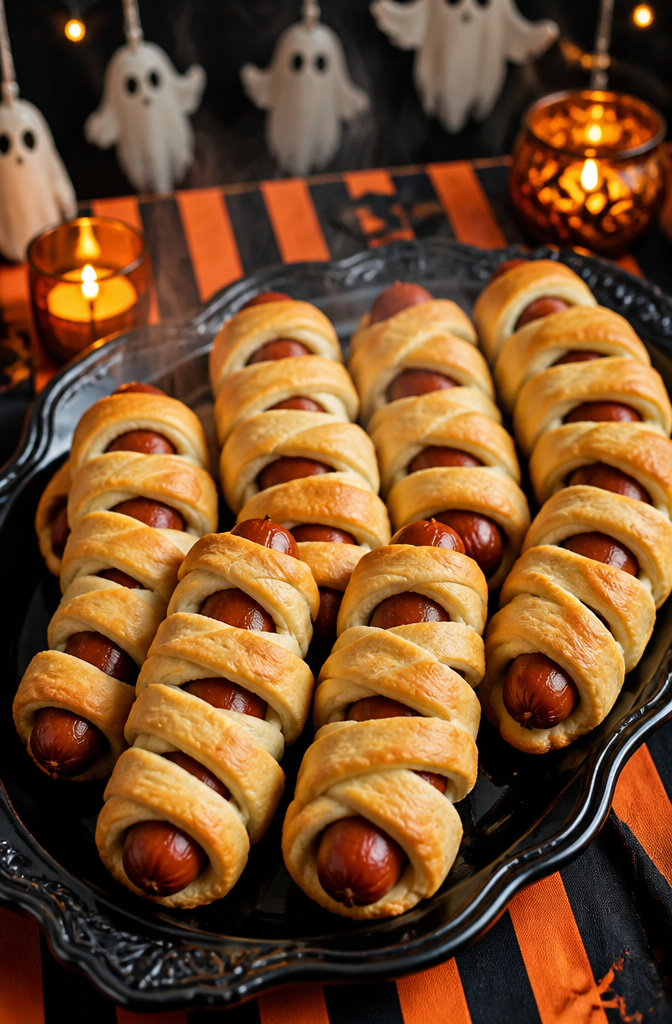
Crescent roll dough gives you two practical ways to shape the strips for mummy dogs, and the difference matters more than you’d expect.
Slice the dough while it’s still in the log and you get cleaner, more uniform strips that wrap evenly around the hot dog.
Unroll the sheet first and slice crosswise with a pizza cutter and you get slightly ragged edges that fray in the oven and look more convincingly like loose bandages.
Either way, three strips per hot dog is the workable number: fewer leaves gaps that deflate, more and the dough layers steam instead of crisping.
Cut the hot dogs in half if you want them bite-sized for smaller hands, which also stretches one can of dough across sixteen pieces instead of eight full dogs.
The temperature listed on the crescent package is built for bread, not for bread wrapped around cold meat.
Run the oven at that printed number and the dough browns before the hot dog warms through, leaving you with a pale center and a burnt crust.
Drop it by 25 degrees and add a few minutes instead; the meat needs time to heat and the dough needs time to turn golden without racing past it.
4. Monster Jaws
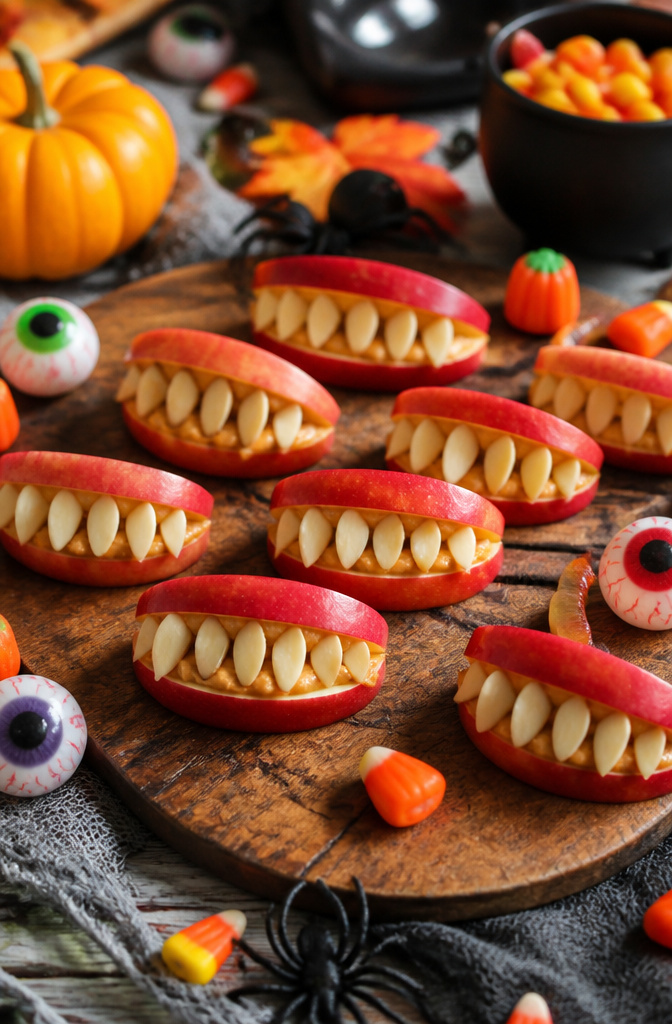
Apple wedges make the cleanest monster jaws if you slice them into quarters and cut a small notch from the center of each wedge to open the mouth.
Granny Smith and Honeycrisp brown slower than most varieties, so you have more time to assemble before the color turns.
A quick dip in water with a little lemon juice buys you extra minutes, though no apple stays pale forever at room temperature.
Slivered almonds work for teeth, but they slide if you just press them in. Spread peanut butter inside the mouth gap before pressing the almonds into place; it holds as well as any edible glue and saves a step.
For nut-free classrooms, skip the peanut butter entirely and use sunflower seeds instead. They press directly into the apple flesh with enough friction to stay put, no spread needed.
Pretzel rods and candy eyes turn these into full faces rather than just jaws, attached with a dot of peanut butter or almond butter. If you cannot find candy eyes, draw pupils on mini marshmallows with a food decorating pen.
5. Bones and Blood
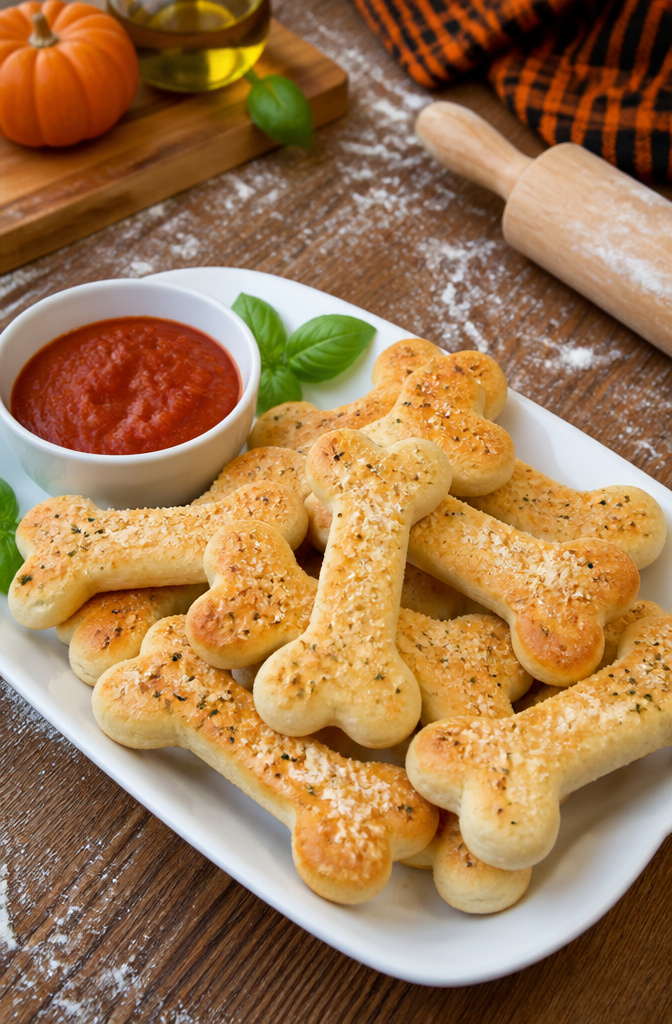
Breadstick bones look right when you snip each end with scissors and roll the two cut pieces downward so they flare like knobby joints.
The finished shape is more convincing than a straight stick with notches, and it takes about ten extra seconds per piece.
For the "blood," jarred marinara from Rao’s or a similar refrigerated brand tastes closest to homemade because those lines use olive oil and a shorter ingredient list that does not lean on corn syrup.
If you have time to simmer a jar with a crushed garlic clove and a pinch of red pepper, the gap between it and scratch-made narrows to almost nothing.
These stay crisp for about two hours after baking, so plan to pull them from the oven roughly twenty minutes before the kids arrive.
Sprinkle with garlic and Parmesan while they are still warm, or skip the seasoning if you want the plain bread to do more of the work against the sauce.
6. Candycorn Pizza
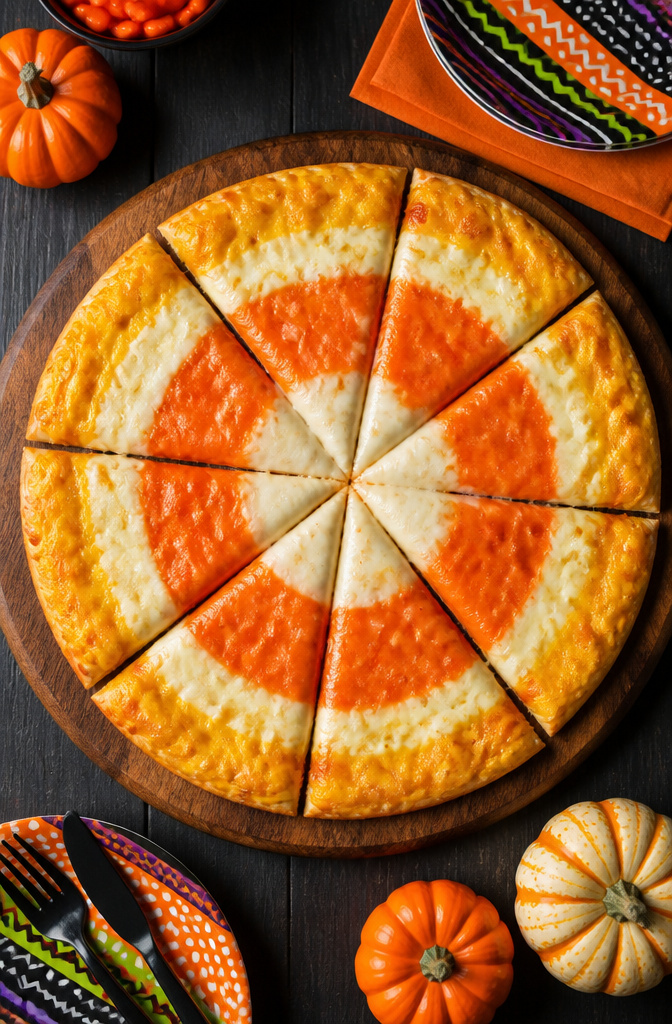
A plain cheese pizza gives you the canvas, but the order of the cheese layers matters more than you might expect. Start with a ring of cheddar around the outer edge, then fill the center with mozzarella.
The cheddar sets a warm orange border that holds its color in the oven, while the white mozzarella in the middle stays pale.
Cut the finished pizza into wedges and each slice reads instantly as candy corn, no extra decoration required.
Do not tint the mozzarella with food coloring. The dye separates and beads on the fat in melted cheese, leaving streaky orange puddles that look more like a mistake than a design.
The two natural cheeses already give you the three colors, white, orange, and the pale gold where they meet. That soft boundary between cheeses is enough; precision is not the point here.
7. Cheesy Fingers
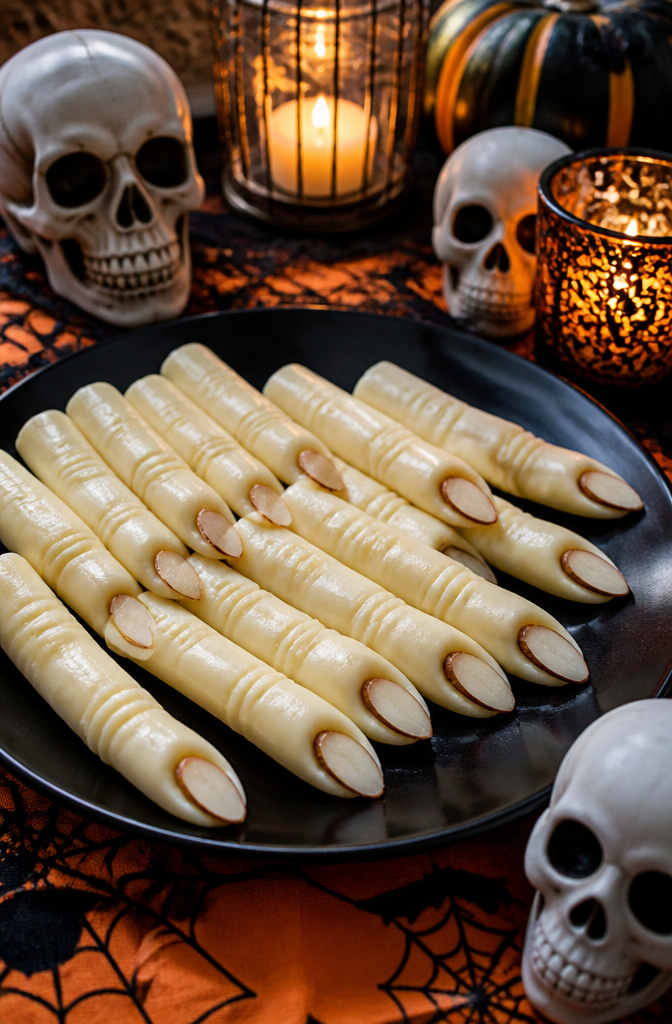
String cheese gets you almost all the way to a convincing finger before you touch a knife.
Cut the sticks in half for a kid-sized portion, then use the flat side of a blade to score two shallow lines across the top third and another two across the middle.
Those marks sit where knuckles would, and the flat edge keeps the grooves clean rather than slicing through.
For the nail, a slivered almond pressed into the wider end works best.
A dab of cream cheese acts as glue, and shaving a slight angle off the cheese first gives the almond a flatter seat so it does not jut out.
Red bell pepper cut to the same shape also reads as a nail if someone at the table has a nut allergy, though the color is brighter and the texture softer.
Keep the cheese cold right up to assembly. At room temperature it goes limp, the knuckle marks soften and lose their shadow, and the cream cheese slides.
Work straight from the refrigerator, score firm, and plate just before the kids come through.
8. Chocolate Cherry Mice
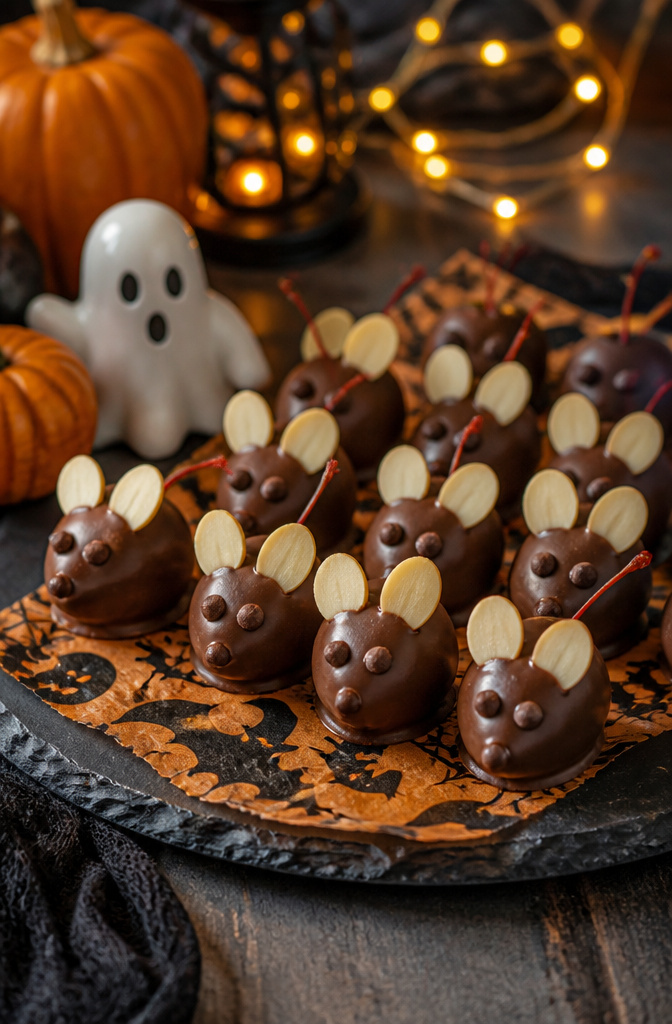
Maraschino cherries with stems are the body of each mouse, and the stem becomes the tail. Drain them thoroughly, then pat them completely dry with paper towels before dipping.
Any leftover syrup will keep the chocolate from setting firm, so this step is not one to rush.
Dip the dried cherries into melted almond bark or chocolate bark. While the coating is still soft, press a chocolate chip onto the pointed end for a nose.
Add two slivered almonds just behind the chip for ears, and finish with small candies or sprinkles for eyes.
Paraffin is optional; a smooth, firm shell comes from tempering the chocolate or simply chilling the coated cherries until the shell sets hard.
Almond bark and chocolate bark are formulated to set hard on their own at room temperature, which keeps the ingredient list short and the prep simpler than old recipes that called for wax.
Let the mice sit until the coating is fully dry before arranging them on a platter.
9. Dirt and Worms
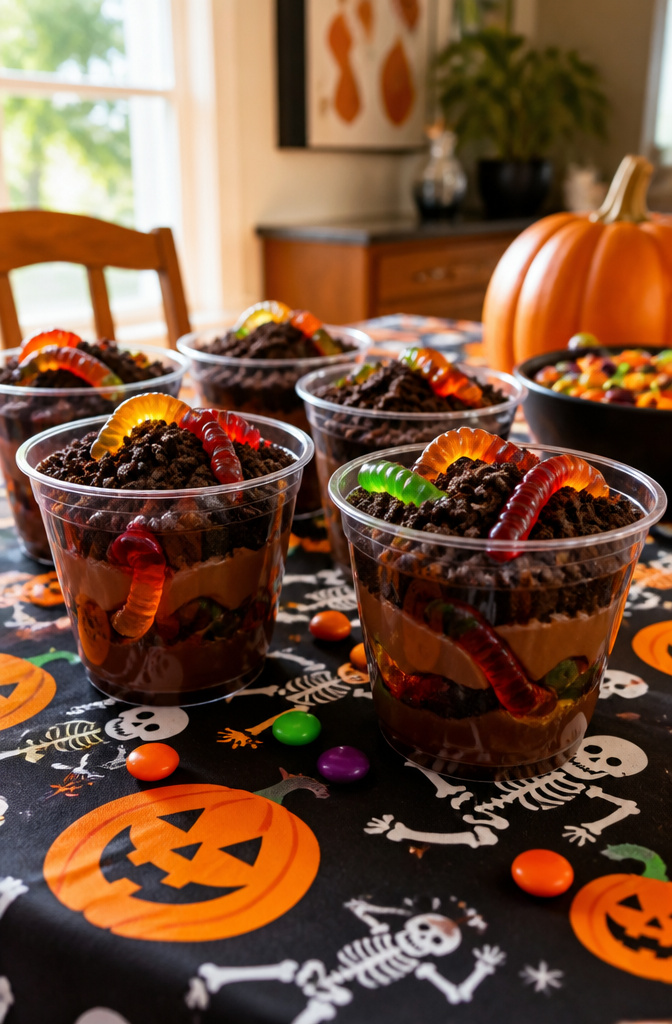
Chocolate pudding cups with crushed Oreos and gummy worms land in that sweet spot where kids shriek and adults do not have to pretend the food tastes good. The presentation splits two ways.
Clear cups let the layers show through, which matters when you want the worms to look buried rather than dropped on top.
Bowls work fine for a buffet line where kids serve themselves, but the Oreo layer tends to slide and you lose the visual.
The gummy worms are where this goes wrong most often. Press them into the pudding while it is still soft, then freeze for ten minutes before you add the Oreo dirt.
If the worms sit on top of the pudding, they float when kids dig in. If they go in too deep, kids cannot find them.
About halfway down the cup is the workable depth, with the tail end curling up just under the crushed cookies.
Instant pudding firms fastest, and the cook-and-serve kind does not buy you enough flavor difference to justify the extra twenty minutes.
Use the instant, let it set in the cups, plant the worms, quick-freeze, then top with Oreos right before the party. The cookies stay crunchy that way, and the worms do not drift.
10. Pumpkin Sammies
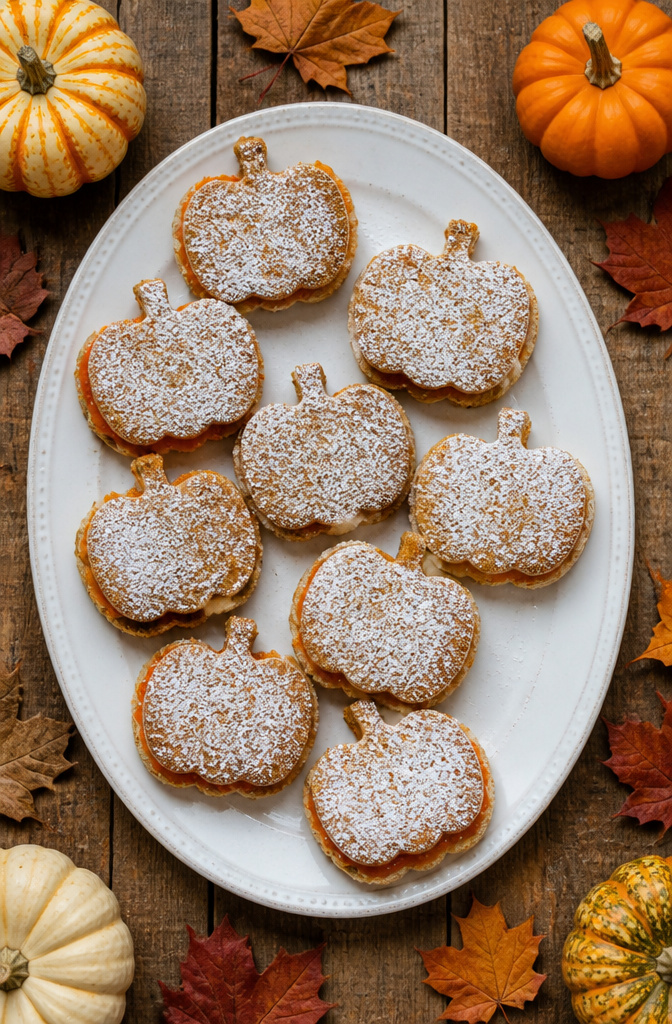
A three-inch pumpkin cutter is the right size for bread: large enough to capture a real sandwich filling, small enough that you waste only the crusts, not half the slice.
Go bigger and you’re trimming away most of the bread to get the shape; go smaller and you’re basically serving croutons with a dab of peanut butter.
Fillings need to stay put when the bread gets handled. Peanut butter works because it grips, and cream cheese with peach or apricot jam does too; the jam is already orange, which fits the theme without extra steps.
Skip anything wet like sliced tomatoes or loose lettuce. They’ll slide out when kids pick these up.
The jack-o-lantern face can be cut freehand with a paring knife; no second cutter required.
After you stamp out the pumpkin shape, use the tip of a paring knife or even a plastic drinking straw to punch two small triangles for eyes and a jagged mouth.
Press gently from the top slice through to the bottom, then wiggle the bread out of the holes. It takes maybe thirty seconds per sandwich, and the face is sharp enough that kids actually recognize it.
11. Nutter Butter Ghosts
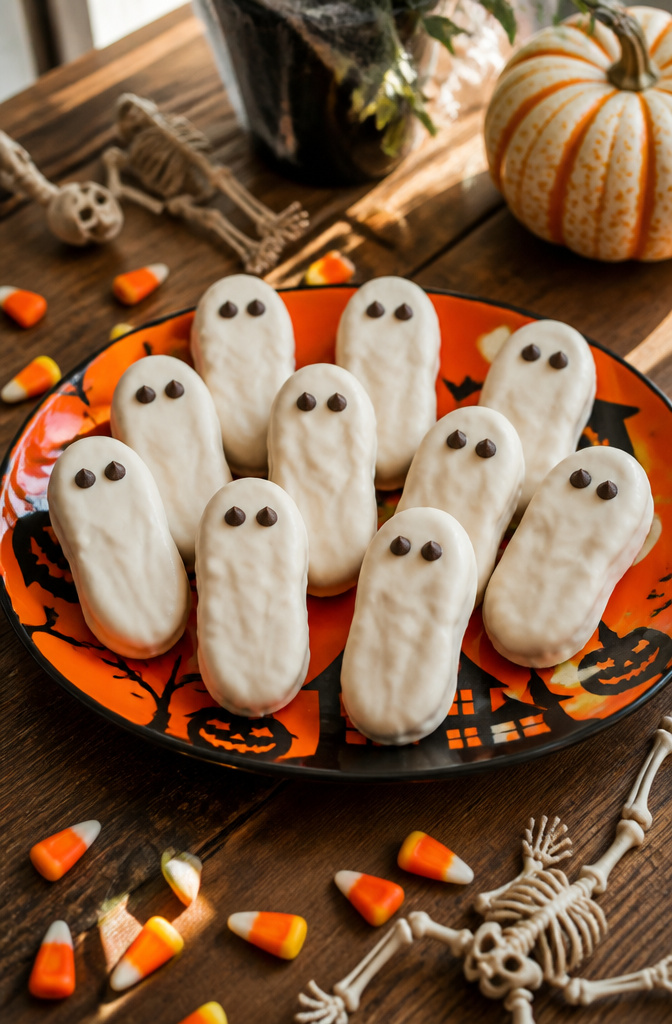
Nutter Butters are already shaped like ghosts, which makes the dipping part almost foolproof. The cookie’s narrow waist and rounded ends give you a built-in silhouette once the coating goes on.
For the coating, almond bark seizes less than white chocolate and sets up cleaner, so you are less likely to end up with a lumpy, thick shell that hides the shape you started with.
Melt it in short bursts and keep the bowl barely warm, not hot. If the coating starts to thicken while you work, a teaspoon of shortening stirred in will loosen it back up without ruining the set.
The face is where these go wrong. Two mini chocolate chips for eyes and nothing else keeps the expression readable.
Add a mouth and you risk the chips sliding together into one smear while the coating is still wet. Press them in right after dipping, when the surface is glossy but starting to hold a fingerprint.
Set them on wax paper or a silicone mat to cool, not a plate.
The coating hardens from the bottom up, and if that first contact surface is not nonstick, you will leave half the ghost behind when you lift it. Give them twenty minutes untouched before you try moving them.
12. Witches Wands
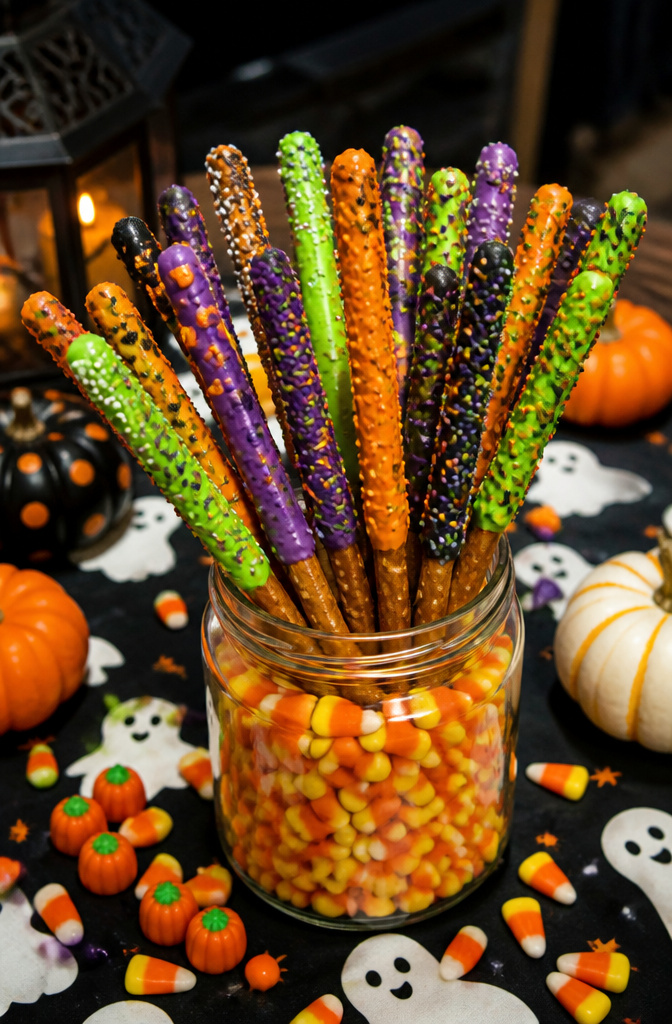
Pretzel rods dipped in melted candy coating are the base most recipes start from, but the coating slips and the sprinkles pool at the bottom unless you work in layers.
Dip the rod, let the coating set for two minutes until it turns matte but is still tacky, then press the sprinkles on. A second thin dip over the top locks them in without burying the color.
The rods that hold up are the full ten-inch length, not the stubby snack sticks. The shorter ones snap when a seven-year-old brandishes them at a classmate.
Stand them upright in a jar of candy corn while they set; the kernels wedge tight and leave no flat side. A candy wafer pressed on top covers the blunt end and gives you something to write a face on.
13. Spider Cookies
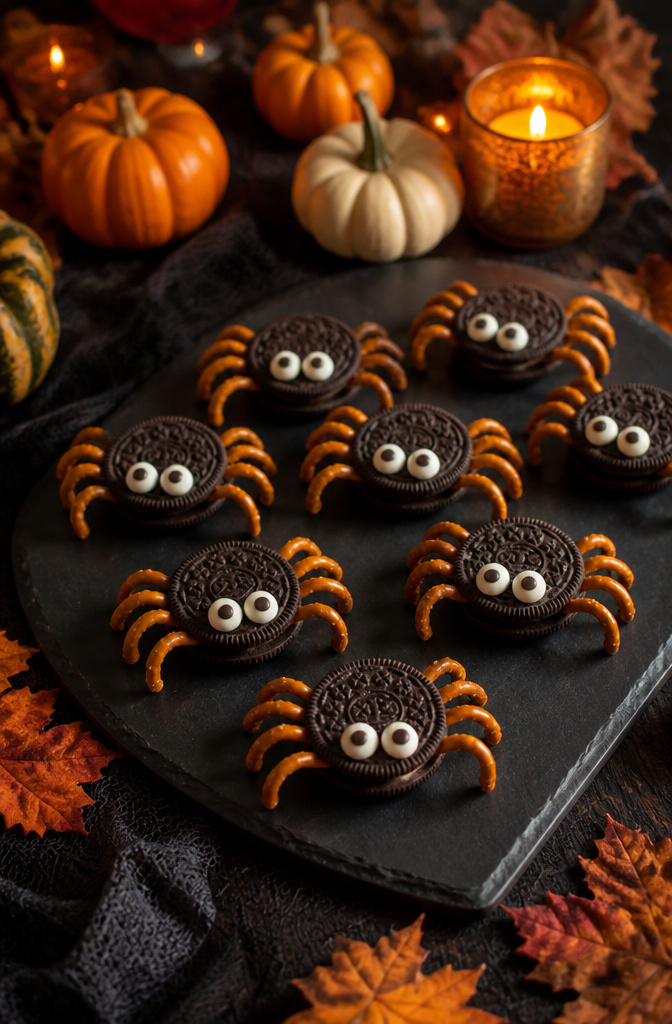
Decorating Oreos as spiders sounds simple until you try to move them. Thick pretzel sticks snap less than thin ones, and that matters more than you might think.
Four legs on each side is the standard, but count on two breaking off in transit unless you pipe the chocolate glue thick and let it set hard.
The face is where the design lives or dies. Googly candy eyes placed close together and slightly low on the cookie read as cute; eyes spaced wide and centered slide straight into creepy territory.
A dot of white icing behind each eye helps them sit at a slight angle, which softens the whole thing.
If you cannot find shoestring licorice for legs, Twizzlers Pull-Apart candy works in a pinch. It is easier to locate and splits cleanly into skinny strips.
Red Hots make decent eyes in an emergency, though they read more Halloween than friendly.
14. Slimy Worms on a Bun
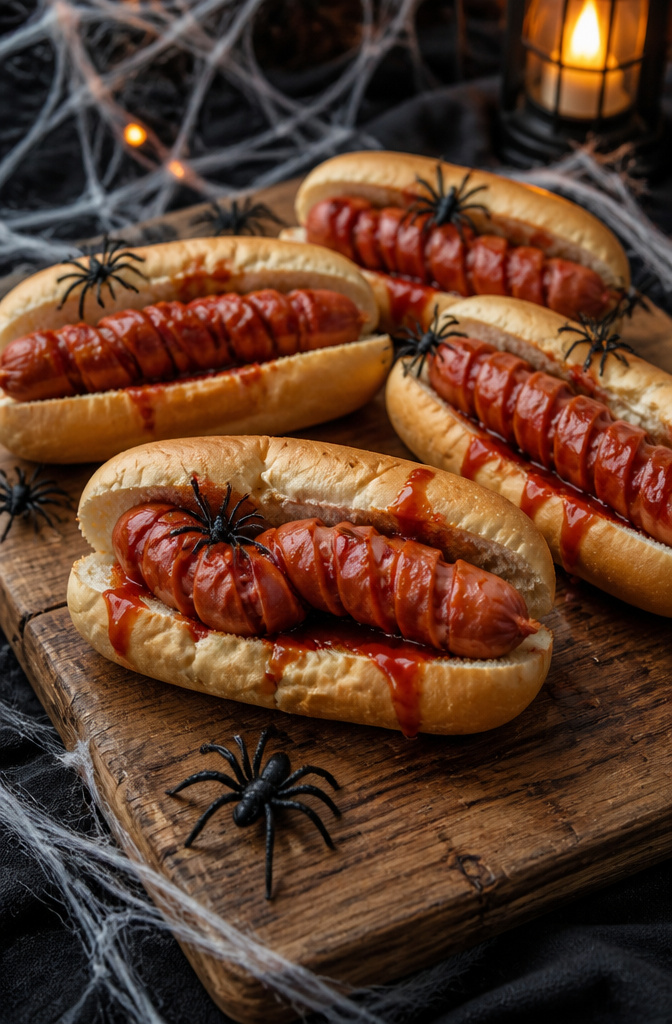
Slice each hot dog lengthwise in a tight spiral, cutting about halfway through so the meat stays in one piece.
Drop the sliced dogs into boiling water for a minute or two and they will curl into tight coils that look exactly like worms wriggling on the plate.
The bun is not just a serving suggestion here; it holds the curled shape in place so the "worm" does not uncoil before kids pick it up.
Ketchup wins over mustard for the look. The bright red reads as slime or blood against the pale meat, while yellow or brown mustard just looks like condiment.
Dunk the curled dogs in barbecue sauce if you want a darker, mud-colored worm, but ketchup keeps the classic Halloween-palette of red on beige. A tight spiral cut, not too deep, is what makes the curl hold.
Go too shallow and the hot dog barely bends; go too far through and you end up with worm halves instead of whole worms.
15. Witch Hats
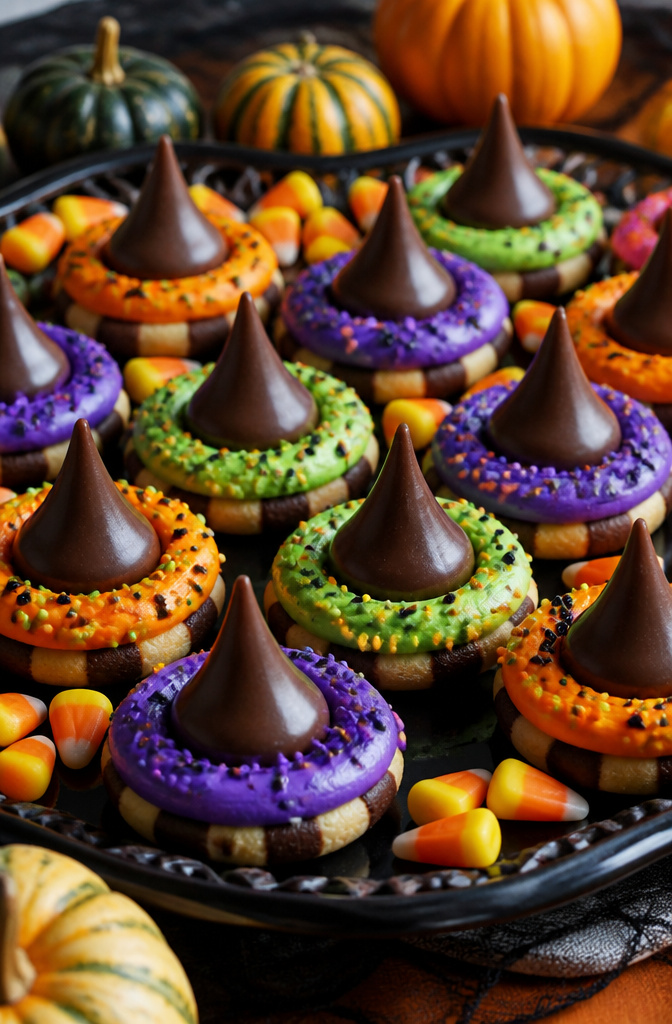
A Hershey’s Kiss pressed onto a Keebler Fudge Strip cookie is the fastest witch hat you can assemble, but the two pieces need something to bind them.
Those little tubes of frosting from the grocery-store baking aisle stay soft too long, so the hats slide apart before the kids even reach the table.
Pipe a ring around the base of the Kiss, press it onto the cookie, and let the excess squeeze out to form the hatband.
The frosting needs to crust hard enough that the Kiss does not rock when you set the plate down.
The Fudge Strip’s chocolate coating and hole in the center give you built-in color contrast, the pale cookie rim reading as the brim against the dark hat.
Skip anything with a chocolate cookie base; it turns the whole thing muddy brown and the shape gets lost.
16. Candy Corn Cookies
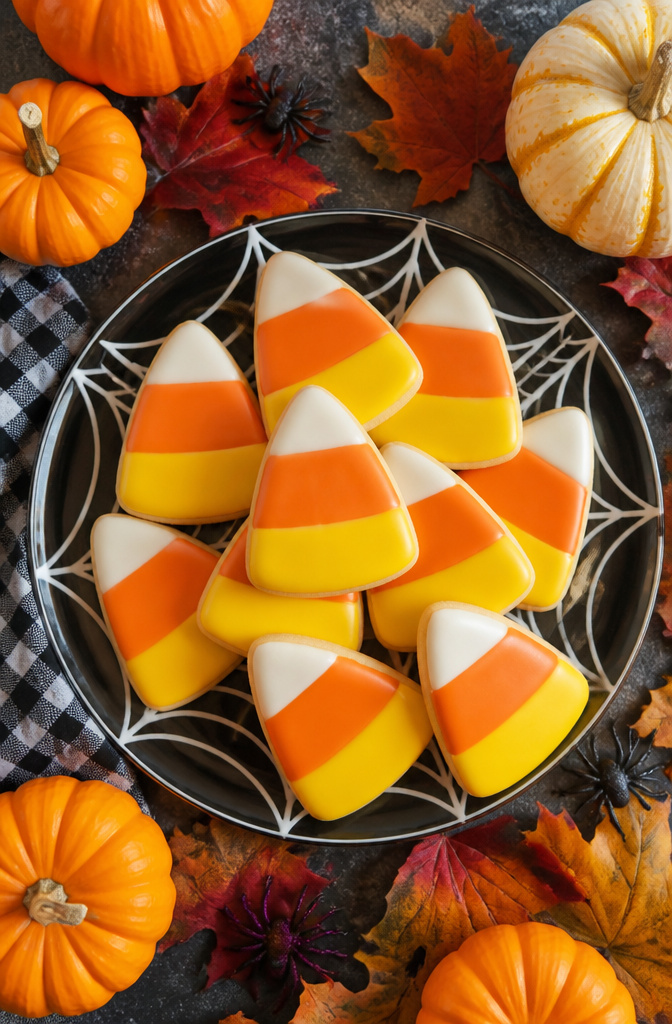
Candy corn cookies rely on a three-zone icing method that keeps the colors from bleeding into each other.
You divide each round cookie into a wide yellow base, an orange middle band, and a white tip, working in that order with the lightest color first.
The icing needs to be thick enough to hold a peak when you lift the spoon, what bakers call fifteen-second consistency. Thin it too much and the orange will slide into the yellow before either one sets.
Pipe a border for each zone, then flood the center with the same bag and let the surface level itself out.
Drying time is what separates a clean stack from a smudged mess. The surface may look firm after an hour, but the underside stays soft enough to wreck your work if you pile them together.
Let them sit uncovered for four to six hours, longer if your kitchen runs humid. You will know they are ready when you can press a fingertip to the white tip and feel no give at all.
17. Halloween Cookie Pops
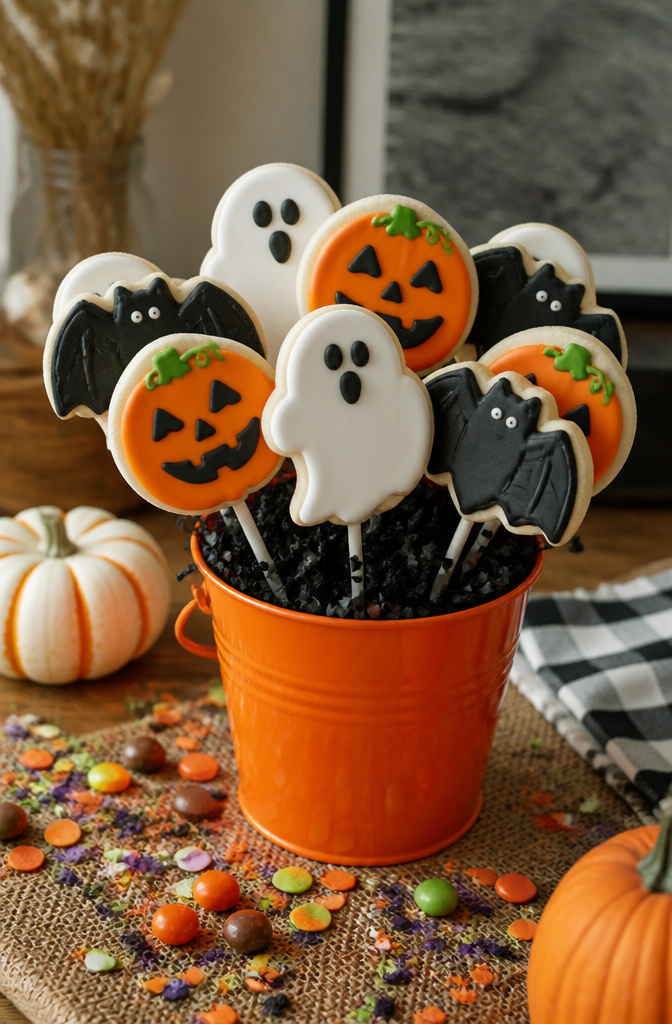
Sugar cookies on sticks solve the transport problem that ruins most party treats, but only if the stick stays put and the cookie survives the bag.
Bake flat cookies, not puffed ones, using a roll-out dough with enough flour to hold its shape. A domed cookie cracks around the stick and spins; a flat one sits steady.
Push the stick in right after baking while the cookie is still warm and soft, about two-thirds of the way up. Let it cool on the stick so the interior hardens around it.
If the stick slides later, the hole was too wide or the cookie too cool when you inserted it.
Decorate with white cookie icing and let it dry completely, at least four hours. Layer the finished pops between sheets of parchment in a tall container so nothing touches the faces.
Tape the sticks to the bottom if you are driving.
18. Monster Munch
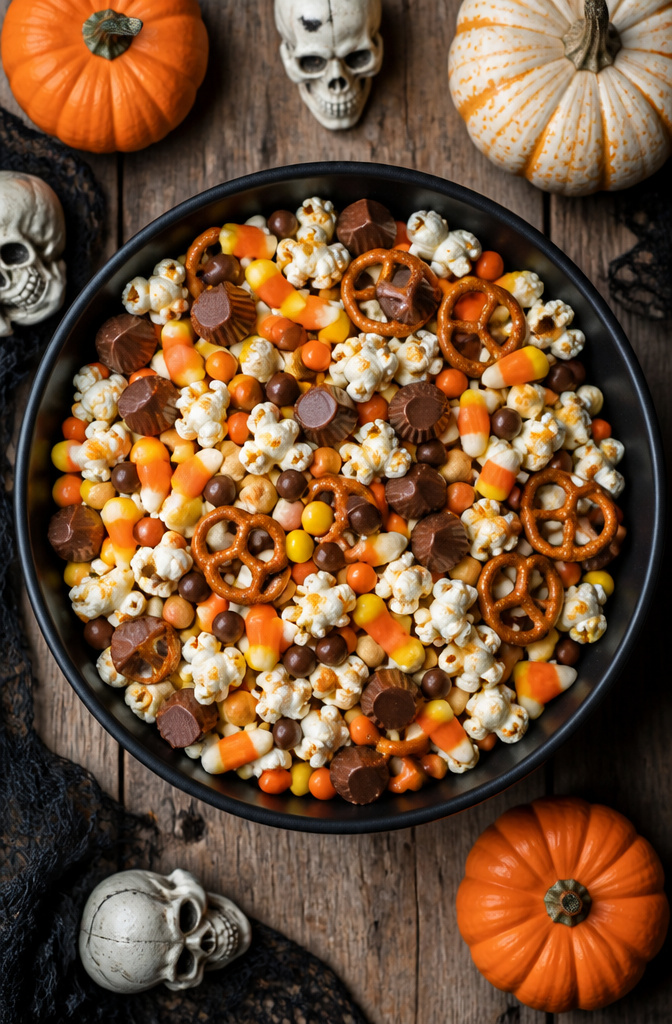
A bowl of Monster Munch disappears faster when the sweet items do not outnumber the salty ones by more than two to one.
Go heavier on popcorn, pretzels, and cheese crackers than on candy corn and chocolate pieces, and the whole mix gets picked at steadily instead of kids cherry-picking the sugar and leaving the rest.
The sweet-salty ratio that empties fastest is roughly 1:1 by volume, which also keeps hands from getting sticky enough that someone abandons the bowl entirely.
Mix-ins need matching shelf lives. Chocolate-coated candies sweat and soften if they sit next to something moist, and cereal gets chewy fast near dried fruit.
Combine dry with dry: pretzel sticks, roasted peanuts, plain popcorn, and firm gummies that do not weep oil. If you add something marshmallow-based, serve it in a separate small bowl and refill as needed.
For twelve kids, a three-quart bowl is the right size. Smaller and they crowd and spill reaching past each other; larger and the mix looks half-empty, which makes kids take less.
Set out a second backup bowl to swap in, not one giant vessel.
19. Caramel Apples
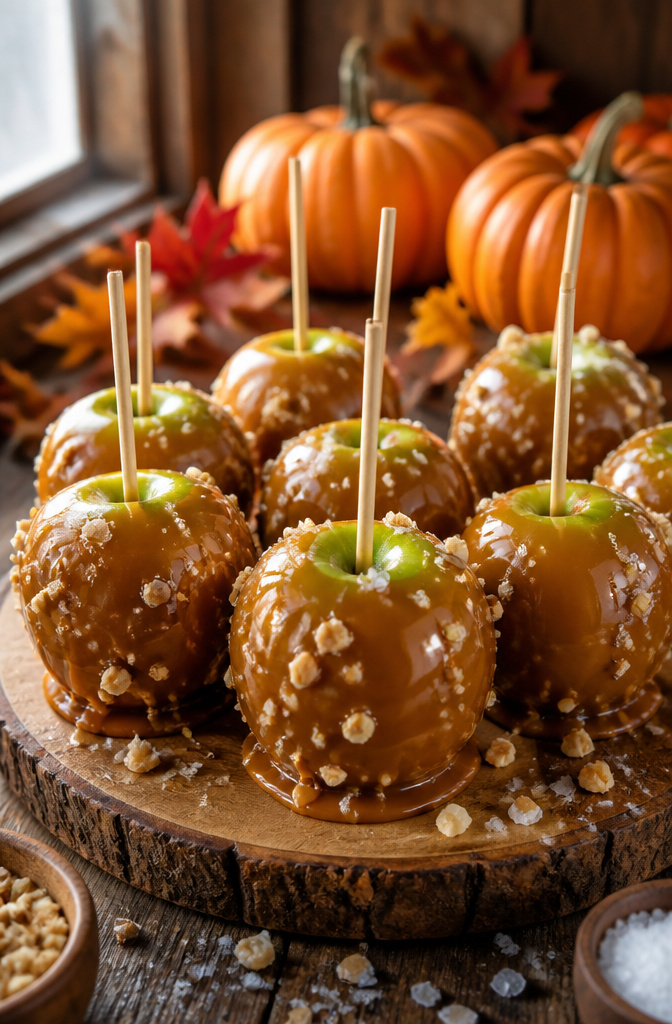
Granny Smith apples hold caramel better than the sweeter varieties, which tend to sweat through the coating by the second hour. Their tartness also balances the sugar so the finished apple does not cloy.
The caramel needs to reach the soft-ball stage, around 235°F on a candy thermometer, to set firm enough that it does not slide onto the plate but stays pliable enough for a child to bite through.
Go hotter and the shell cracks; cooler and it pools into a puddle you will be scraping off wax paper.
Skip the individual wrappers by starting with caramel bits sold loose in a bag, the kind that melt straight from the package.
They cost a dollar or two more than the wrapped squares and save you twenty minutes of unwrapping plus the sticky foil you would otherwise fish out of the trash.
Melt them with a splash of heavy cream and a pinch of salt. The salt is not optional; without it, the coating tastes flat against the apple’s acidity.
Dip apples that have sat out of the refrigerator for an hour. Cold fruit shocks the caramel into setting too fast, leaving thick collars at the top and bare patches near the bottom.
Twirl off the excess, let them set stick-side up on a parchment-lined pan, and do not move them for at least forty minutes.
20. Halloween Fruit Tray
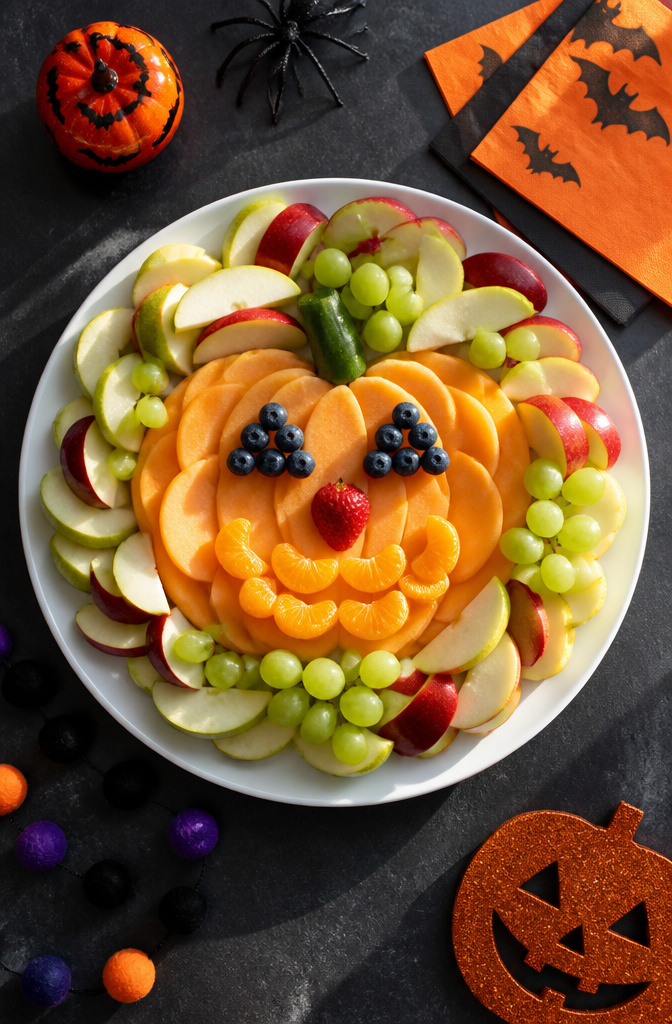
Apple slices, pear wedges, and firm grapes hold their shape after cutting, so they are your best base for a Halloween fruit tray that does not wilt into a sad puddle before the kids arrive.
Arrange the slices in a rough circle on a large platter, rounded side out, to build the body of a pumpkin. Fill the center with more fruit until the surface is level.
Use two small clusters of blueberries or dark grapes for eyes, a strawberry tip or a bit of melon for the nose, and a crescent of tangerine segments or sliced mango for the grin.
The whole thing takes about ten minutes once your fruit is prepped. Assemble it no more than two hours before serving, or the cut edges will brown and the arrangement will look tired.
If you need to go earlier, keep the pieces in acidulated water, dry them well, and build the face at the last minute. A fruit tray clears the table fast and gives parents one option that is not pure sugar.
Frequently Asked Questions
What are some easy Halloween food ideas for kids party?
Several require no oven at all: monster jaws from apple wedges and almonds, dirt and worms pudding cups, and slimy worms on a bun using spiral-cut hot dogs. Most take under thirty minutes of active time.
How can I make healthy Halloween snacks for a kids party?
The Halloween fruit tray uses apple slices, pear wedges, and grapes arranged as a pumpkin face with blueberry eyes and tangerine grin. Monster jaws stack apple wedges with sunflower seeds or almonds for teeth.
Both hold up for about two hours after assembly and give parents one option that is not pure sugar.
What are some fun Halloween treats to make with kids?
Dirt and worms lets kids press gummy worms into pudding and top with crushed cookies. Spider cookies involve piping chocolate glue and pressing pretzel legs onto Oreos.
Nutter Butter ghosts need only dipping and pressing in chocolate chip eyes. Pumpkin sammies use a cutter and paring knife to carve jack-o-lantern faces through sandwich bread.
What kind of food is usually served at a Halloween party for kids?
Sweets include chocolate cherry mice, caramel apples, and candy corn cookies with three-zone icing. A sweet-salty monster munch mix rounds out the table.
What are some good finger foods to serve at a Halloween party for kids?
Mummy dogs in crescent wrap, cheesy fingers from cold string cheese with almond nails, breadstick bones with marinara for dipping, and pumpkin sammies cut with a three-inch cutter all work without utensils.
Slimy worms on a bun curl in boiling water and sit in buns to hold their shape. Everything here is sized for small hands.
What to give kids instead of candy for Halloween party food?
The Halloween fruit tray offers a full pumpkin face built from sliced fruit. Monster jaws use apples and seeds.
Pumpkin sammies with peanut butter or cream cheese filling cut into jack-o-lantern shapes give protein and fruit. Breadstick bones with marinara read as themed while staying bread and tomato.
All avoid candy entirely.