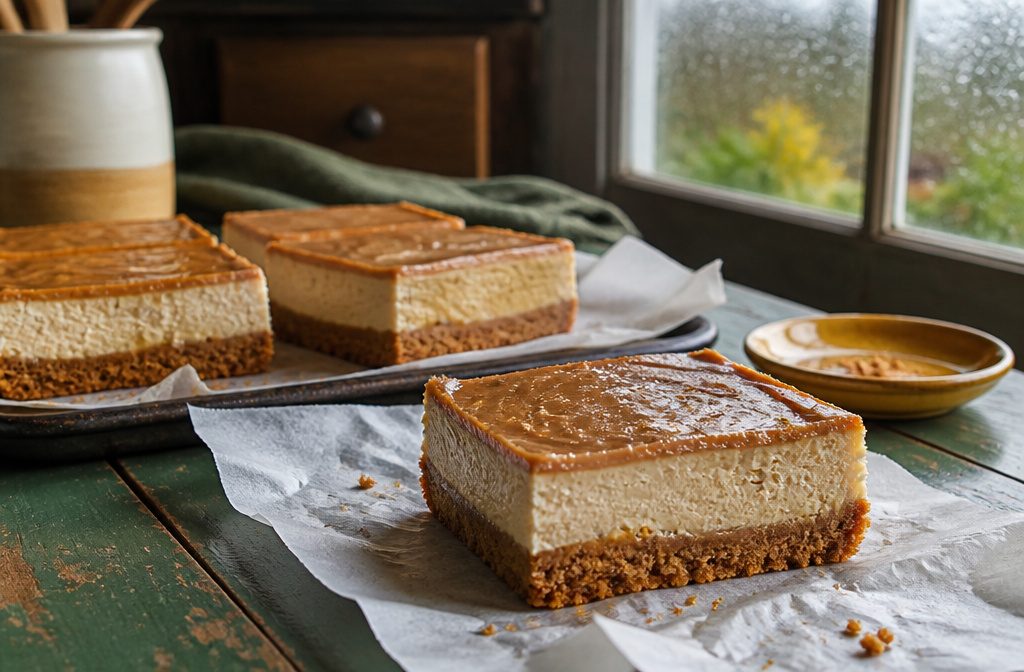
Caramel and warm spice run through both the crisp Biscoff crust and a cream cheese filling blended with ½ cup cookie butter.
Total time is 295 minutes, most of it chilling, because the bars need at least 4 hours to slice cleanly. Mix the eggs only until combined, or the top cracks.
Ingredients
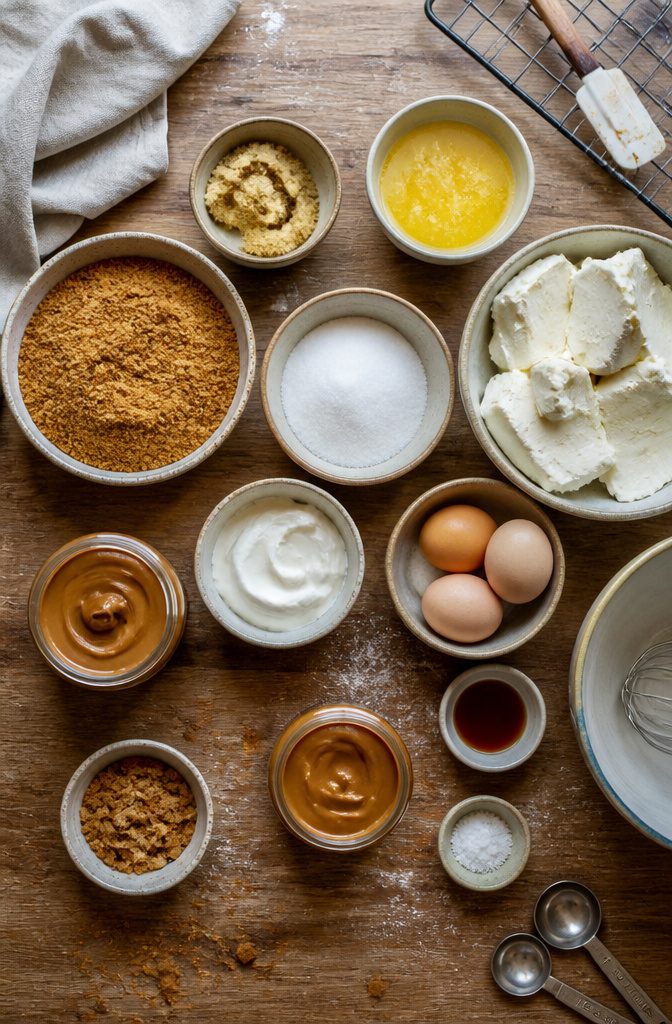
This makes 16 bars in an 8×8 pan.
- Crust:
- 1½ cups crushed Biscoff cookies (about 22 cookies)
- 1 tablespoon packed brown sugar
- 5 tablespoons unsalted butter, melted
- Filling:
- 16 ounces cream cheese
- ½ cup packed brown sugar, light or dark
- ¼ cup granulated sugar
- ½ cup cookie butter
- ¼ cup sour cream
- 3 large eggs
- 1 teaspoon vanilla extract
- ¼ teaspoon salt
- Topping: warmed cookie butter and cookie crumbs, scaled to taste. For a starting point, use half of what a 9×13 pan takes: ½ cup melted cookie butter and ½ cup crumbled cookies (about 6).
- Temperature: set the cream cheese, eggs and sour cream out until they reach room temperature so the filling mixes smooth.
How to Make Biscoff Cheesecake Bars
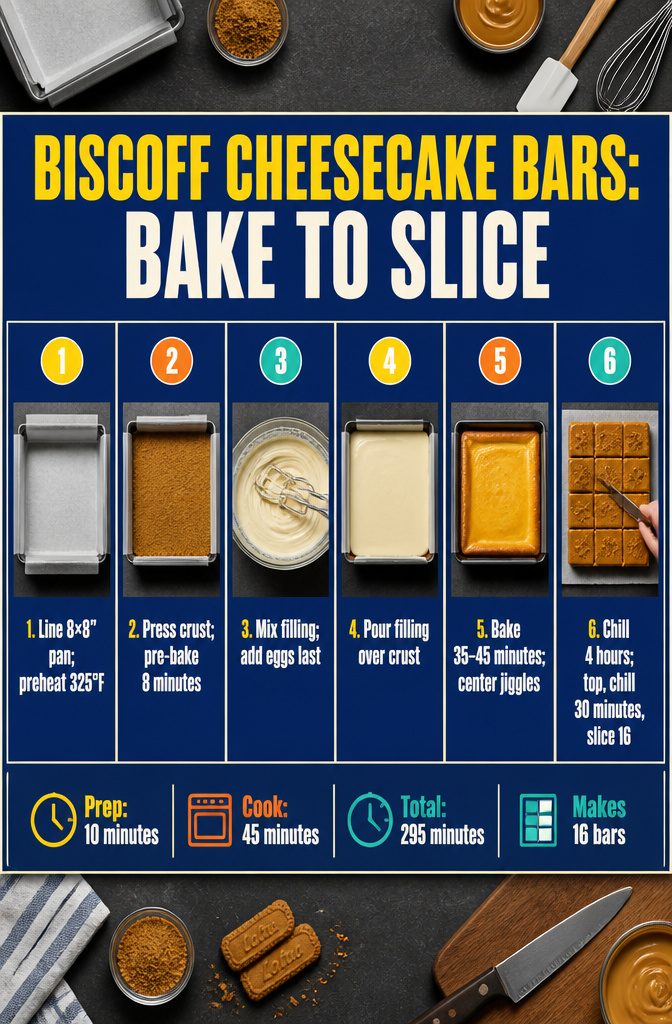
Prep: 10 minutes. Cook: 45 minutes.
Total: 295 minutes. Makes 16 bars.
- Preheat the oven to 325°F. Line an 8×8 pan with parchment, leaving an overhang on two sides so you can lift the bars out later.
- Mix the crushed cookies, brown sugar and melted butter. Press the crumbs into the pan and pre-bake for 8 minutes.
- Beat the cream cheese and both sugars until smooth. Add the cookie butter and sour cream, then the vanilla and salt, then the eggs. Mix the eggs only until combined.
- Pour the filling over the crust.
- Bake for 35–45 minutes, checking at 35. The edges should be set and the center should have a slight jiggle.
- Let the pan cool, then refrigerate at least 4 hours or overnight.
- Spread the warmed cookie butter over the top, add the crumbs, and chill at least 30 minutes more.
- Lift the slab out by the parchment and cut it into 16 bars.
Why Biscoff Works in the Crust
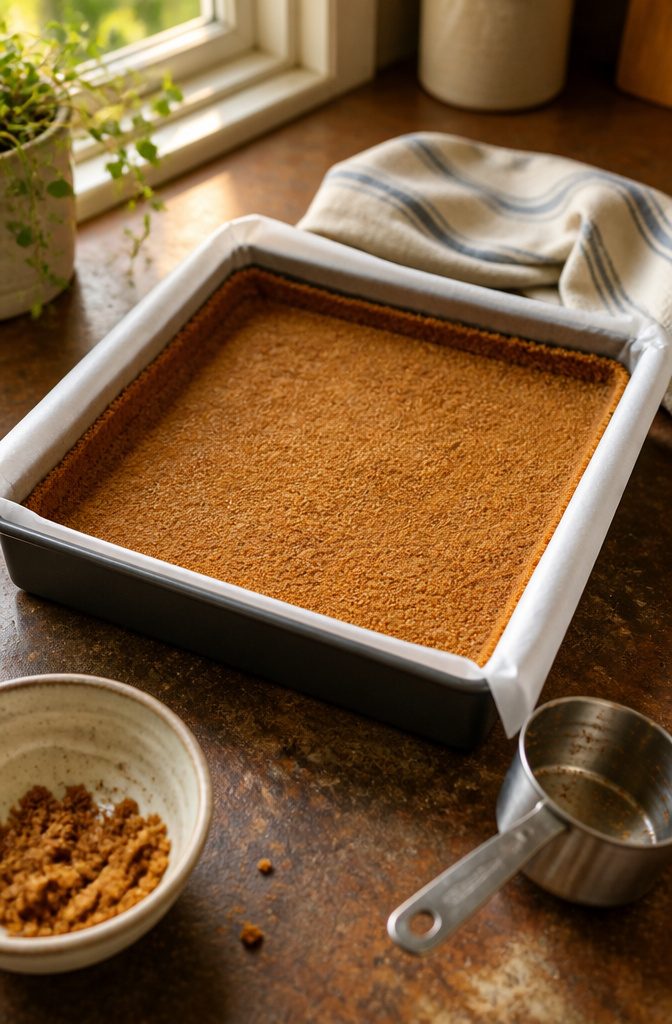
Biscoff cookies taste of caramel and warm spice like cinnamon, and they’re made with brown sugar, so the crust is already sweet and deeply flavored without anything added.
Crush them to fine crumbs, then stir in melted butter that has cooled.
Warm butter turns the crust greasy and makes it burn faster in the oven. The mix should look like wet sand.
Press it firmly into a parchment-lined pan, reaching all the corners.
The back of a measuring cup gives the flattest, tightest layer. Then bake the crust 10 minutes at 350°F so it turns crisp and holds a clean edge when you cut.
It can still be a little warm when the filling goes on. A no-bake cheesecake skips this step, but a baked bar needs it.
Doneness and Cracks
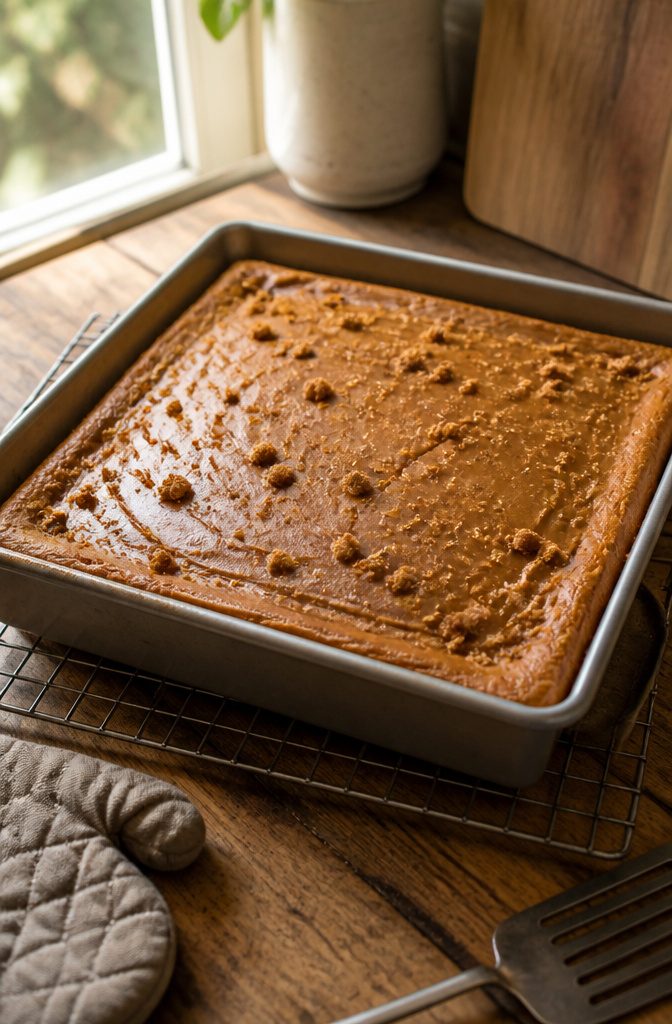
Bars crack for three reasons: cold ingredients, overmixing after the eggs go in, and overbaking.
Let the cream cheese and eggs come to room temperature, and mix the eggs in only until the batter looks combined. Start checking at 35 minutes.
The bars are done when the edges are set, the center still has a slight jiggle, and the surface no longer looks wet or liquid.
If the center sloshes or shines, give it more time. If the whole pan is stiff, it has already gone too far.
A different pan changes the clock. A larger pan may need a bit longer, and a smaller one may bake faster, so trust those visual cues over the timer.
A thin crack isn’t a failure. The Biscoff spread on top covers it.
Chill and Cut Clean
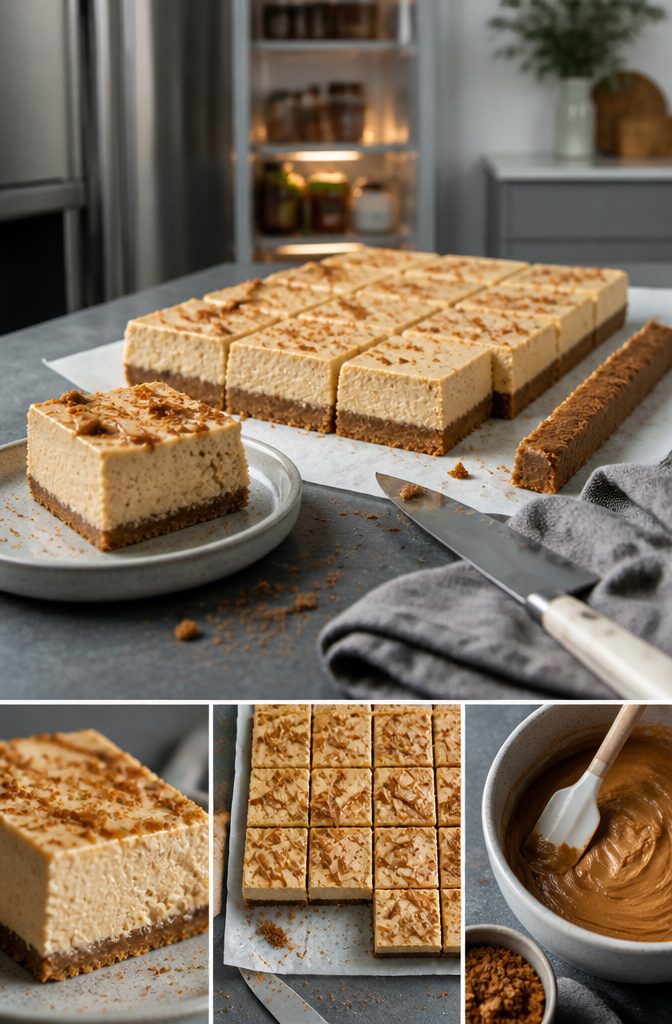
Let the bars cool completely on the counter before you move them to the fridge. An hour on a wire rack brings the pan down to room temperature and keeps condensation from forming on the surface once you cover it.
Chill at least four hours or overnight so the filling sets firm enough to slice cleanly.
Wipe the knife between cuts. A warm, damp cloth clears the blade and keeps each edge sharp instead of dragging filling from one bar to the next.
Trim the outer edges of the slab before you portion the rest into squares. The perimeter tends to bake a shade firmer or darker, and cutting it away leaves you with uniform bars that all release cleanly from the parchment.
Cheesecake belongs in the fridge. The dairy base and moisture level make it perishable, so keep the finished bars covered and cold until you serve them.
Storing and Freezing Leftovers
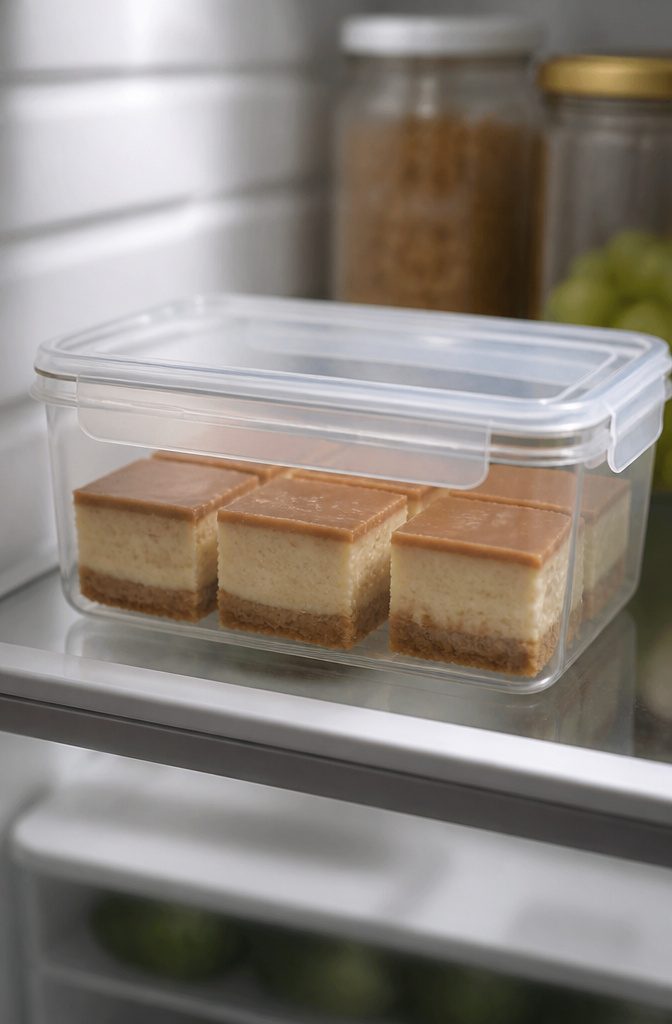
This recipe makes 16 bars.
Keep them in an airtight container in the refrigerator for 3 to 5 days, and plan to finish them within 3 days for the best texture. Add any crumb or whipped topping right before serving so it stays crunchy or fluffy.
To freeze, chill the bars completely first. Wrap the pan tightly in plastic wrap, then in aluminum foil.
A baked cheesecake freezes well for up to 3 months. If you cut the bars into individual pieces first, stick to about 1 month.
Thaw in the fridge, and let frozen bars sit at room temperature for half an hour (or in the fridge for at least 1 hour) so they slice cleanly.
A no-bake version can pick up small ice crystals and a slightly different texture, so skip the freezer for those if you can.
Topping Swaps and Substitutions
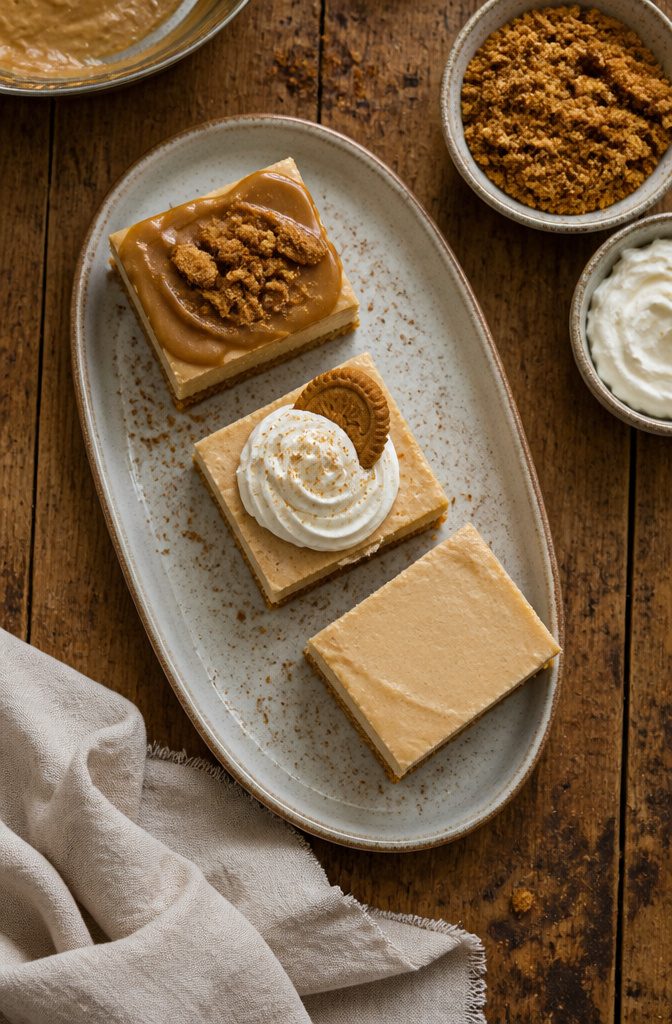
The simplest topping for a weeknight is warmed cookie butter with cookie crumbs, and the other options are only worth the extra bowl if you want them:
- Cookie butter and crumbs: Melt the cookie butter in a microwave-safe bowl, spread it over the chilled bars, and refrigerate until it sets. Hold the crumbled cookies until just before serving.
- Whipped cream and mascarpone: Top each piece with a halved cookie. This is the dressier choice, but it means whipping and one more dish to wash.
- All heavy cream: Replace the mascarpone with extra heavy whipping cream. The topping turns lighter and fluffier, though a little less rich.
- No topping: Skip it if you’re carrying the bars to a party or want the plainest presentation.
- Graham cracker crust: Use graham crackers in place of the Biscoff cookies, in an equal amount. You lose the caramelized speculoos flavor, but the bars still set the same way.
Apple Crumble Variation
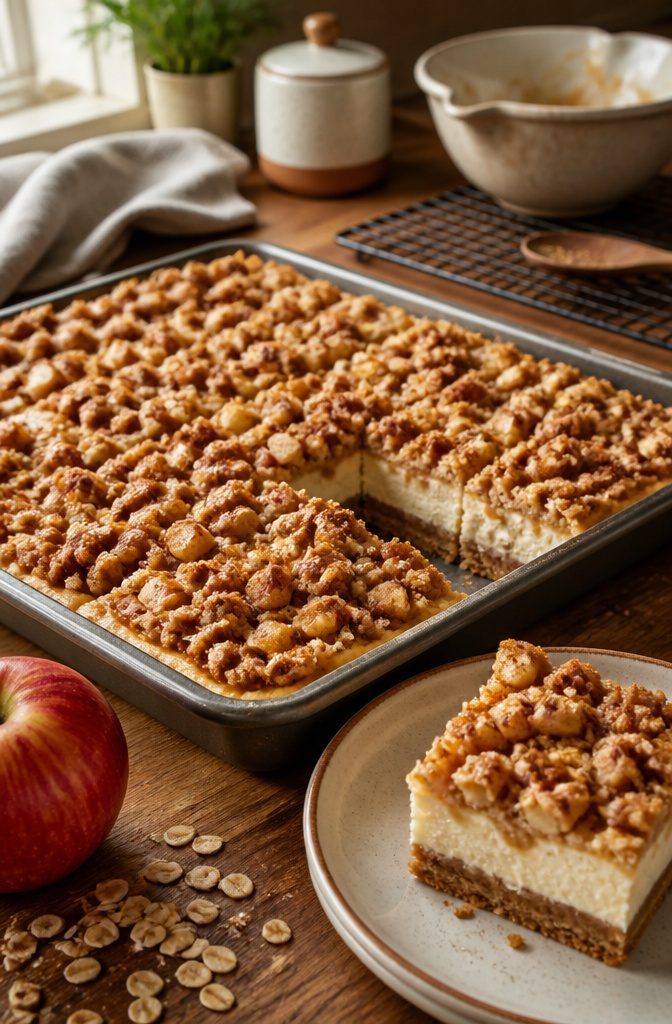
This is a variation, not a change to the base recipe: the Biscoff crust and cheesecake filling stay as written, and the apple crumble goes on top.
Bake at 350°F, with the crust for 10 minutes first and the finished bars for 35–40 minutes in an 8×8 pan, which cuts into 12 bars.
Toss 1 large diced EverCrisp apple (about 1 cup) with ½ teaspoon cinnamon. Scatter it over the filling gently, so the pieces do not sink.
Then work ½ cup brown sugar, ½ cup flour, ½ cup rolled oats and 4 tablespoons butter into a crumble and pile it on freely. Holding back leaves the top patchy.
Chill the bars at least 3 hours before cutting. They keep in the refrigerator for up to 3 days.
No-Bake Version
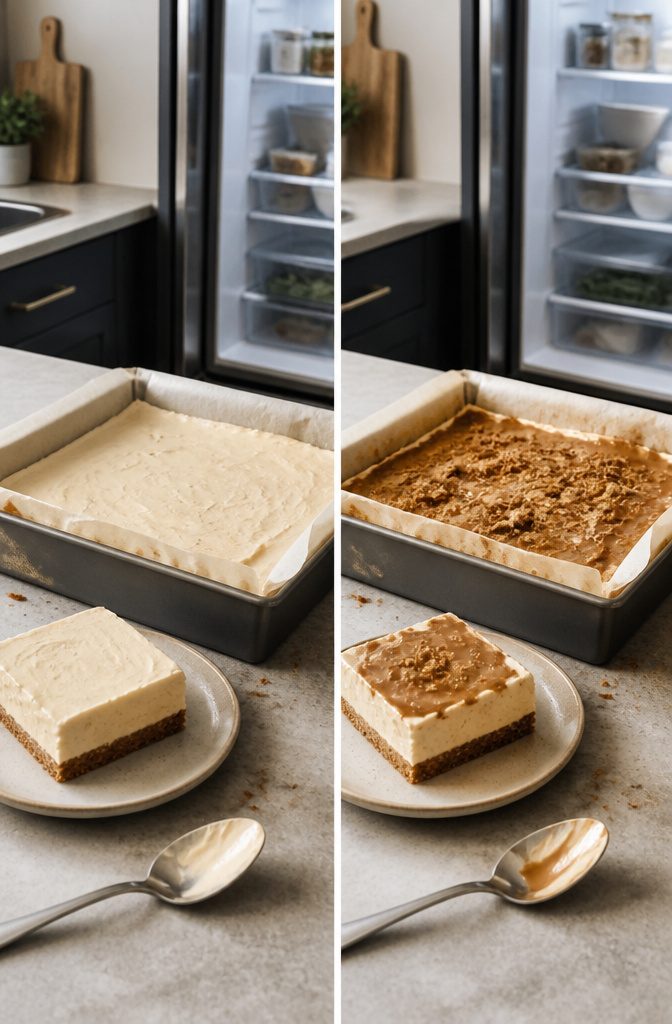
A no-bake bar starts the same way as the baked one but never sees the oven. Press the cookie crust into the pan and freeze it for 15–30 minutes so it firms up enough to hold the filling.
Leave the egg and sour cream out of the filling, since with nothing to bake neither has a job. Spread the filling over the cold crust, chill, and add the topping last.
A simpler five-ingredient version uses cream cheese, cookie spread and powdered sugar, among others. Give it at least 3 hours in the refrigerator before you slice.
You gain a cool kitchen and lose some structure.
Without egg, the filling sets softer, so the cuts are less sharp and the bars should stay cold until serving. Freezing them can change the texture, so keep leftovers in the refrigerator if you can.
Frequently Asked Questions
Why did my cheesecake bars crack?
Cracks usually come from cold ingredients, mixing too long after the eggs go in, or overbaking.
Let the cream cheese and eggs reach room temperature, stir the eggs in only until the batter looks combined, and start checking at 35 minutes. A thin crack is fine, because the warmed cookie butter on top hides it.
How do I know when Biscoff cheesecake bars are done?
The edges are set, the center still jiggles slightly, and the surface no longer looks wet or shiny.
In an 8×8 pan that usually happens between 35 and 45 minutes. If the center sloshes, give it more time; if the whole pan is stiff, it has gone too long.
Should cheesecake bars be refrigerated?
Yes.
The dairy base makes them perishable, so keep them covered and cold until you serve them. They hold for 3 to 5 days in an airtight container, but they have the best texture within 3 days.
How do I get clean slices of cheesecake bars?
Chill the bars at least 4 hours so the filling is firm, then lift the slab out by the parchment and trim the outer edges, which bake a bit firmer or darker.
Wipe the knife with a warm, damp cloth between every cut so filling doesn’t drag from one bar to the next.
Can I use a different baking pan for these bars?
Yes, but the timing changes.
A larger pan may need a bit longer and a smaller pan may bake faster, so go by the doneness cues (set edges, slight jiggle in the center) rather than the timer. The recipe here is written for an 8×8 pan.
Can I substitute the mascarpone in the topping?
Yes.
Use extra heavy whipping cream in place of the mascarpone, which gives a lighter, fluffier topping that is a little less rich. You can also leave the topping off, which is the easiest choice if you are transporting the bars.
How do I turn a cheesecake recipe into bars?
Press a cookie crust into a parchment-lined 8×8 pan, leaving an overhang on two sides, then pour the filling over it and bake.
After chilling for at least 4 hours, lift the whole slab out by the parchment and cut it into 16 squares.