
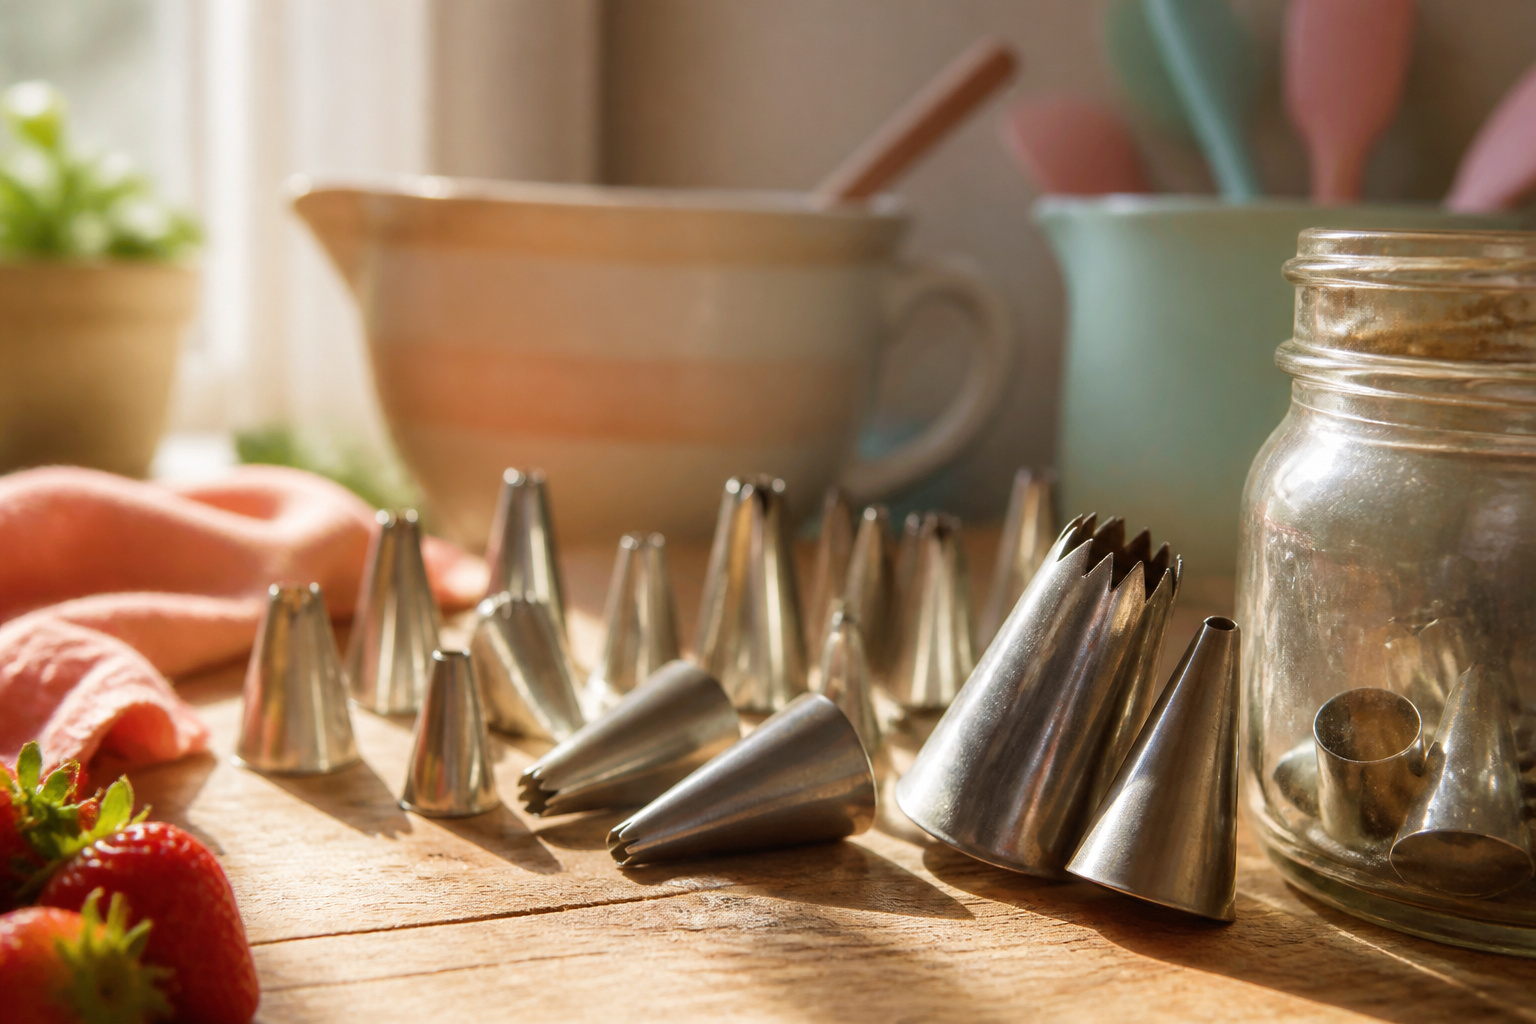
The right piping tip depends on whether you need speed or control, because a tip that covers a cupcake in one squeeze will wreck a name written in frosting.
A Wilton 1M open star throws up tall swirls in seconds, while a #12 round demands silk-smooth buttercream and a steady palm just to finish a line. Most home bakers own both and still grab the wrong one mid-project.
1. Wilton 1M
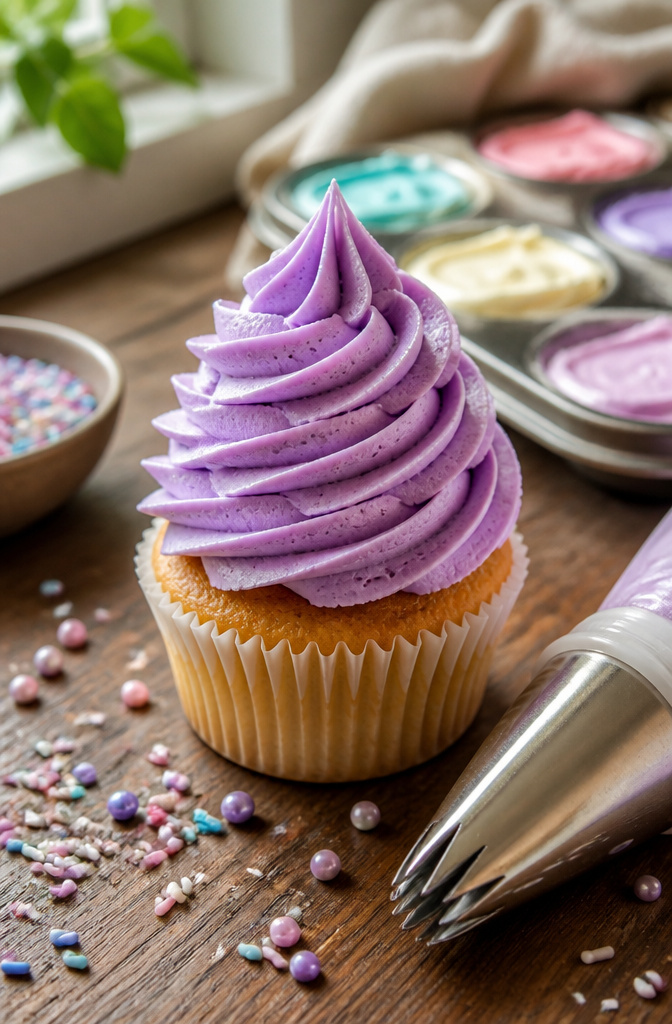
The Wilton 1M is the open star tip most home bakers pick up first, and for solid reason.
Its six-point opening presses ridges into buttercream as it exits, so a single squeeze produces the tall swirl that looks like soft-serve ice cream without any wrist gymnastics.
Start in the center of a cupcake, circle slowly, and let each layer stack on the last until you break off clean.
That same six-point geometry works flat for roses and rosettes. Begin in the middle, spiral outward, and the prongs leave petal-like grooves that read as texture even from a distance.
Standard American buttercream pipes cleanly through it; the opening is wide enough that stiff peaks do not clog the points.
You can skip the coupler here if you cut the bag opening to fit the base snugly.
A coupler adds speed when you are swapping tips mid-project, but for an afternoon of swirls or a batch of rosettes, the direct fit saves cleanup and works fine.
2. Wilton 2D
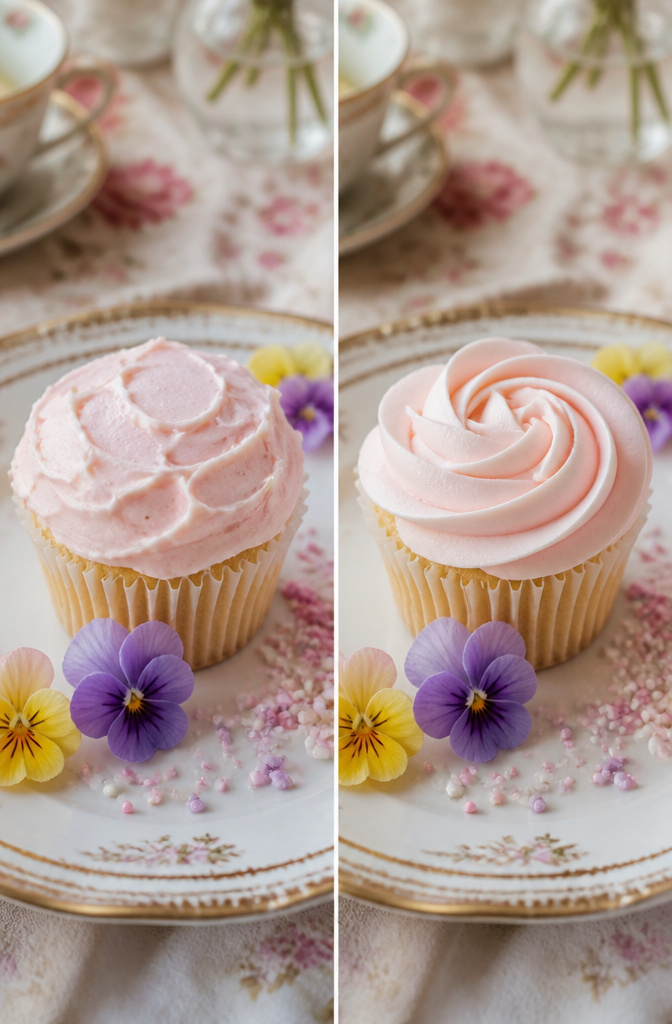
The Wilton 2D is the closed star tip behind the rosette swirls you see in bakery cases, and the difference from the 1M comes down to how the prongs finish.
On the 2D they curve inward and close tight, where the 1M leaves a wider open star. That tighter opening pushes the buttercream into softer, more ruffled folds with less of the sharp ridging the 1M leaves behind.
Pick the 2D when you want a gentler, almost fabric-like texture on a cupcake swirl, or when you are after that classic rosette look that reads as bakery-standard rather than homemade-dramatic.
The 1M still wins for height and definition; the 2D wins for delicacy and for holding a rounded dome without collapsing into ridges.
You can also use this tip for drop flowers.
Pipe a single squeeze onto parchment, twist your wrist so the petals fan sideways, then chill them in the freezer for about 10 minutes until firm enough to lift and press onto a frosted cake.
3. Wilton 8B
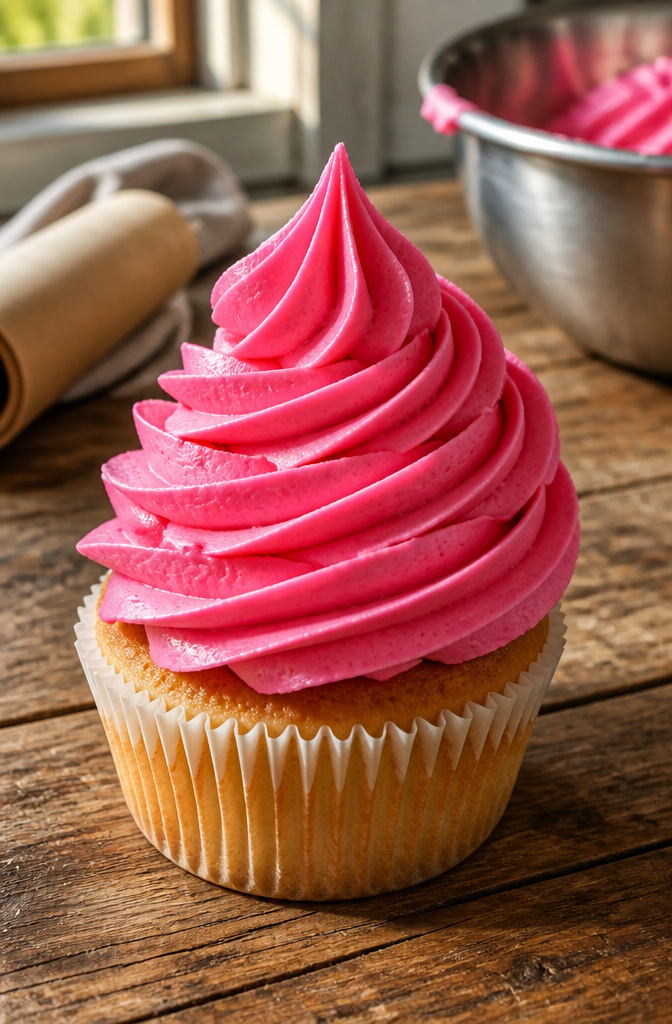
The Wilton 8B takes the same open-star shape as the 1M and scales it up for larger surfaces.
Where the 1M leaves a tall, soft-serve swirl that looks right on a standard cupcake, the 8B spreads that same ridged texture across a wider diameter.
It is the tip you reach for when a single layer cake needs a border that reads from across the room, or when jumbo cupcakes look skimpy with anything smaller.
You will need a 16-inch bag or larger to load this tip without constant refilling.
The 8B moves enough buttercream per squeeze that an underfilled bag collapses before you finish one swirl, and stopping mid-pipe to scrape the sides wastes the time you were supposed to save.
Speed on wide surfaces is the advantage: one pass with the 8B covers what two 1M swirls piped side by side would manage, and you skip the seam where the two smaller shapes meet.
On a 9-inch cake top, that difference adds up to several minutes and a cleaner finish.
4. Ateco 849
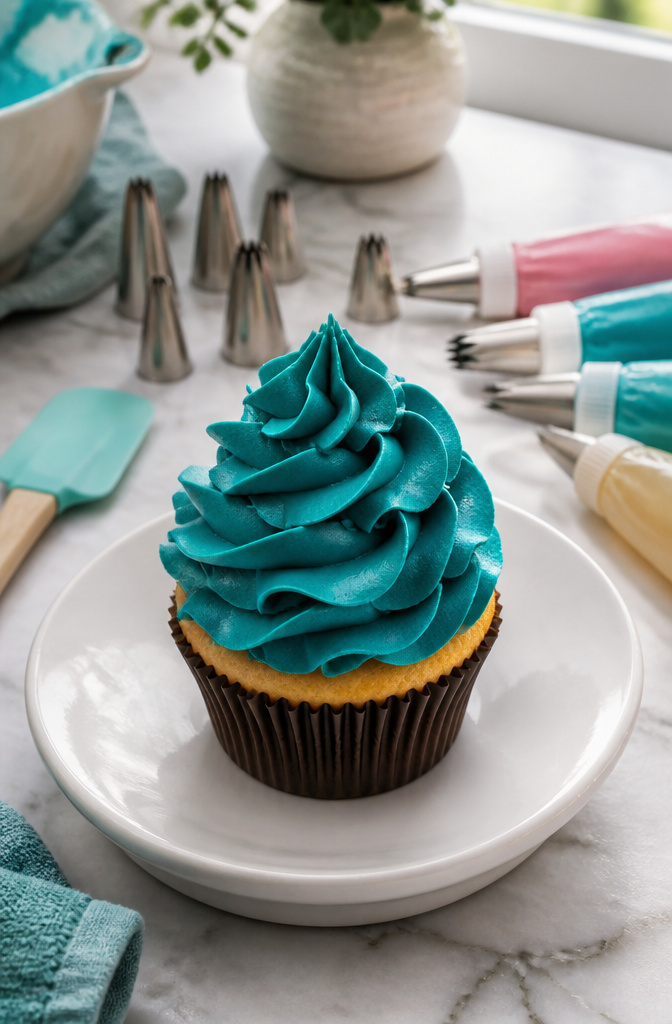
Ateco numbers its wide closed star tips in the 840s, while Wilton uses single digits and letters, so the 849 is not the same as the 1M or the 2D even though the shapes look related.
The 849 has eight points, and that extra width pushes the frosting out in broader rosettes and taller swirls than the 2D can manage.
You press the tip straight down into the center of a cupcake, squeeze while you lift, and the ridges stack into a ruffled shell that holds its shape because the points curve inward and trap the buttercream.
Pastry students often start with Ateco for this exact reason: the numbering is logical, the seams on the tip are cleaner, and the stainless steel holds up to being dropped in a bain-marie for sanitizing.
If you already own the Wilton 2D, the 849 does not replace it.
The 2D is for standard cupcakes and tight rosettes; the 849 is for jumbo liners, cake borders, or anywhere you want a single swirl to cover the whole surface without a second pass.
5. Wilton 12
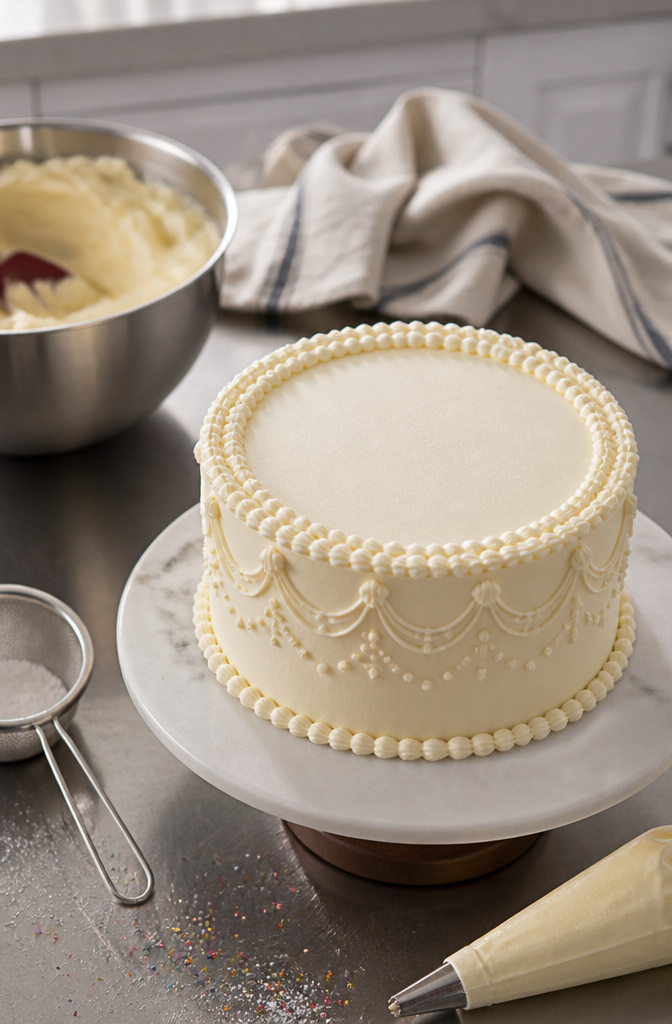
Wilton 12 is a small round tip with a plain opening, the kind you reach for when you need to write a name, pipe a thin outline, or place a single dot of frosting exactly where you want it.
The opening runs small enough that stiff American buttercream will clog it mid-squeeze, leaving you with a broken line and a bag you have to stop and knead.
You need a silky frosting here: cream cheese frosting, salted caramel frosting, anything that moves through the narrow bore without fighting back.
The technique that saves a line from wobbling is touching the tip to the surface to start, not hovering above it. Press the metal against the cake, squeeze until the frosting anchors, then lift slightly and draw.
Break contact and the stream falls; stay too close and you drag a ridge. It takes a light hand and even pressure, which is why this tip rewards practice on parchment before you commit to the cake.
6. Round Tips Small and Large
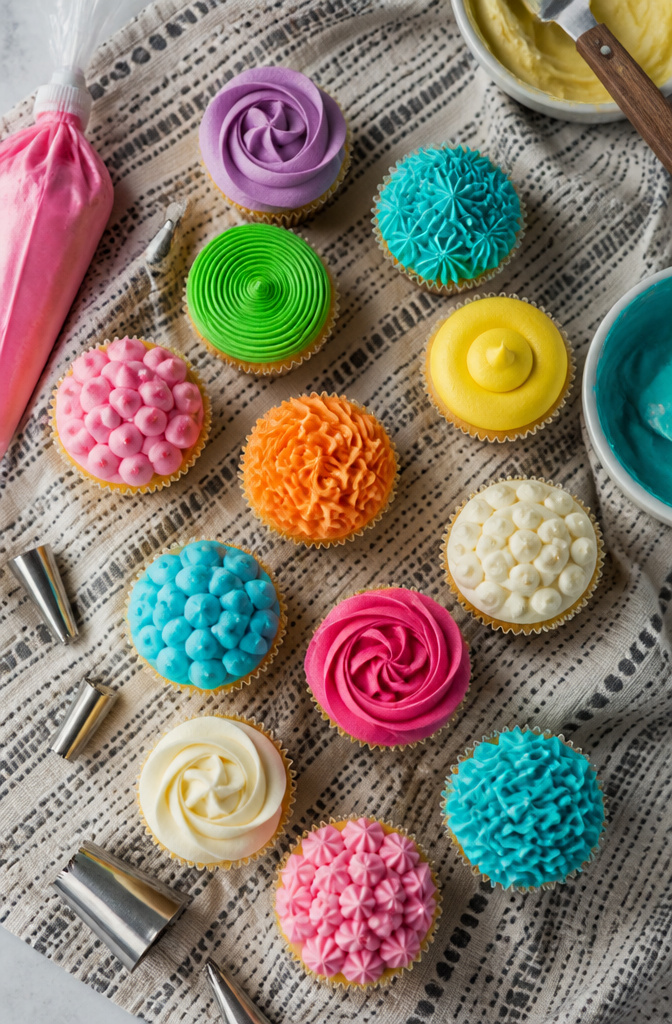
Round tips are the workhorses of a decorating kit, and the numbering tells you most of what you need to know.
Sizes #0 through #12 cover the small end, with each step up meaning a wider opening and a thicker line of frosting.
The smallest, #0 through #3, give you the control for writing names, piping tiny dots for berry centers on floral cakes, and outlining cookies with royal icing.
By the time you reach #4 and #5, you have the all-purpose sizes that decorators reach for constantly: filling gaps in flower arrangements, writing messages, adding bead borders.
The upper small sizes, #6 through #12, move into thicker lines and larger dots, useful when you need a bold outline or a solid string of frosting that still keeps a clean round profile.
At the large end, #1A and #2A open things up dramatically. A #1A can pipe the flat drops that form macaron shells: hold the bag straight, squeeze until the batter spreads to size, then swish away to cut it clean.
The same tip pipes scalloped borders when you dot and swoosh sideways with a spatula, or peaked borders when you pull upward to leave a spike on each dot.
The #2A goes wider still, filling donuts, injecting filling between cake layers, or covering larger areas where a ruffled edge would fight you.
For cupcakes, either large round starts in the center and swirls upward into a pillowy dome with no ridges to catch the eye wrong.
7. Star Tips Open and Closed
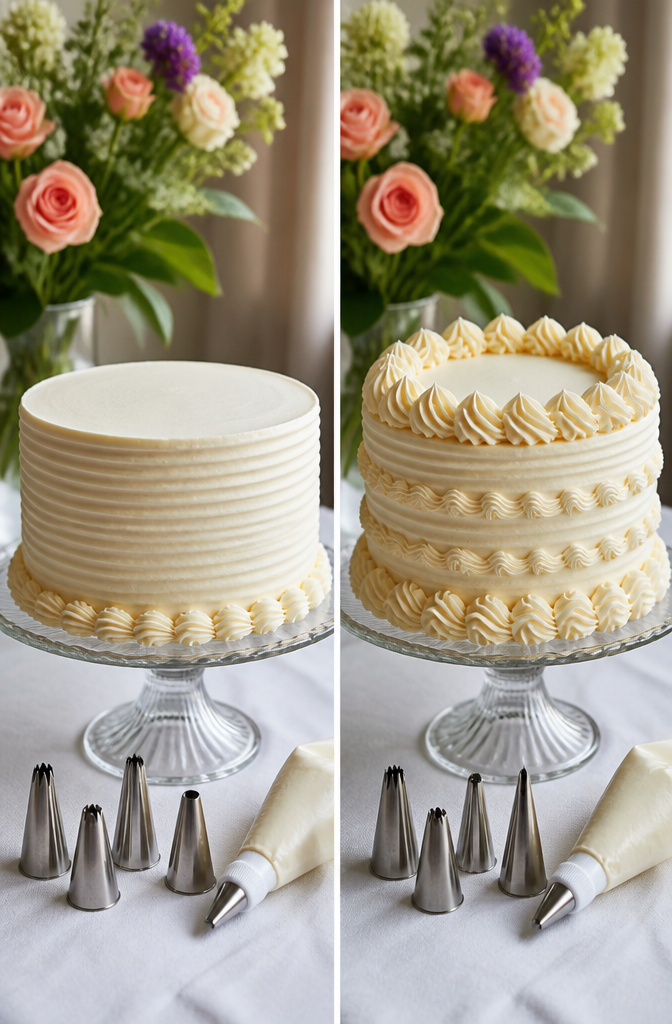
Open and closed star tips sit right next to each other in the numbering system, and the gap between #22 and #23 is where the whole family splits in two.
Open stars run #13 through #22, while closed stars pick up at #23 and run through #31. The 1M, 2D, and 8B you will see in their own sections are the famous exceptions, oversized versions of these same two shapes.
The difference is in the teeth. An open star tip has gaps between its points, so the frosting comes out with slightly ridged, round lines.
A closed star pulls those points inward until they almost touch, which forces the buttercream into deeper, ribbed cylinders with more structure.
For a simple cupcake swirl, the distinction barely shows; both read as a ruffled spiral from across the kitchen. Where you will actually notice it is on borders.
A ridged open-star shell border looks lighter and breaks more easily if you pipe too fast.
The closed star’s tighter ribs hold their shape longer, which matters when you are working your way around a cake base and the first inch has already started to crust.
For small detail work, the open stars #18 and #21 and the closed stars #27 and #30 are the sizes you will reach for most. Go larger only when the design itself is large.
8. Leaf Tips
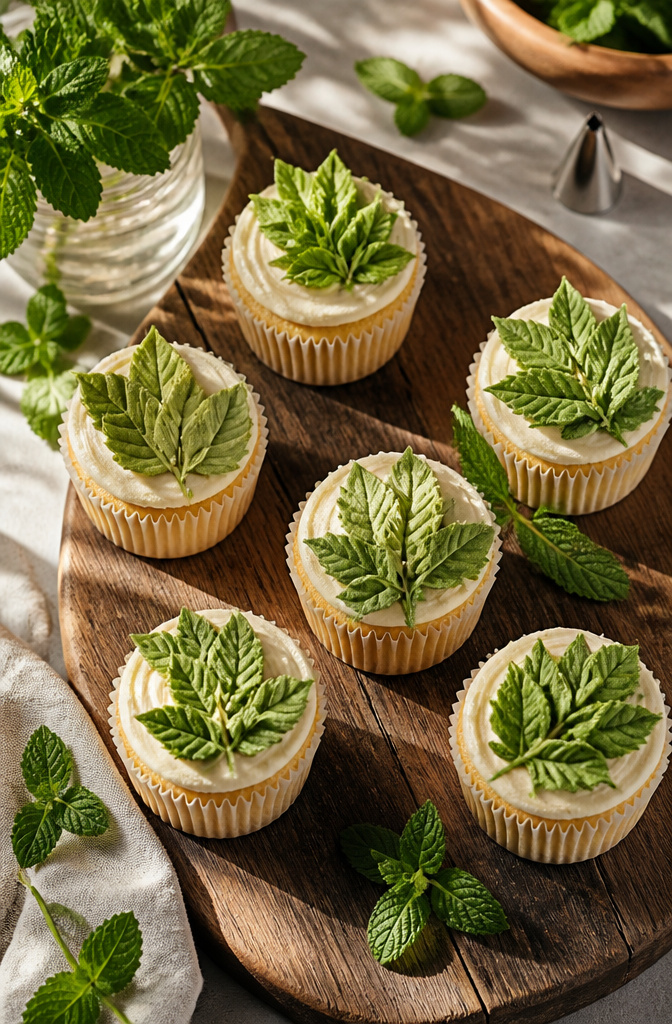
A leaf tip like the #352 has a V-shaped opening that looks like a pair of jaws from the side. You squeeze the bag, push the frosting out sideways, and stop squeezing as you pull away to leave a pointed tip.
That wrist flick is what makes the leaf read as a leaf instead of a flat ribbon.
The same motion works for vines and filler greenery. Squeeze longer for longer leaves, shorter for buds or tight clusters.
The #352 is the standard workhorse here, while variants like the #67 can give you a more ruffled edge. Common numbers in this family run #65 through #76, #112 through #115, and #349 through #353 and #363.
You can also use this tip without the flick. Pipe a straight line and you get a simple ribbon border, which saves you from buying a separate border tip if you are only decorating occasionally.
The leaf tip pulls double duty on weeknight cupcakes or a full floral cake, and cleanup is just the one metal piece.
9. Petal Tips
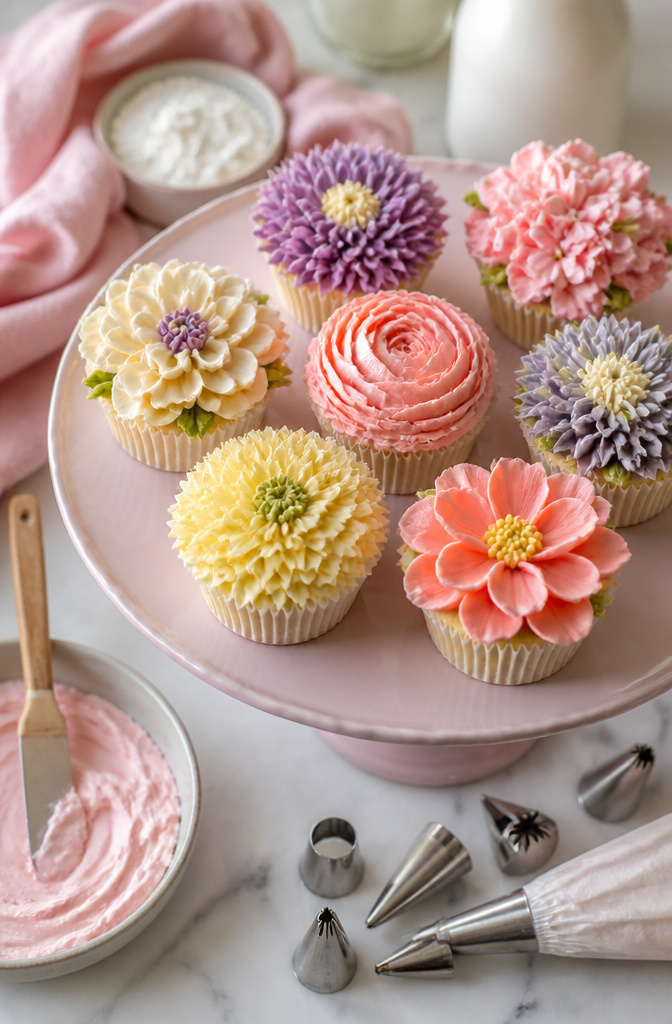
Petal tips are the ones where technique matters more than with any other shape, because the same teardrop opening gives completely different results depending on which end faces up.
The narrow end creates the thin, moving edge of a rose petal or the crisp fold of a ruffle, while the wide end anchors the shape.
Turn it wrong and you get a blob; turn it right and the frosting suddenly behaves like fabric.
For home bakers, the workhorses are the mid-range sizes: Wilton 104 for standard roses, 101 for smaller flowers, and the 123–125 range for fuller petals and ribbon borders.
The 59, 60, and 61 sizes handle ruffles going up or down a cake side, which is how you get those vintage Lambeth-style layers without smoothing a single inch of buttercream.
You will see petal tips listed across a huge spread of numbers, from tiny 44s up to 128s and beyond. Most of that range is specialty work.
For weeknight cupcakes or a birthday cake, three sizes cover almost every petal, ruffle, and ribbon border you actually want to pipe.
10. Grass Tips
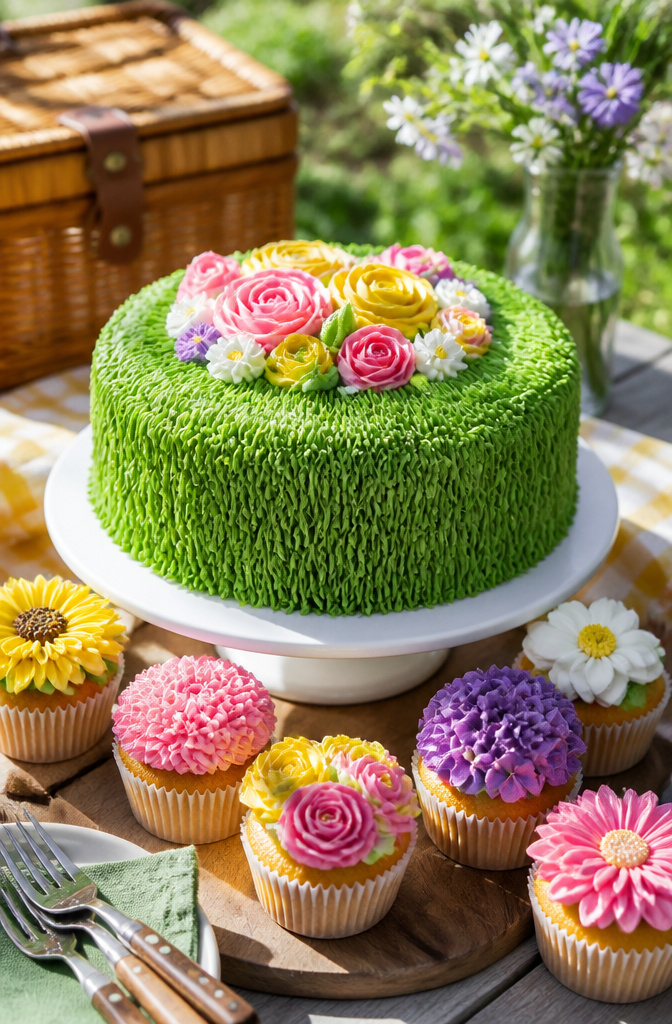
Multi-opening tips, commonly called grass tips, force buttercream through a cluster of small holes to create strands that read as grass, fur, or moss depending on how you handle them.
The standard sizes are #133, #233, and #234, with the smaller numbers producing finer, more delicate strands and the larger ones giving you a bolder, more defined texture.
These appear on everything from Easter cakes to teddy bear designs to football cupcakes, anywhere the aim is a hairy or grassy surface rather than a smooth one.
This is one of the few places where softer buttercream works against you. The strands need enough body to stand up and separate cleanly; if your frosting is too loose, you get clumped, sagging ropes instead of distinct grass.
Aim for the stiff end of pipeable, the kind that takes real pressure to squeeze through the bag.
Your hand motion changes the result completely. Pull straight up and the strands stay upright like grass or fur; drag the tip along the surface and you flatten the strands into something closer to moss or shag carpet.
The same tip gives you two textures based on nothing more than whether you lift or drag.
11. Drop Flower Tips
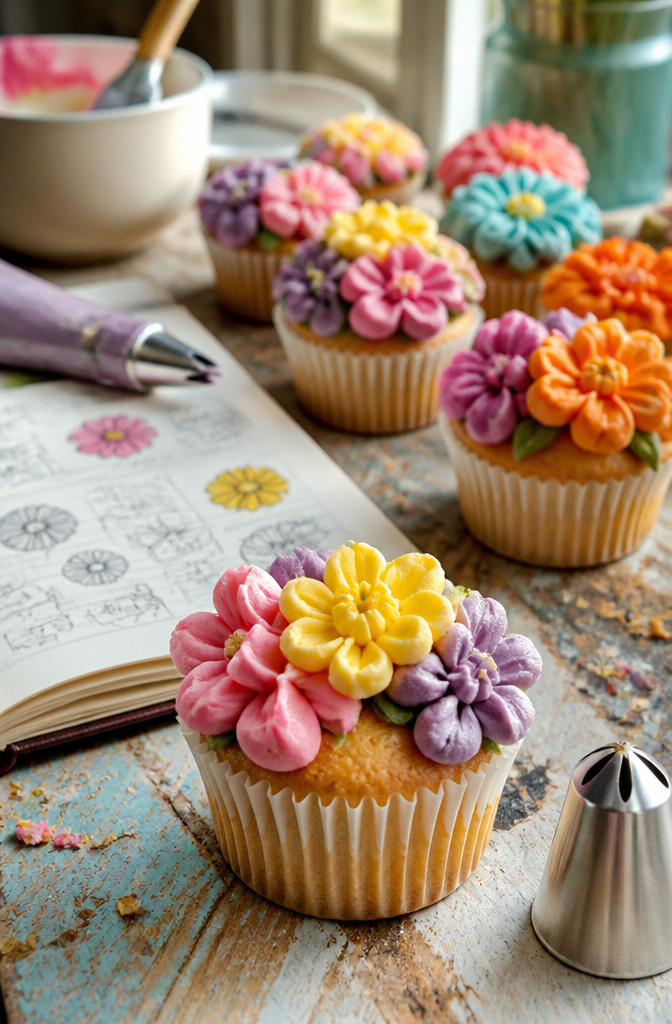
The #106 and #107 drop flower tips carry a notched, star-shaped opening that pushes five petals and a center dimple in one squeeze. You press, release, and lift.
No wrist twist, no petal-by-petal build. That speed is why these tips exist: a cake covered in dozens of small blooms takes minutes, not hours.
The look is deliberately homemade-charming on cupcakes, sheet cakes, and anywhere the frosting itself is the point. The flowers read as cheerful abundance, not precision botany.
Where they falter is on tiered wedding cakes or anywhere the eye lingers long enough to notice every bloom is identical. Same five petals, same dimple, same angle.
The effect tips from charming to plainly homemade fast when the surface is large and the decoration sparse.
Sizes run from small (#106) to larger (#107, #108, #109, #135, #171, #190, #194). The smaller numbers suit cupcakes and border accents.
Scale up for bolder cake-top coverage, but keep the spacing tight so the repetition does not become the only thing you see. These are tools for volume and speed, not for the one flower someone photographs up close.
12. Russian Piping Tips
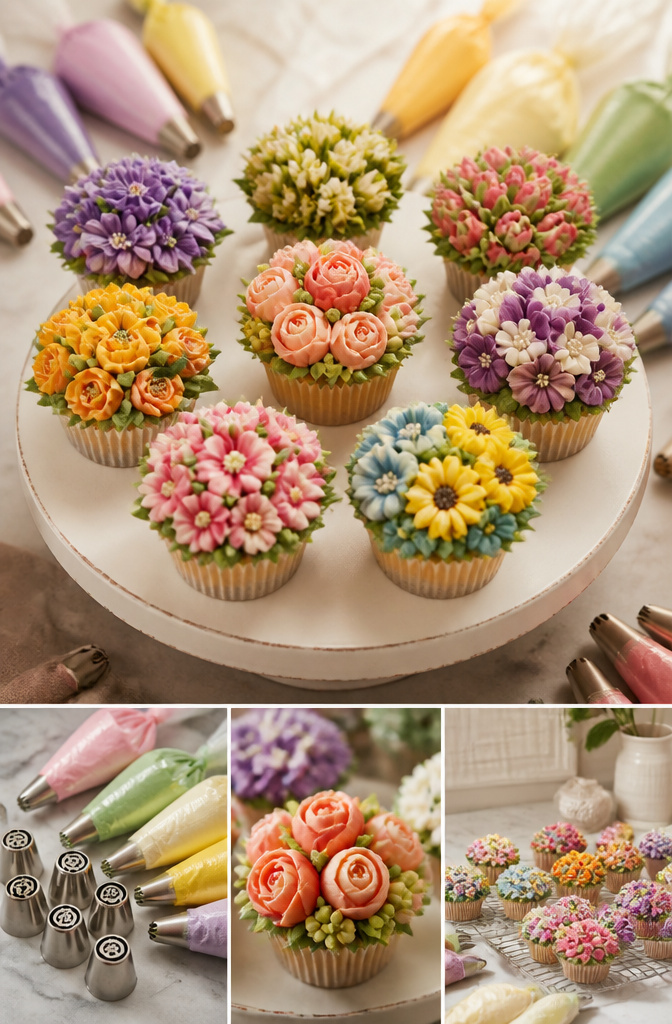
Russian piping tips are the multipart metal cutouts that pipe a full flower, sometimes with leaves included, from a single squeeze.
The shape stamped into the tip’s face determines the bloom: curved lines form wrapping petals like a rose, while dots in the center become stamens.
You load the bag with one color in the middle and another around the outer edge, so the flower emerges already shaded.
These tips cost more in buttercream waste than they save until you have put in real practice. The first ten squeezes tend to give lopsided flowers with petals that do not meet or a center that bulges wrong.
That buttercream goes in the scrap bowl, not on the cake. They earn their place when you need a dozen cupcakes decorated fast and you have already learned the pressure and lift.
For a single showpiece cake, a standard petal tip and leaf tip give you control these do not.
13. Couplers
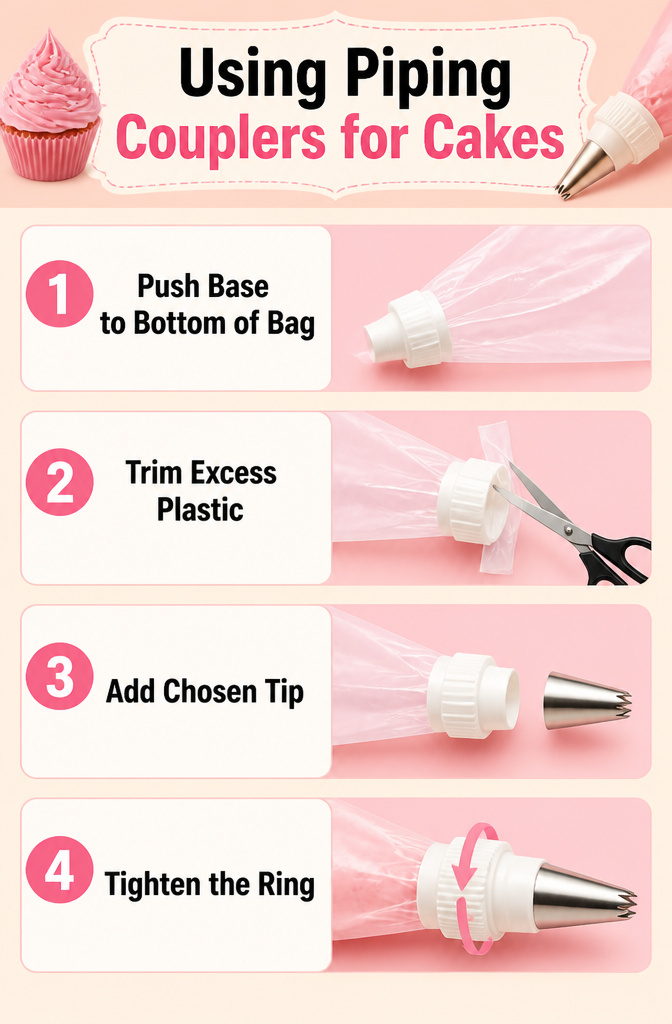
A coupler is the two-piece plastic fitting that lets you swap piping tips without scraping frosting into a new bag every time.
The base threads through the cut end of the bag and sits snug against the opening; the ring screws over your chosen tip to lock it in place. Unscrew, switch, and pipe again.
Sources disagree on material: most home sets are plastic, though heavy-duty metal versions exist for stiffer doughs. Either way, the setup is identical.
Push the base to the bottom of the bag, trim the excess plastic so it fits flush, add your tip, and tighten the ring.
If you own even three tips, the small cost pays for itself in saved frosting and cleanup time. Without one, you are either committing to a single tip per batch or juggling multiple loaded bags across your counter.
Most beginners pick up a standard plastic coupler where they buy their Wilton or Ateco tips; it is not a specialty item, and no particular brand loyalty matters here.
14. Basketweave Tips
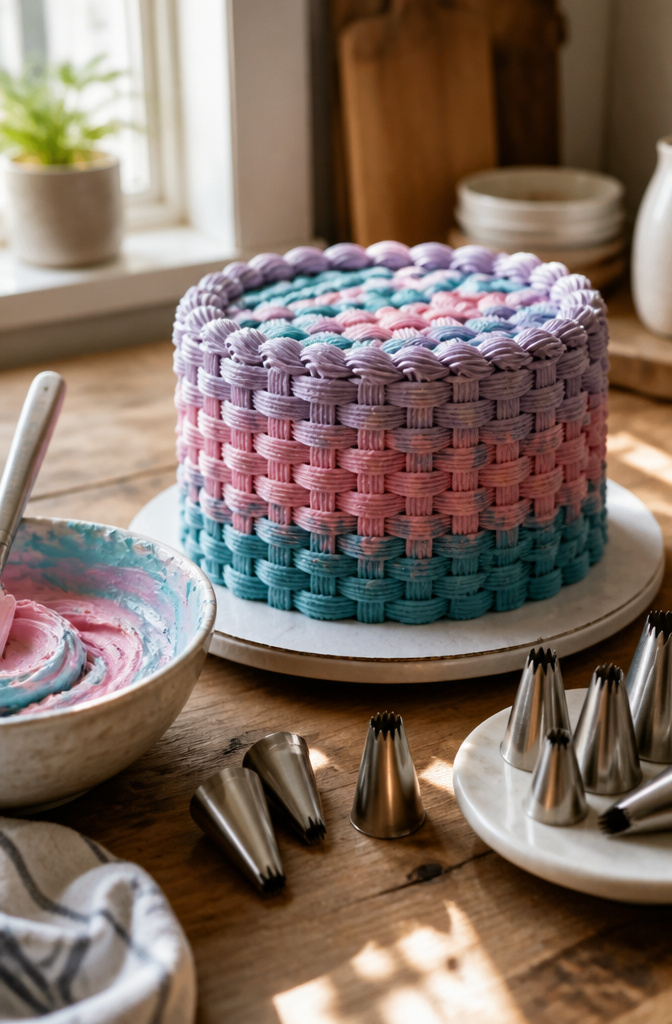
Basketweave tips are flat, serrated metal nozzles built for one job: making frosting look woven. You will find them in single-line versions like #44, #45, #47, and #48, and double-line versions such as #46, #895, #897, and #898.
The double-line tip pipes two parallel ridges at once, which cuts the work in half on a large cake but demands more control on a cupcake border.
The flat edge of the tip lays down a smooth strip; flip it and the serrated edge leaves a ridged one. For a true basket pattern, you pipe vertical strips first, spacing them one tip-width apart.
Then you lay horizontal strips across them, starting at the top and working down. The next row of vertical strips covers the ends of those horizontals, and you alternate until the surface is woven.
A rotating cake stand is nearly required here because you are piping straight lines across a curved surface, and reaching around a fixed cake with a full bag will smudge what you just laid down.
Medium to stiff buttercream is the only consistency that holds these ridges. Anything softer and the serrations blur together before you finish the first pass.
15. Specialty Tips
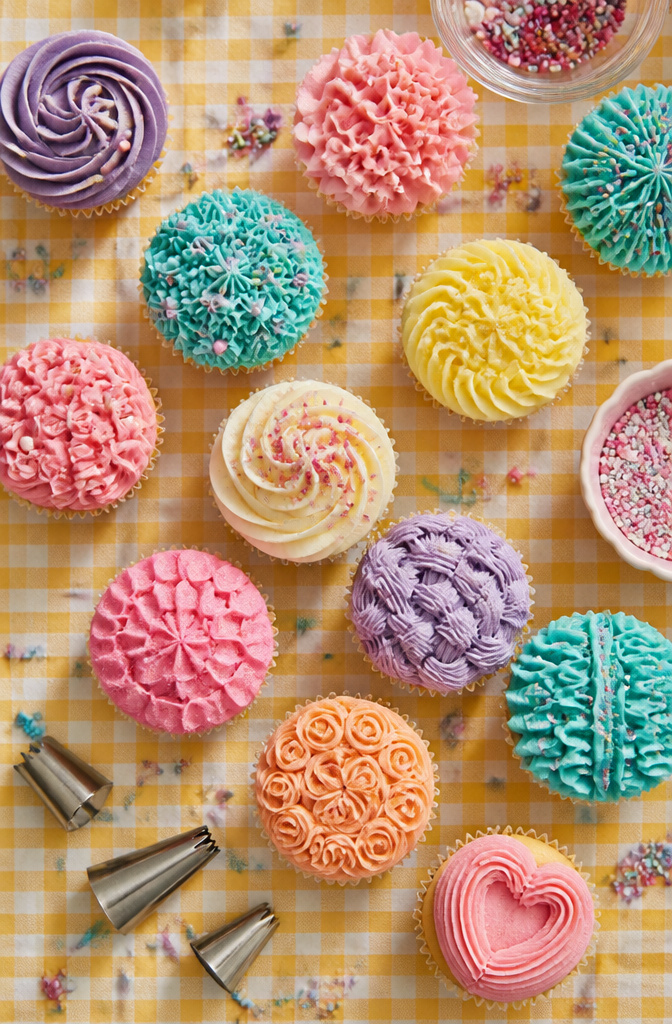
Specialty tips are the catch-all bin of any piping collection. You will find ball tips for buttercream beads, heart-shaped openings, ruffle tips with one curved edge, and seasonal forms that show up once a year.
Most of these get used exactly once and then migrate to the back of the drawer.
The ruffle tips are the exception. Numbers like #030, #040, #050, #070, #86, #88, and #100 put down smooth or ridged ribbons that work for borders, swags, bows, and scalloped edges.
The curved edge does the ruffling for you; you just move the bag in a straight line or a gentle curve. These earn their spot because one tip covers several looks depending on speed and angle.
Russian flower tips sit in a category of their own. Each tip pipes multiple shapes and multiple colors from a single squeeze, with curved lines forming wrapped petals and center dots becoming stamens.
The catch: you layer colors carefully inside one bag, and you still need a separate leaf tip. The heart-shaped openings and spiral-motion heart dominoes make pretty borders, but they are narrow-use tools.
Before you buy any specialty tip, look at how many designs it truly creates. A tip that pipes one shape in one season is a gimmick.
A tip that handles borders, ruffles, and ribbons year-round is not.
How to Hold the Bag and Apply Pressure
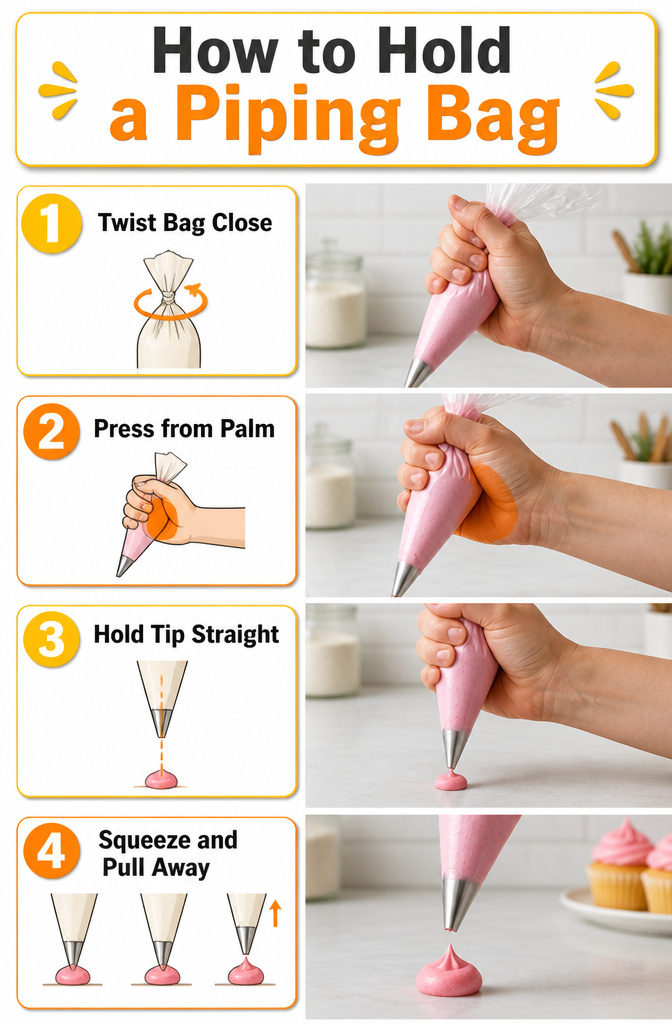
- Twist the top of the bag closed and grip it in your dominant hand with your fingers at the twist, not down on the middle of the bag. Squeezing from the middle forces frosting toward the back seam, and that is how the bag splits open on you.
- Press from the heel of your palm, not your fingers. The palm gives steady, even pressure; fingers give spurts that leave blobs and tails you did not plan.
- Hold the tip straight, slightly lifted off the surface. Too high and the frosting falls in a heap; too low and you drag the shape out of shape.
- Squeeze, hold for a moment so the frosting sets where it lands, then stop pressure and pull away cleanly. Lift straight up or the tail drags across the dot, the leaf, or the border you just piped. The next dot covers that tiny tail if you are piping a beaded border; on a single drop flower, there is no next dot to hide it, so the clean break matters more.
Buttercream That Pipes and Holds
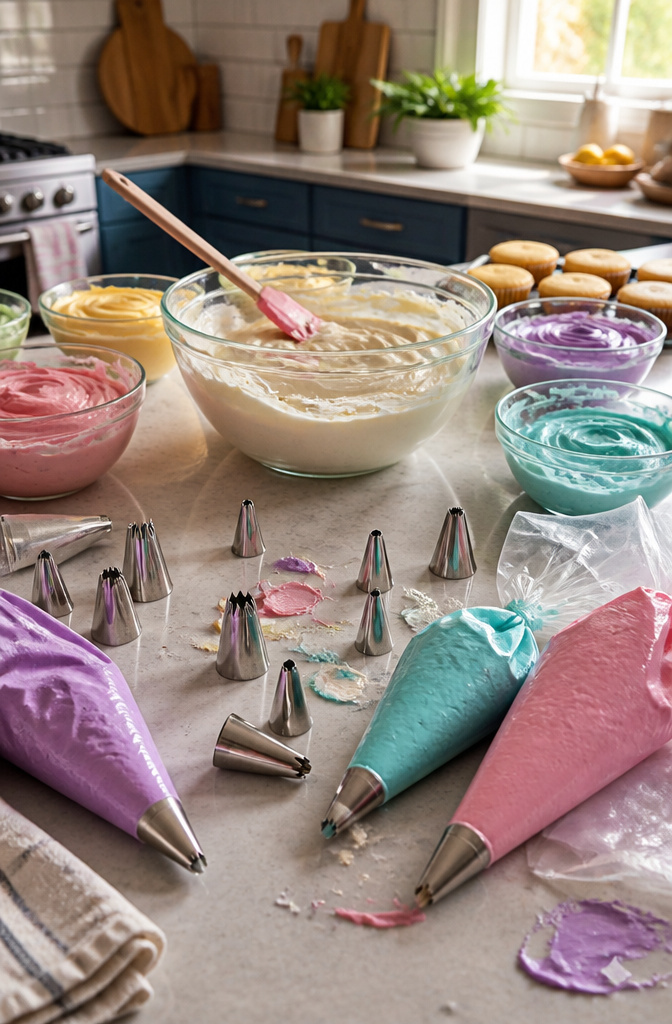
Cold butter is the foundation of a buttercream that pipes clean edges and holds its shape through an afternoon on the counter.
Most American buttercream recipes run high on butter and confectioners’ sugar for stiffness, but adding a spoonful of shortening to the mix keeps the frosting from wilting in summer heat without changing the flavor you expect.
Cornstarch stirred in at the end stiffens the batch further when you need peaks that stand up on their own, like the dramatic texture from a 4B or 6B star tip.
The real test is simple: beat the frosting, then hold the bowl upside down over your counter. If it stays put, it will hold in the bag.
Too soft, and your rosettes slide; too stiff, and you fight the bag for every squeeze.
Swiss meringue buttercream and chocolate buttercream pipe through the same tips with the same pressure, but they start from different textures, so judge each batch by the bowl test rather than the clock.
Cleaning and Storing Metal Tips
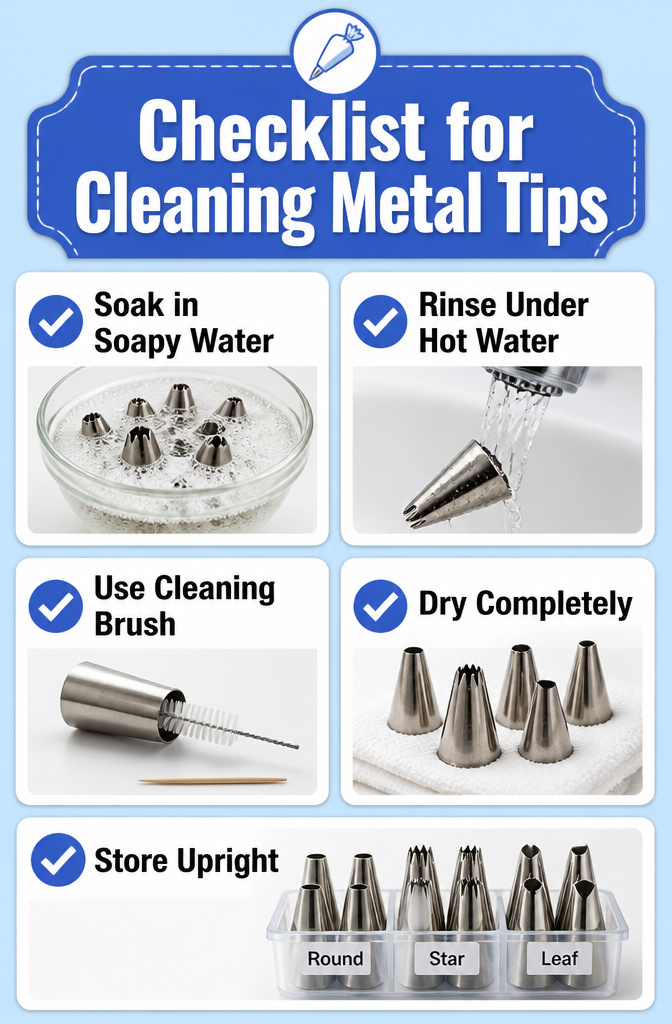
Metal piping tips last years if you treat them right, but a single lazy cleanup ruins the set.
- Soak the tips in hot, soapy water right after use. Hot water cuts the grease from buttercream so it lifts off instead of hardening in the crevices. Let them sit until the residue softens.
- Run them under hot water to rinse away what loosened. For the tiny openings, use a tip cleaning brush or a toothpick to push out the last bits of frosting that a rinse misses. Neglect this step and dried sugar crusts inside, clogging the shape and eventually corroding the metal.
- Dry every tip completely with a cloth, then let them air dry. Storing even slightly damp tips traps moisture and breeds rust.
- Store upright in a tip organizer or a labeled container. Upright storage keeps the metal from warping, and grouping by type saves you from digging through a drawer of jumbled metal that dents itself every time you reach for a star tip.
A Short History of Piping
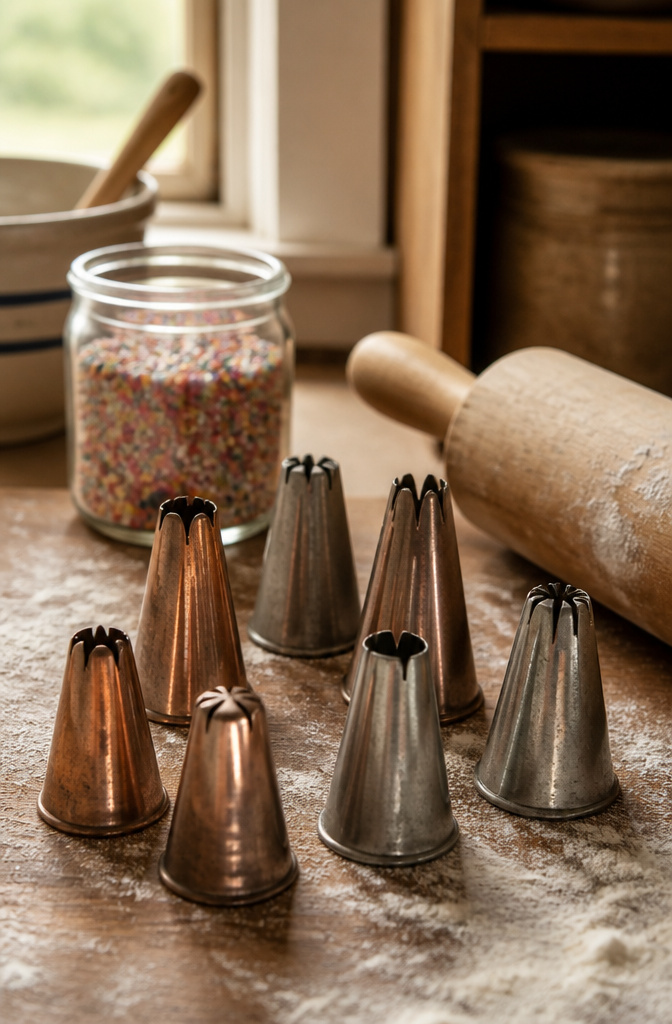
Piping as you know it started in 19th-century France, where the first tips were handmade from copper or tin. That made them rare and expensive, so decorating stayed limited to professionals with the budget for custom metalwork.
Manufacturing caught up by the late 1800s and early 1900s, and the tools finally became affordable enough for ordinary kitchens.
The material shift matters more than it sounds. Early tips were built from bone and wood before metal took over, and the jump to seamless metal tubes changed what was possible.
Seamless construction meant smoother frosting flow and finer detail, which is the difference between a ruffled edge that holds and one that splits.
In American home kitchens, two names took over. Wilton and Ateco became the standard brands, the ones you will see in every craft store aisle and in most starter sets.
They are not the only makers now, but they are the baseline other brands get compared against, and most tip numbering systems trace back to one of the two.
Frequently Asked Questions
What are the different types of piping tips?
Piping tips fall into families based on their opening shapes: round, open star, closed star, leaf, petal, grass, drop flower, basketweave, and specialty tips like Russian flower cutters.
Each family creates a distinct texture, from the ridged swirls of an open star to the woven ridges of a basketweave tip. Sizes within each family run from small detail work to jumbo borders.
How do you clean piping tips?
Soak metal tips in hot, soapy water right after use to cut the grease from buttercream. Run them under hot water, then use a tip cleaning brush or toothpick to push out frosting from tiny openings.
Dry every tip completely with a cloth, let them air dry, and store upright in an organizer or labeled container to prevent warping and rust.
What frosting is best for piping?
Cold butter-based American buttercream pipes clean edges and holds its shape, with a spoonful of shortening added to prevent wilting in heat. The bowl test tells you if it is ready: hold it upside down over the counter.
If the frosting stays put, it will hold in the bag and keep its shape on the cake.
How do you use a coupler with piping tips?
Push the coupler base through the cut end of the piping bag until it sits snug against the opening, trim any excess plastic so it fits flush, add your chosen tip, and tighten the ring over it.
Unscrew the ring to swap tips without scraping frosting into a new bag each time.
What are the most important piping tips to have?
A basic kit should include a small round tip like Wilton 12 for writing and details, an open star like the Wilton 1M for tall swirls, a closed star like the 2D for softer rosettes, a leaf tip like the 352 for greenery, and a large round like the 1A or 2A for borders and filling.
A coupler saves time if you own three or more tips.
What is the easiest piping tip to use?
The Wilton 1M open star is the most forgiving starter tip.
Its six-point opening presses ridges into buttercream automatically, so a single squeeze from the center of a cupcake produces a tall swirl that looks like soft-serve ice cream with no complex wrist motion.