
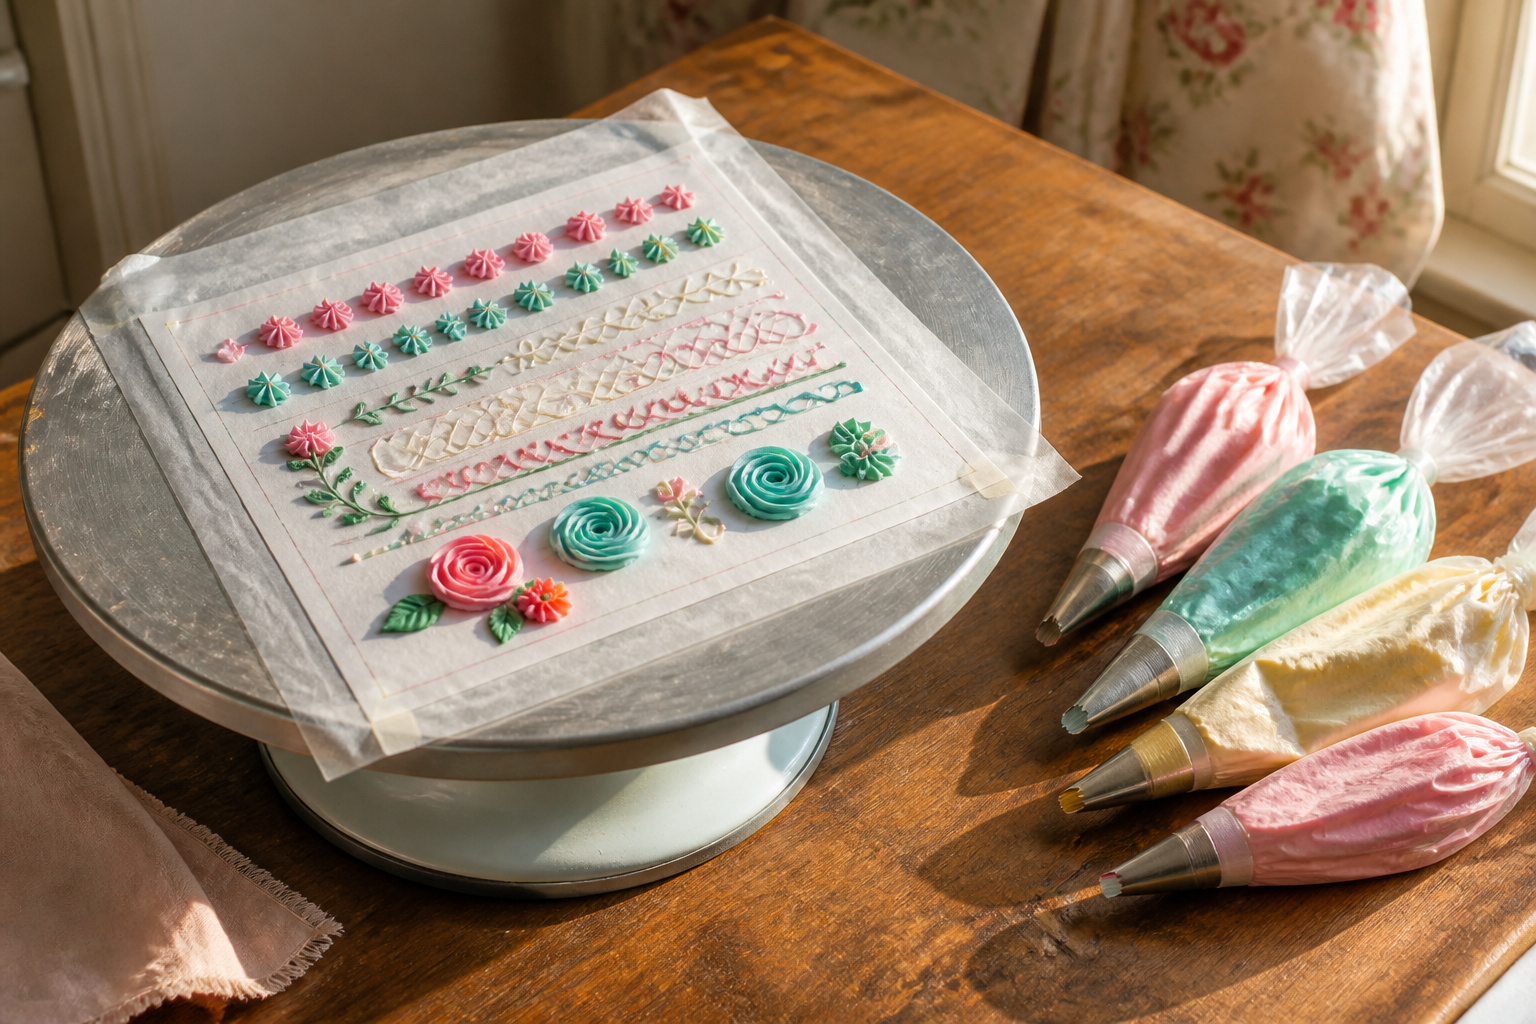
The single most useful thing you can do for your buttercream piping is print a practice sheet, tape it flat, and pipe over wax paper until your hand knows the pressure.
That only works if you start with the right tip size: a #3 round for lettering, a #10 for bold outlines, anything smaller and the frosting snags or breaks.
Most home bakers skip the wall angle, but taping that same sheet vertically trains you for cake sides where gravity fights every squeeze.
Basic Piping Techniques
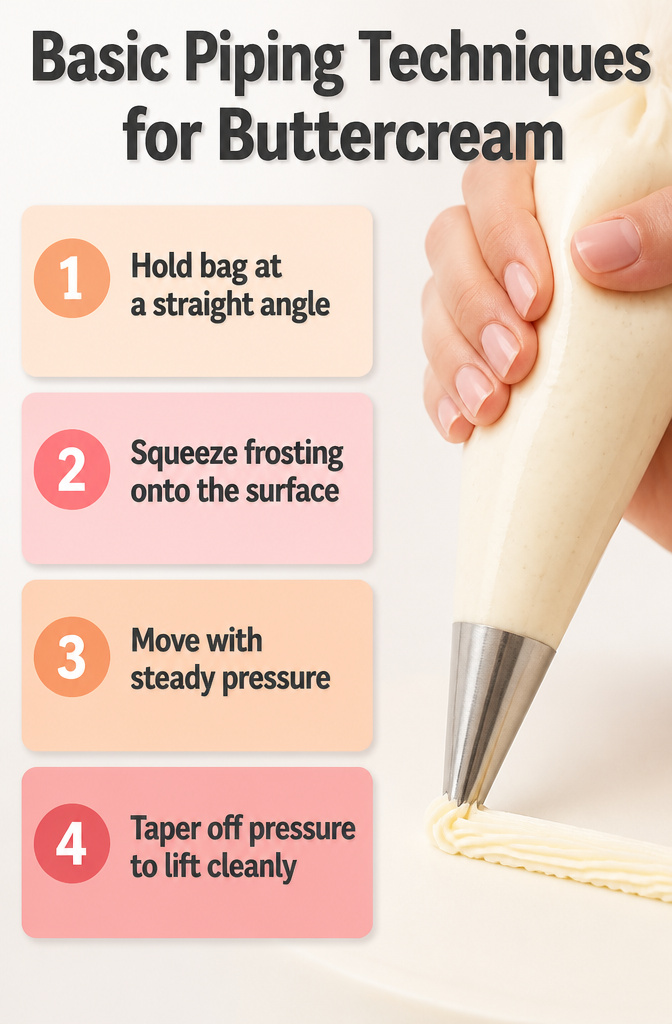
Hold the piping bag at a straight angle, slightly lifted off the surface, and squeeze until the frosting touches down. Keep pressure steady as you move, then taper off before lifting cleanly away.
That single motion, repeated, builds every line you will pipe on a cake.
Round tip #3 is the go-to for writing on cakes, because the opening is narrow enough for legible letters but wide enough that the frosting does not snag or break.
For beading, use the same squeeze-and-release rhythm you would with a star tip for shells: press, let the bead round out, stop pressure, and lift. The bead should sit proud of the surface, not flatten.
Straight lines are the hardest skill to hold steady, and you need them for both writing and swag borders. Move slower than you think; rushing makes the line wobble or snap.
Dots and short strokes are easier places to start if your hand needs the practice before you tackle a full name across a cake top.
Piping Tips
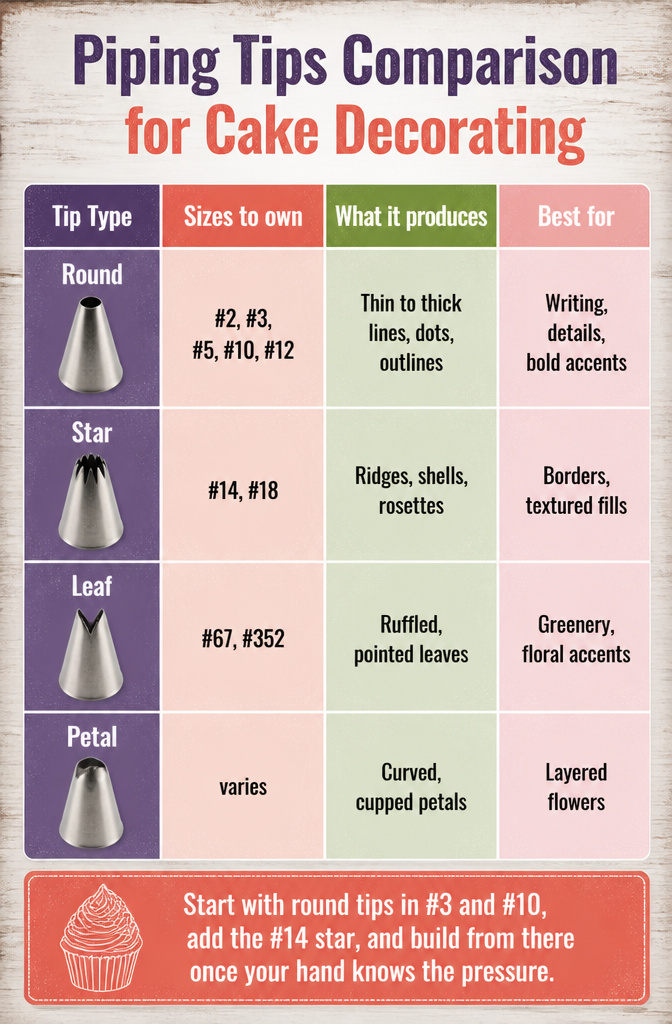
Round tips are the workhorses of cake piping drawing, and the sizes matter more than you’d expect. A #2 or #3 gives you hair-thin lines for lettering and fine details.
Step up to #5 for standard writing, and #10 or #12 for bold dots and thick outlines that hold their shape.
Star tips build the borders and rosettes that frame your work. The #14 handles small shells, ropes, and tight stars.
The #18 covers larger borders and full rosettes with the same motion, just more frosting.
Leaf and petal tips round out the set for anything floral. A leaf tip, size 352 or 67, crimps out ruffled leaves with a single squeeze.
Petal tips cup and curve for layered flowers.
| Tip type | Sizes to own | What it produces | Best for |
|---|---|---|---|
| Round | #2, #3, #5, #10, #12 | Thin to thick lines, dots, outlines | Writing, details, bold accents |
| Star | #14, #18 | Ridges, shells, rosettes | Borders, textured fills |
| Leaf | #67, #352 | Ruffled, pointed leaves | Greenery, floral accents |
| Petal | varies | Curved, cupped petals | Layered flowers |
Start with round tips in #3 and #10, add the #14 star, and build from there once your hand knows the pressure.
Piping Patterns
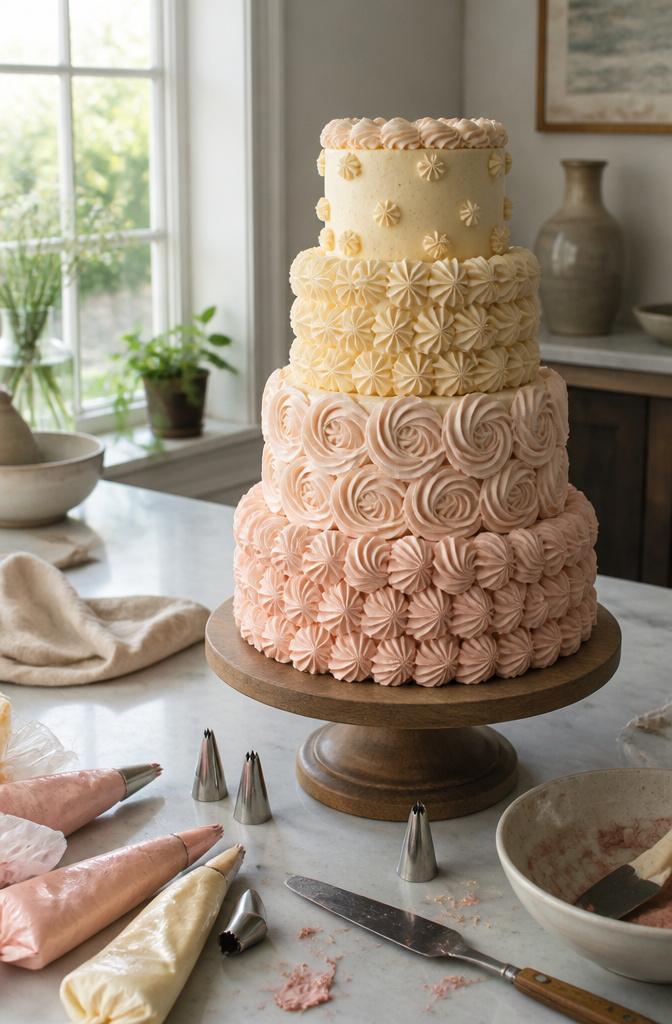
Shell borders are where most home bakers start, and they are forgiving enough that your first row still looks like a border, not a mistake.
Squeeze the bag, let the buttercream build into a bulb, then release pressure and pull the tip away in a short arc. The next shell tucks into the gap left by the last one.
A #14 star tip makes small shells that work on 6-inch cakes; step up to a #18 for anything larger, or the border shrinks against the cake and looks skimpy.
Rosettes and swirls read as flowers from across the room, and they hide a lot of surface trouble. Start at the center, swirl outward in one motion, and lift straight up.
The #14 tip gives you tight rosettes that cluster well on a cupcake top; the #18 opens into a fuller shape that holds its own on a cake side.
For words and messages, a #3 round tip is the practical choice. It is small enough that letters stay separate, but large enough that the icing flows without breaking mid-sentence.
Curved lines and flourishes, like swags or a fleur-de-lis, need rhythm more than precision. The motion is a steady sweep, not a series of dots you try to connect.
Practice the curve on parchment first until your hand finds the pace, then move to the cake.
Practice Sheets
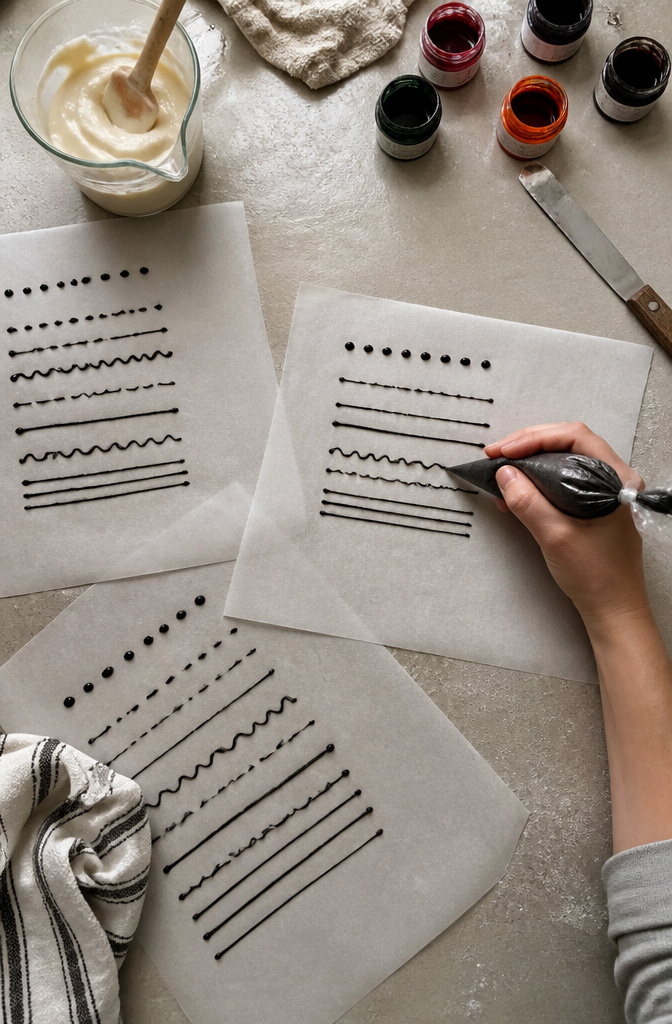
Printable practice sheets let you rehearse the motions before buttercream meets cake. Lay a template on the counter, cover it with parchment or wax paper, and tape both layers flat.
Trace the printed lines with your piping bag until the muscle memory sticks.
Start with top borders and straight lines. Those unbroken strokes are harder than they look; they show up in cake writing, swags, and every clean edge you will want later.
Move on to basketweave only after you can keep pressure steady enough that the line does not break or blob.
The basketweave sheet numbers each stroke and marks direction for the first few lines; repeat that rhythm until the pattern runs itself.
Tape the paper to a wall once the table feels easy. Piping vertically trains your hands for the sides of a real cake, where gravity works against every squeeze.
Frosting Consistency
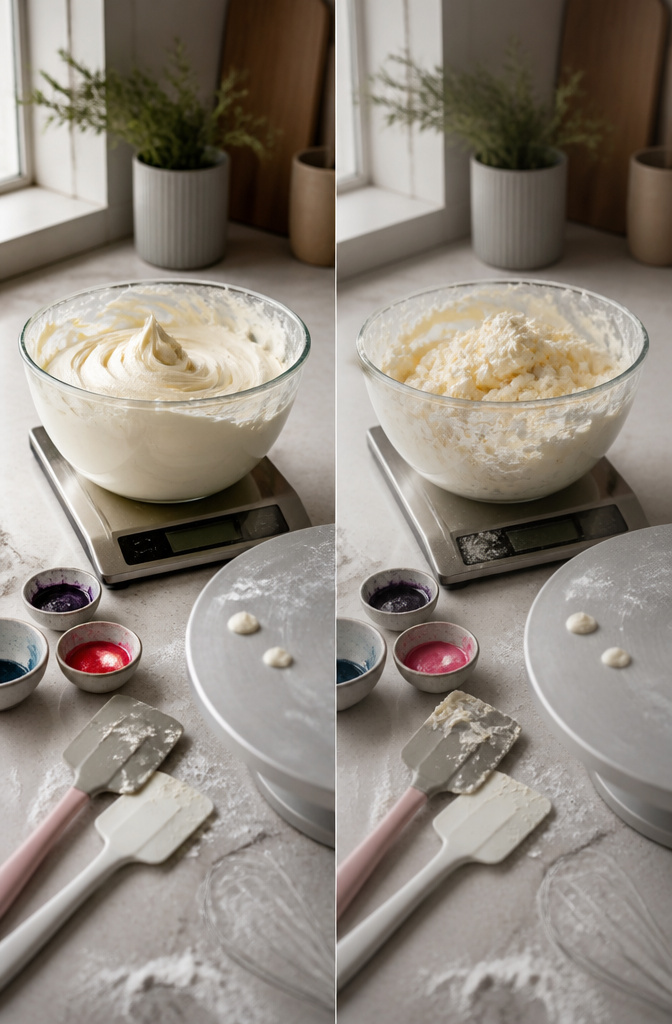
Softer frosting flows through small round tips without breaking, which is exactly what you need for fine lines and detail work.
A tip #1 or #2 demands that thinner consistency; push something too stiff through it and the line snags or the tip clogs. For larger shapes, shells, and swirls, thicker buttercream holds its structure and keeps the definition you piped.
Gel food coloring keeps this balance intact. Liquid dyes thin the buttercream as they darken it, which turns a frosting that piped clean into something that spreads or slumps.
Gel gives you the saturated color without adding that extra moisture, so the consistency you mixed is the consistency that comes out of the bag.
Piping Bag Types
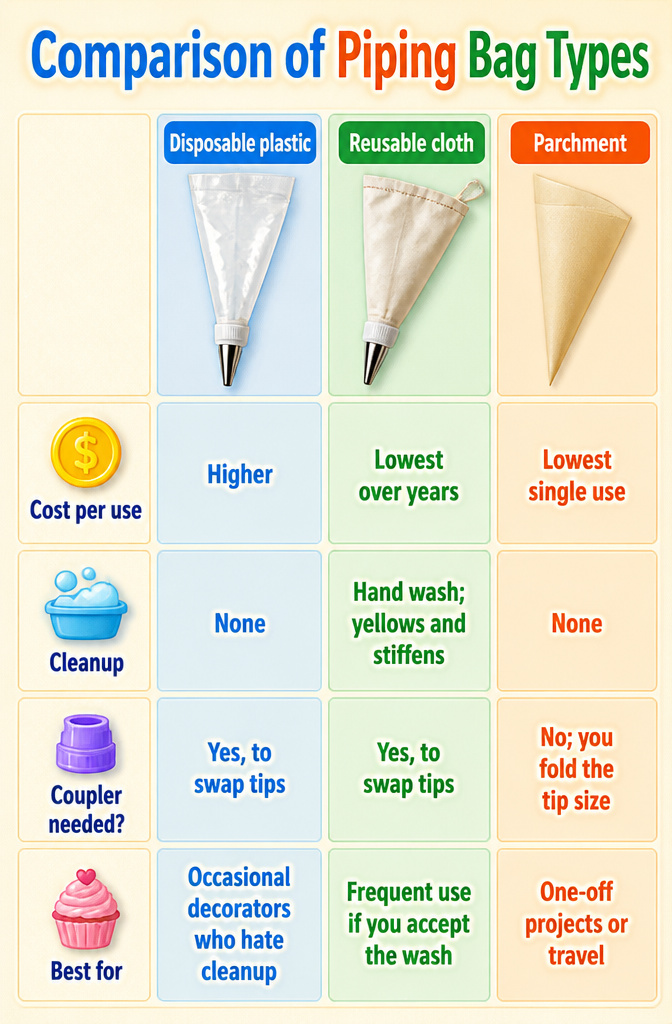
You have three real options for cake piping drawing at home, and the right choice depends on how often you decorate and how much cleanup you will tolerate.
Cloth bags feel the most comfortable in your hand and you can refill them mid-project without much fuss. These bags have to be washed after every use.
Over time they yellow and develop a sticky, greasy film that does not fully come out. If you bake once a month, that buildup is slow.
If you pipe buttercream weekly, it becomes noticeable within a few months.
Disposable plastic bags skip the wash entirely. You snip the tip, pipe, and toss.
The waste adds up, and the thin plastic can burst under pressure if you squeeze too hard or the buttercream is cold.
Parchment triangles are the third route. You fold them yourself, use them once, and compost the paper.
They cost almost nothing and work in a pinch, but they lack the structure for detailed cake piping drawing where you need steady, sustained pressure.
| Disposable plastic | Reusable cloth | Parchment | |
|---|---|---|---|
| Cost per use | Higher | Lowest over years | Lowest single use |
| Cleanup | None | Hand wash; yellows and stiffens | None |
| Coupler needed? | Yes, to swap tips | Yes, to swap tips | No; you fold the tip size |
| Best for | Occasional decorators who hate cleanup | Frequent use if you accept the wash | One-off projects or travel |
A coupler is a two-piece plastic or metal fitting that sits inside the bag and lets you change tips without emptying or cutting a new opening. You need one with any bag you plan to reuse the same session.
Without it, every tip change means a new bag or a new parchment fold.
For most home cooks doing cake piping drawing a few times a year, disposable plastic plus a single coupler is the practical middle ground. You keep one or two bags in rotation for a single project, then toss them.
The cloth bag only wins if you decorate often enough that the comfort matters more than the sticky cleanup.
Piping Bag Materials
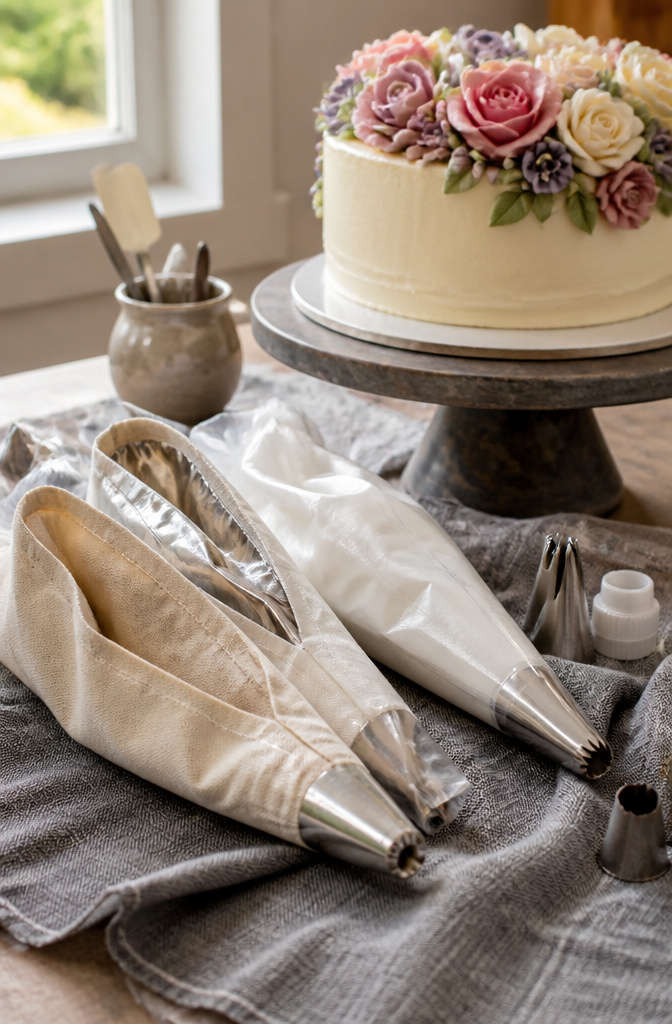
Cloth piping bags carry a shiny coating on the inside that repels butter and fat in frostings, which matters more than you might expect when you are mid-swirl and the bag starts to grease through.
Plastic bags do not have that problem, but they slip against damp palms unless you grip harder than you want to for fine detail work.
Cloth bags seal by rolling or twisting the top down against itself, and the fabric friction usually holds it closed without a knot.
Plastic tends to fight back, and if you over-twist to compensate, the seam splits at the worst moment. For repeated washing, cloth holds up.
The coating eventually wears thin, but a bag survives dozens of cycles before it starts to absorb butter.
Plastic bags are not built for that cycle at all; even the thicker reusable ones crack at the seams after enough hot water. If you pipe often enough to wash bags weekly, cloth pays for itself in a month.
A coupler helps either material, since it lets you switch tips without emptying the bag, but the base has to seat cleanly.
Cloth bags take a coupler more naturally; the fabric grips the threads where plastic can torque loose if you twist too hard changing from a star to a round tip.
Specific Piping Techniques
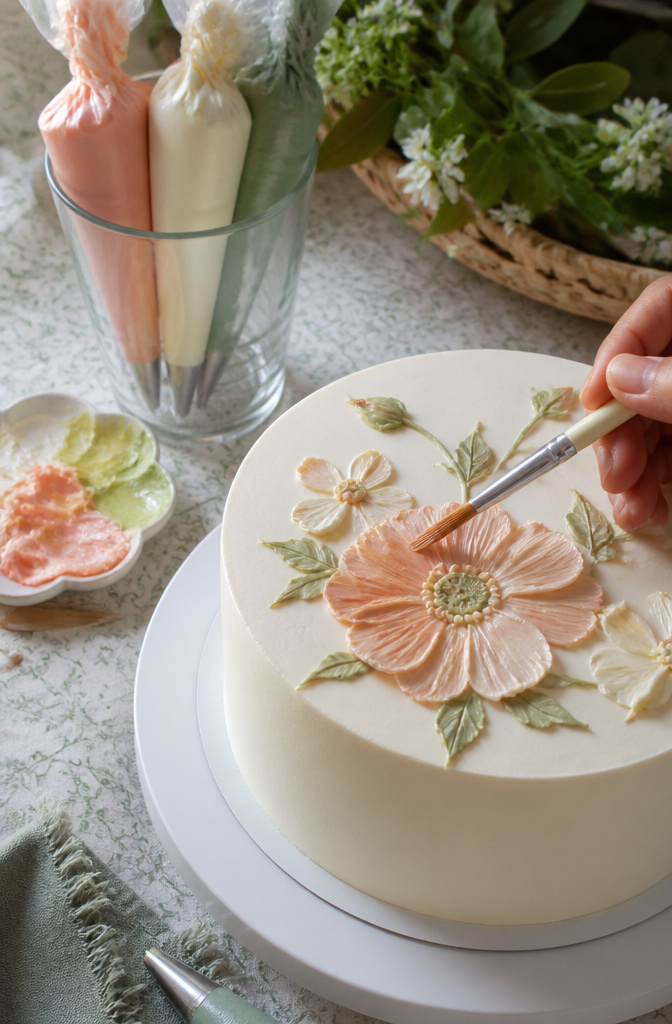
Once your hand is steady with shells and rosettes, brush embroidery is the next technique to try. Pipe a simple five-petal flower with a larger tip than usual, leaving the petals open at the center.
While the buttercream is still soft, take a small, clean paintbrush and drag the icing downward into the cake. The stroke thins the petal edges into something that looks like lace.
Work one flower at a time; buttercream crusts faster than you think, and a firm petal will not brush.
For filler, dot swirl vines do the same job as line work but with less pressure on your spacing. Pipe a dot, lift, and repeat so the dots nearly touch.
The result reads as a vine from a distance and hides gaps where your main pattern runs thin.
These two techniques share one requirement: timing. Brush too late and you drag crumbs; dot too slowly and the line breaks.
Both improve with the same practice you already put into basics, just with a paintbrush in your other hand.
How to Practice
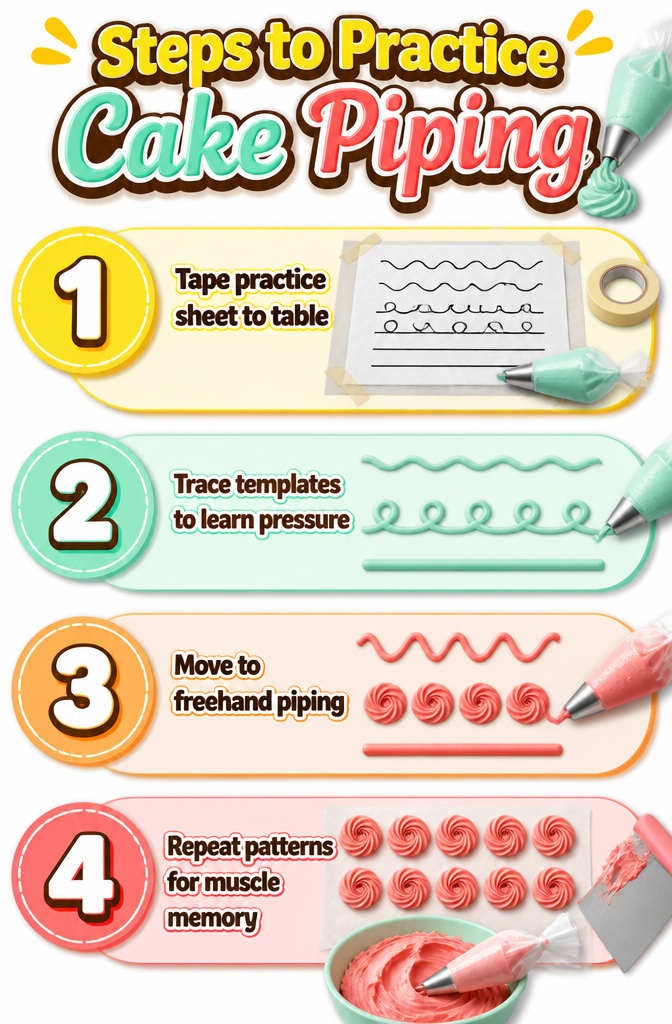
- Tape a printed practice sheet to your table or wall, then lay wax paper over it. Piping over the table is easier to control; the wall angle trains you for the sides of a cake where gravity works against you.
- Trace the templates until the motion feels automatic. You are not decorating yet. You are learning how hard to squeeze so the line stays continuous without building up in blobs.
- Move to freehand piping with the sheet as a visual guide, not a physical template. If the line breaks, you gave too little pressure. If icing piles up, you gave too much. Wax paper means the mistake costs you a minute, not a layer of frosting.
- Repeat the same pattern ten times before you switch designs. Muscle memory builds from repetition, not variety, and parchment or wax paper lets you scrape the icing back into the bowl and pipe again.
Cleaning Piping Tips
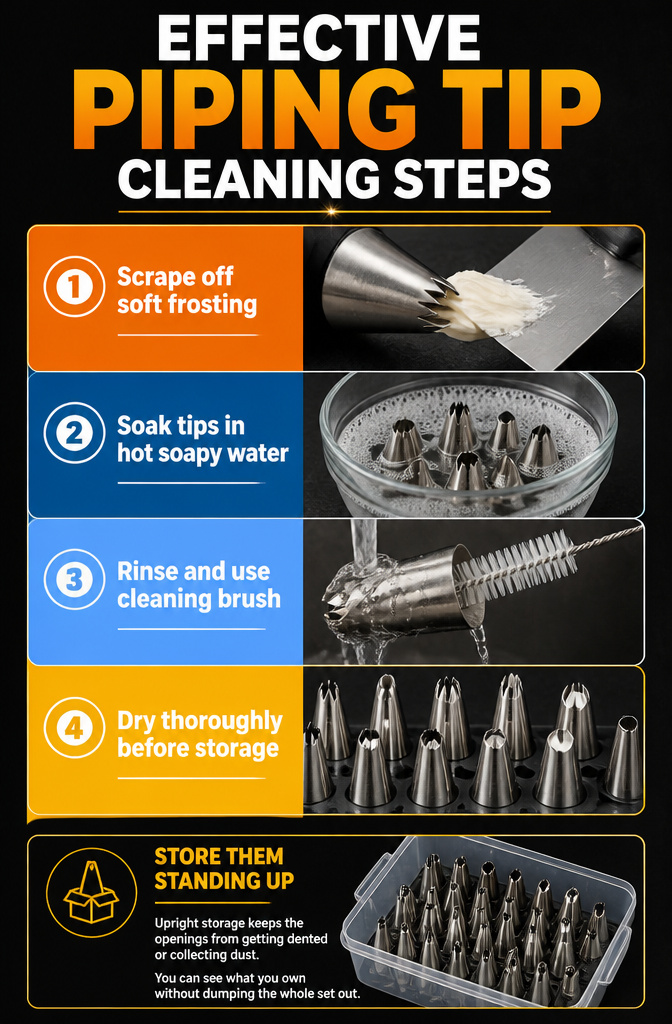
Metal piping tips last longer when you clean them right after the buttercream sets up. Here is the order that works:
- Scrape off as much frosting as you can while it is still soft. The less residue you start with, the faster the rest goes.
- Soak the tips in hot soapy water. Hot water cuts the grease in buttercream faster than warm, so use the hottest your hands can stand.
- Rinse under hot running water, then run a tip cleaning brush through the openings. The small ones especially hold residue that water alone will not push out.
- Dry every surface, inside and out, before you put the tips away. Any trapped moisture on metal will rust, and rust ruins the edge you pipe with. A wall rack or a tip organizer that holds them upright lets air reach both ends while they finish drying.
Store them standing up in a box or organizer. Upright storage keeps the openings from getting dented or collecting dust, and you can see what you own without dumping the whole set out.
Frequently Asked Questions
What are the best piping tips for beginners?
Start with round tips #3 and #10, then add the #14 star tip. Round tips handle everything from fine lettering to bold outlines, while the #14 star covers small shells, ropes, and tight rosettes.
Build your collection from there once your hand learns the pressure.
How do I practice piping techniques?
Tape a printed practice sheet to your table, cover it with parchment or wax paper, and trace the lines until the motion feels automatic. Move to freehand piping with the sheet as a visual guide, not a physical template.
Repeat the same pattern ten times before switching designs; muscle memory builds from repetition, not variety.
What type of frosting is best for piping?
Softer frosting flows through small round tips without breaking, which you need for fine lines and detail work. Thicker buttercream holds its structure for larger shapes like shells, rosettes, and swirls.
Use gel food coloring to tint without thinning; liquid dyes add moisture that makes frosting spread or slump.
How do I clean piping tips?
Scrape off soft frosting first, then soak the tips in hot soapy water. Hot water cuts buttercream grease faster than warm.
Rinse under hot running water and run a tip cleaning brush through the openings, especially the small ones. Dry every surface inside and out before storing upright in a box or organizer to prevent rust.
How to do simple piping on cake?
Hold the piping bag at a straight angle, slightly lifted off the surface, and squeeze until the frosting touches down. Keep pressure steady as you move, then taper off before lifting cleanly away.
Dots and short strokes are the easiest starting points; straight lines are the hardest skill to hold steady.
How to pipe handwriting on cake?
Use a round tip #3 for writing on cakes; the opening is narrow enough for legible letters but wide enough that the frosting does not snag or break. Move slower than you think; rushing makes lines wobble or snap.
Practice the full name on parchment first if your hand needs the work.
What are some common cake piping styles?
Shell borders, rosettes, swirls, straight lines, dots, and brush embroidery are the core styles. Shell borders build from a squeeze-and-release rhythm with a star tip.
Rosettes start at the center and swirl outward in one motion. Brush embroidery drags soft petals with a paintbrush into lace-like edges.
How to pipe trees on a cake?
Brush embroidery and dot swirl vines are the closest techniques described, using a paintbrush to drag soft buttercream or piping dots that nearly touch to read as vines from a distance.