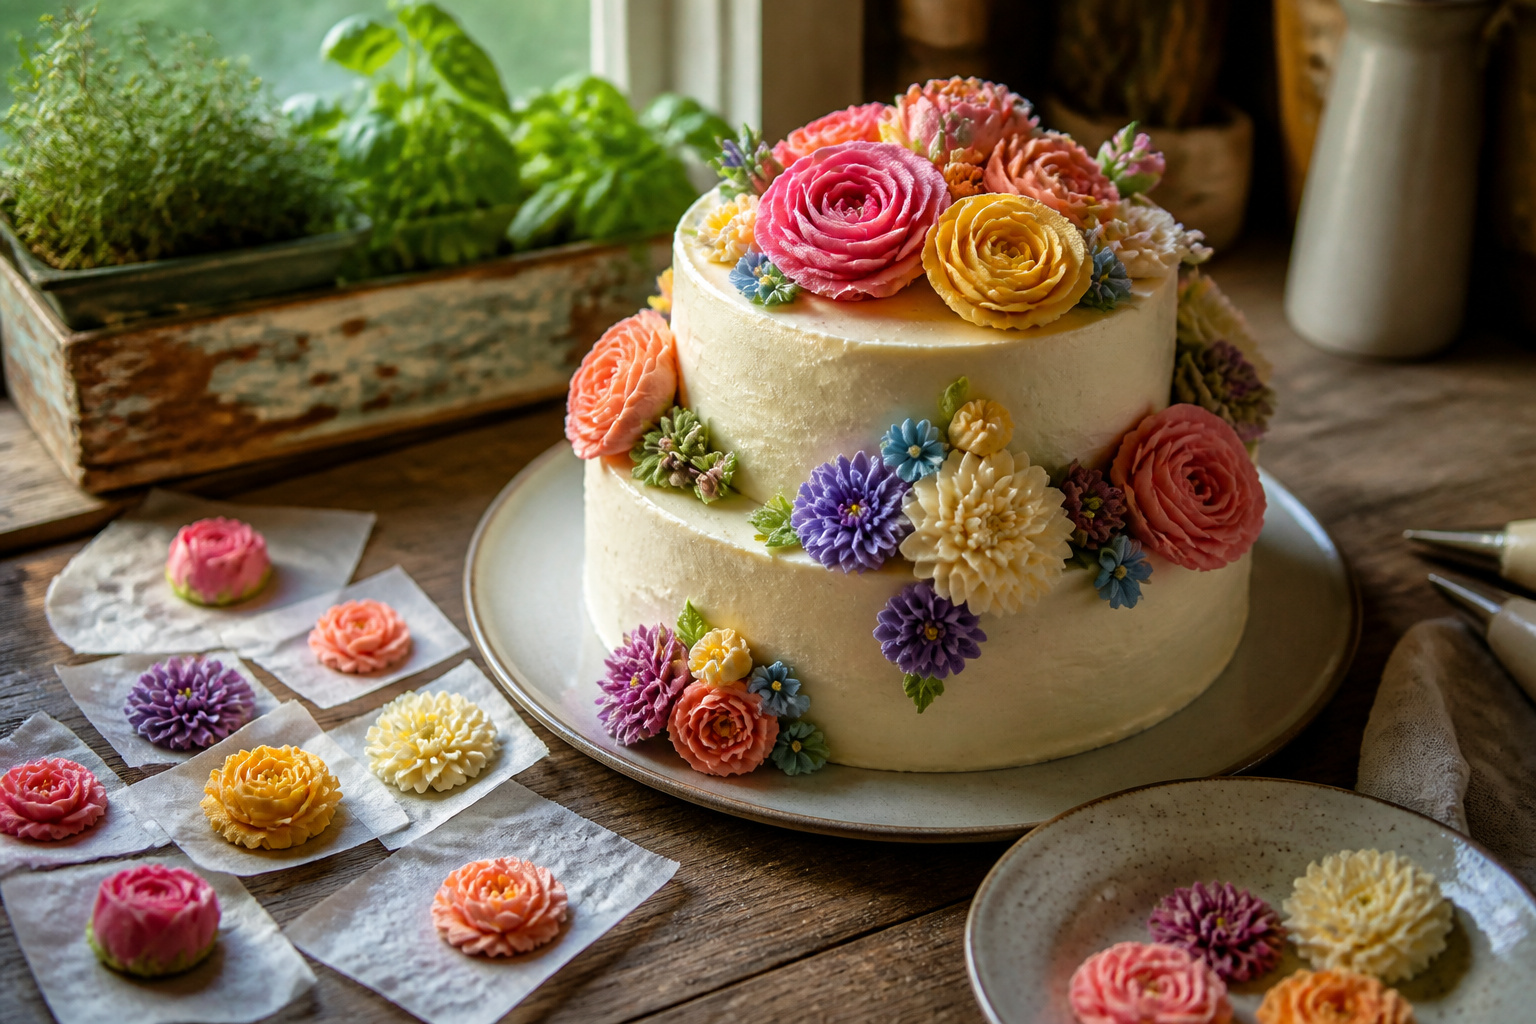
American buttercream flowers give a cake a soft sweetness that crusts into clean edges, and the trick that separates a neat finish from a smudged one is freezing each flower on a parchment square before it ever touches the cake.
That cold step takes 5 to 30 minutes and lets you lift, place, and reposition without wrecking the frosting underneath. It is the only method here that forgives a shaky hand.
What You Need
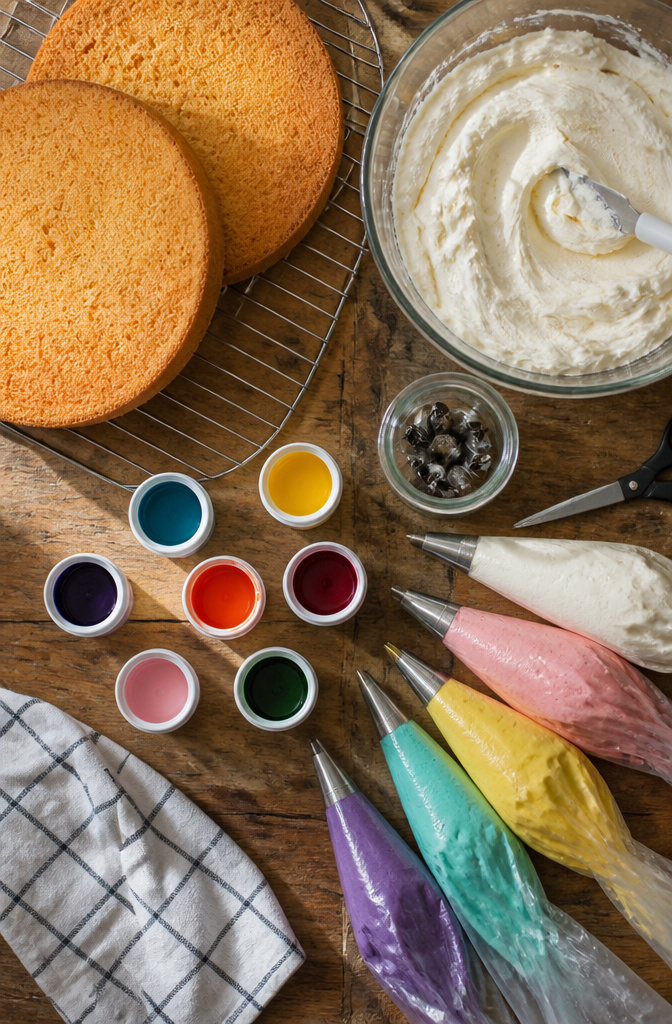
A short supply list is enough for piping buttercream flowers, though the right items make the first try less frustrating. Gather these before you start.
- Cake layers, baked and cooled. Warm cake melts the buttercream on contact.
- American buttercream. It is the stiffest and most heat-stable option for beginners. Swiss and Italian meringue buttercream both pipe well, but they are softer and less forgiving in a warm kitchen.
- Gel food coloring. Liquid coloring thins the frosting and throws off the consistency. A drop or two of gel goes a long way.
- 12-inch disposable piping bags. Four small bags, one for each color, keeps cleanup simple.
- Wilton #104 tip. This is the classic choice for 5-petal flowers. A #103 gives smaller petals, a #125 larger ones.
- Wilton #352 tip. Use this for leaves.
- Wilton #1M tip. Use this for rosettes.
- Flower nail. You pipe onto this, freeze the flowers, then transfer them to the cake.
- Parchment squares, about 3 inches. These sit on the nail while you pipe. You will need roughly thirty for a batch of flowers.
Make and Color the Buttercream
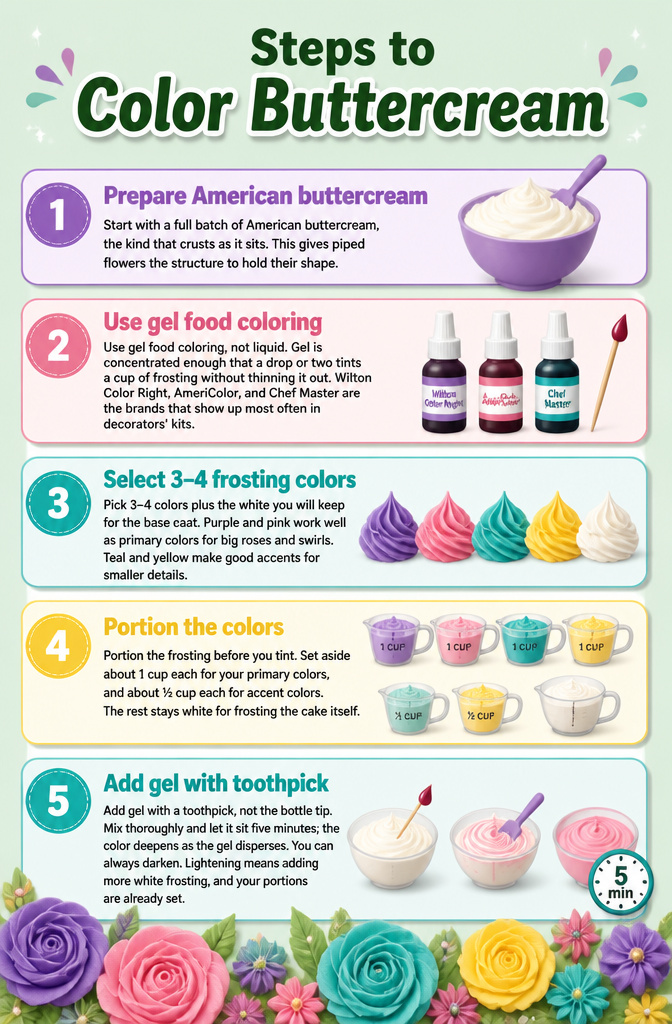
- Start with a full batch of American buttercream, the kind that crusts as it sits. This gives piped flowers the structure to hold their shape.
- Use gel food coloring, not liquid. Gel is concentrated enough that a drop or two tints a cup of frosting without thinning it out. Wilton Color Right, AmeriColor, and Chef Master are the brands that show up most often in decorators’ kits.
- Pick 3–4 colors plus the white you will keep for the base coat. Purple and pink work well as primary colors for big roses and swirls. Teal and yellow make good accents for smaller details.
- Portion the frosting before you tint. Set aside about 1 cup each for your primary colors, and about ½ cup each for accent colors. The rest stays white for frosting the cake itself.
- Add gel with a toothpick, not the bottle tip. Mix thoroughly and let it sit five minutes; the color deepens as the gel disperses. You can always darken. Lightening means adding more white frosting, and your portions are already set.
Pipe the Flowers
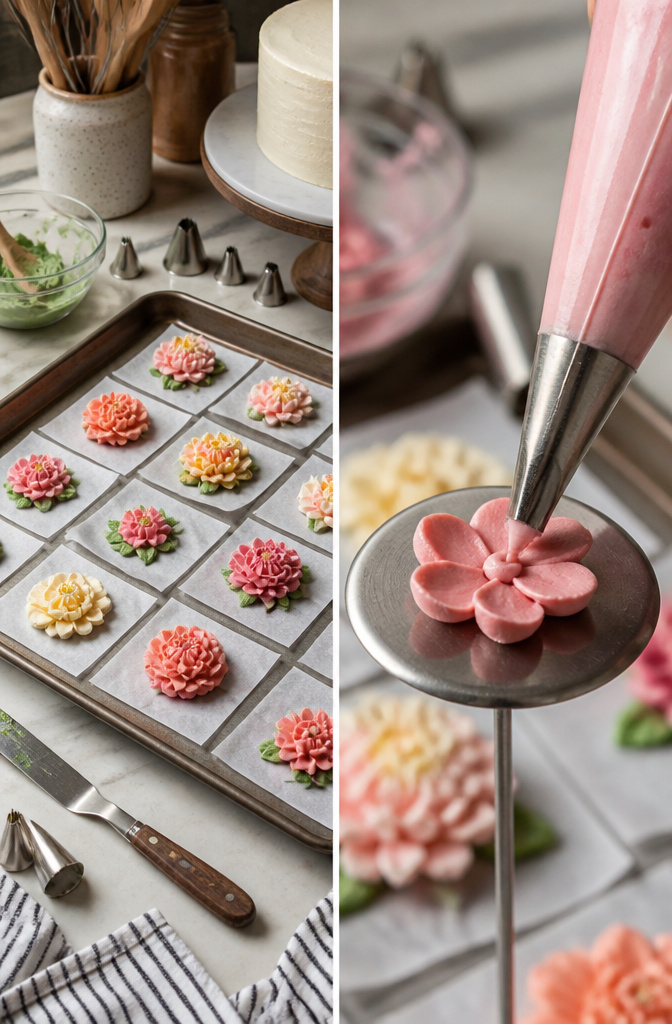
- Cut parchment into small squares and lay them on a cookie sheet. Fit a piping bag with a Wilton #104 tip, load it with buttercream, and set a flower nail in your other hand.
- Hold the piping bag so the wide end of the tip faces down and the narrow end points up. Pipe five petals around a center point, turning the nail a fifth of a rotation between each one. The first ten or fifteen will look rough. Keep them; your hand finds the pressure after that.
- For rosettes, switch to a Wilton #1M tip. Start at the center, swirl outward, and taper off without lifting until the pressure stops.
- Slide the parchment squares with finished flowers into the freezer. Leave them 5 to 30 minutes, depending on how warm your kitchen is. The buttercream should feel firm like clay, not hard like ice.
- Once the flowers hold their shape when you lift a corner of parchment, they are ready to move. Work quickly; they soften again in about two minutes at room temperature.
Attach Flowers to the Cake
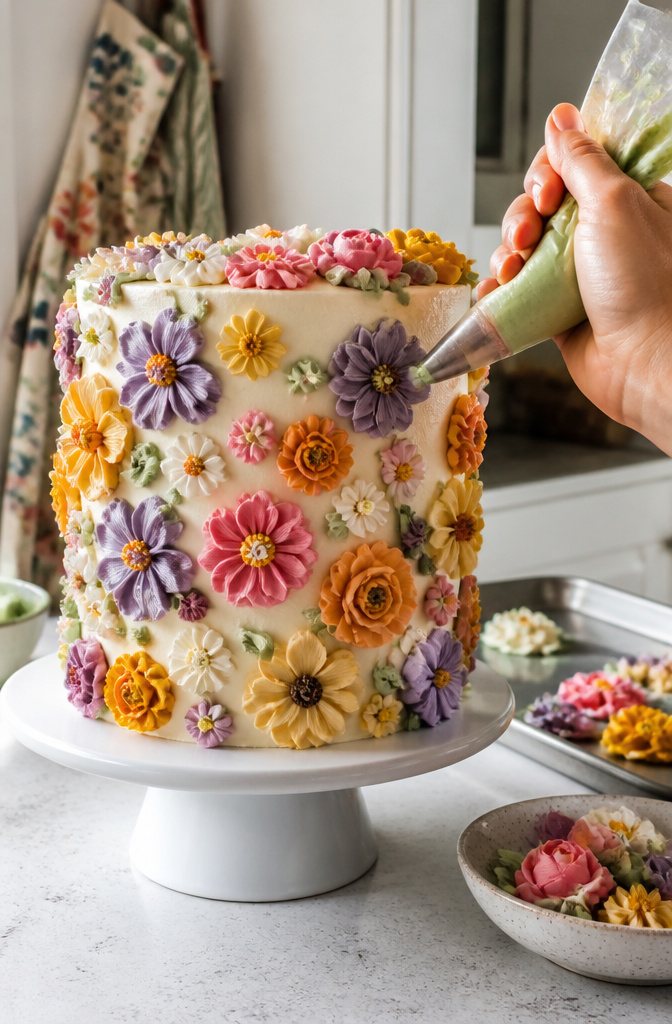
- Pull the tray of flowers from the freezer only when your cake is fully cooled and your design is mapped out. Work fast: frozen buttercream softens within minutes at room temperature.
- Pipe a small dot of fresh buttercream onto the flat back of one frozen flower.
- Press the flower gently onto the cake, top or side, exactly where you want it. The fresh frosting hardens quickly against the cold surface, locking the flower in place without sliding.
- Repeat with each flower, one at a time, until your arrangement is complete. Skip the freezer trips back and forth; the flowers you are not touching stay cold enough on the tray.
Add Leaves and Final Touches
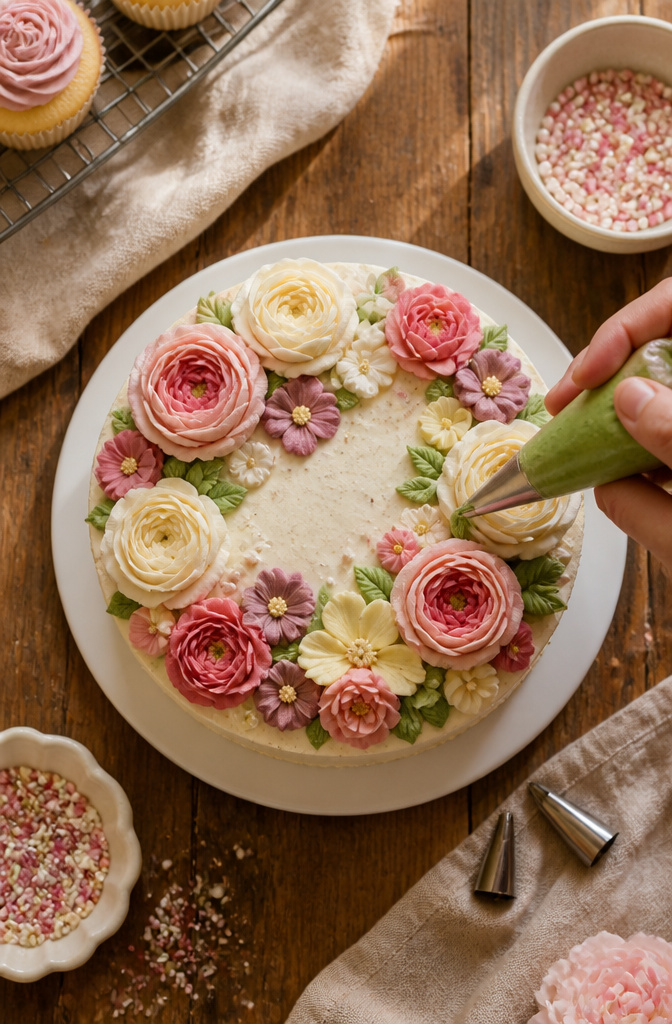
- Switch to a Wilton #352 leaf tip and green buttercream. Hold the tip so the two points of the opening face up and down, not side to side. Squeeze and pull away to make a leaf, tucking each one right against the base of a flower where the petals meet the cake.
- Pipe leaves in uneven clusters, two or three per flower, not a perfect ring. The gaps are what keep it from looking stamped.
- If you want more texture, add sprinkles or sugar pearls while the buttercream is still soft. Press them in with clean fingers or the back of a spoon so they sit flat.
- Step back and look at the whole cake from a few feet away. Any bare spots where the frosting shows through will jump out from that distance, not up close. Fill them with a leaf, a dot, or an extra sprinkle.
Which Buttercream Works Best
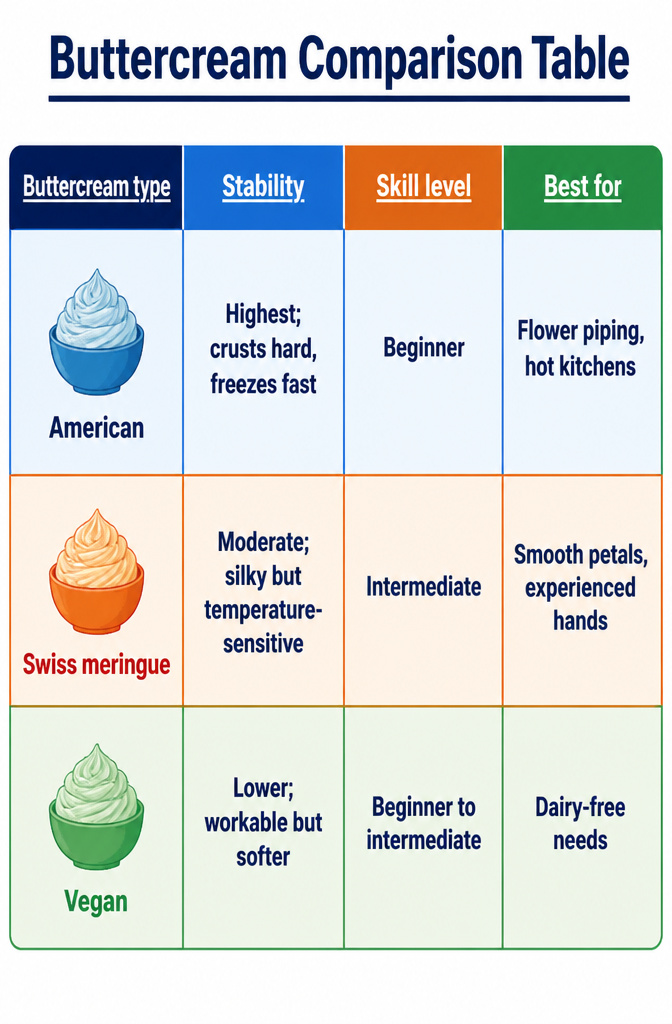
American buttercream is the standard for flower piping because it holds its shape at room temperature and freezes hard within minutes.
That stiffness comes from a high ratio of powdered sugar to butter, which gives you petals that keep their form even when your kitchen runs warm.
Swiss meringue buttercream pipes smoother, silkier petals, but it demands more skill and temperature control. Too cold and it curdles; too warm and it slumps.
Italian meringue behaves similarly. Both work for flowers, yet neither sets firm the way American does.
Vegan buttercream, made with vegan butter like Earth Balance or vegetable shortening, handles dietary restrictions fine. The texture shifts slightly and the flowers hold shape, though the result is less stable than dairy-based versions.
| Buttercream type | Stability | Skill level | Best for |
|---|---|---|---|
| American | Highest; crusts hard, freezes fast | Beginner | Flower piping, hot kitchens |
| Swiss meringue | Moderate; silky but temperature-sensitive | Intermediate | Smooth petals, experienced hands |
| Vegan | Lower; workable but softer | Beginner to intermediate | Dairy-free needs |
For your first flowers, start American. You can always experiment with meringue once your hand is steady.
What Each Piping Tip Makes
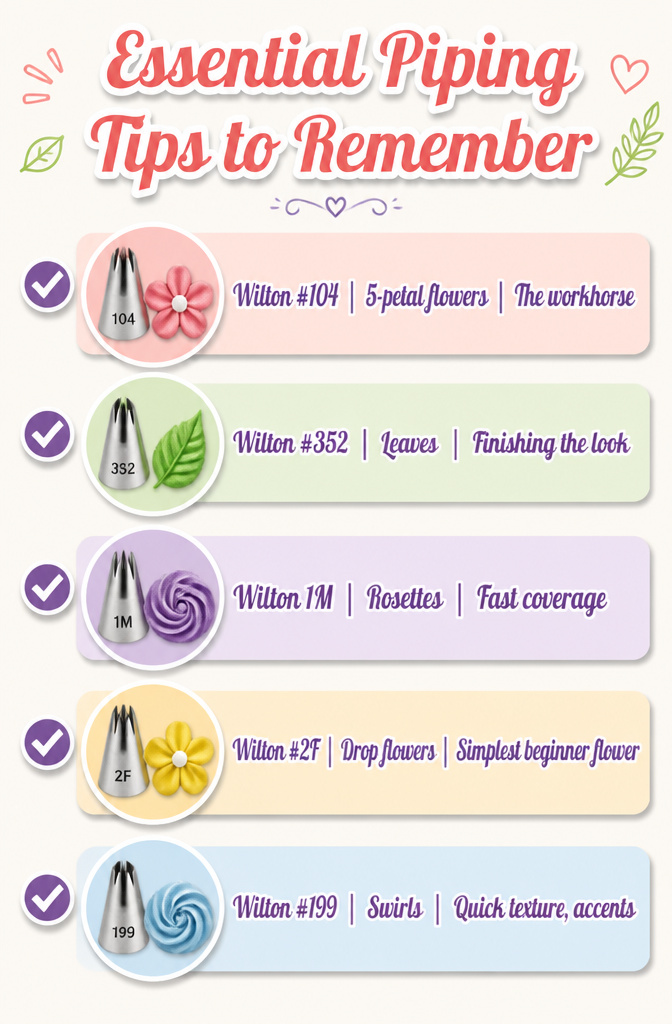
A drawer full of specialty tips is not required for a full cake. Five tips cover every flower and leaf in this method, and two of them do most of the work.
| Tip | What it makes | Best for |
|---|---|---|
| Wilton #104 | 5-petal flowers | The workhorse; most of your flowers |
| Wilton #352 | Leaves | Finishing the look |
| Wilton 1M | Rosettes | Fast coverage, filling large gaps |
| Wilton #2F | Drop flowers | The simplest beginner flower |
| Wilton #199 | Swirls | Quick texture, accents |
The #104 and #352 are the core pair. The #104 builds roses, daisies, and any five-petal shape you pipe onto a flower nail.
The #352 adds the greenery that makes scattered flowers read as a garden instead of polka dots.
The 1M, #2F, and #199 are your shortcuts: rosettes when you need to cover a tier fast, drop flowers when you want a finished look with one squeeze, swirls when you need filler that still counts as a flower.
Frozen Flowers vs. Piping Direct
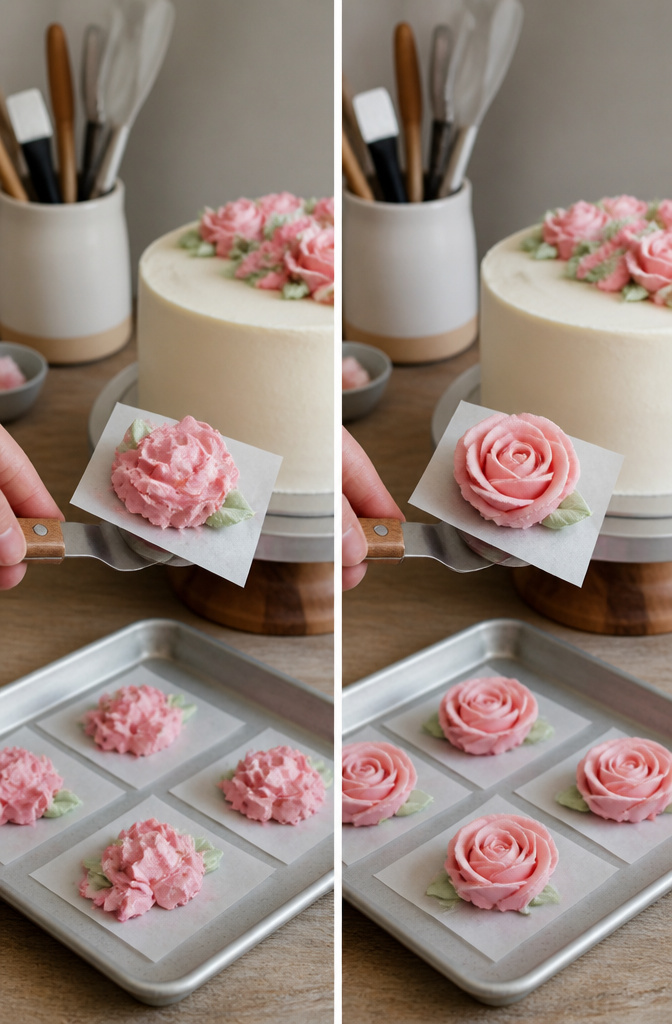
You have two ways to get buttercream flowers onto a cake, and one of them saves you from most of the swearing. Piping directly onto the cake means every petal lands where it first touches.
Smudge a rose against the frosting, and you are either living with the mark or scraping the whole area smooth and starting over.
Small vines and tiny filler details still work best this way, since a single motion with a leaf tip does not give you time to second-guess.
Freezing the flowers first changes the whole job. Pipe each flower onto a parchment square, freeze until solid, then lift them off with a thin spatula.
A flower sits wrong? You have ten seconds to peel it back and try again before the frosting dot underneath hardens against the cold.
Build your whole set a day ahead, or keep them in an airtight container for at least a month.
The only catch is timing: place them the same day you serve, then let the cake sit at room temperature for 15 to 20 minutes so the petals soften to match the bite of the cake underneath.
Coloring Without Ruining the Frosting
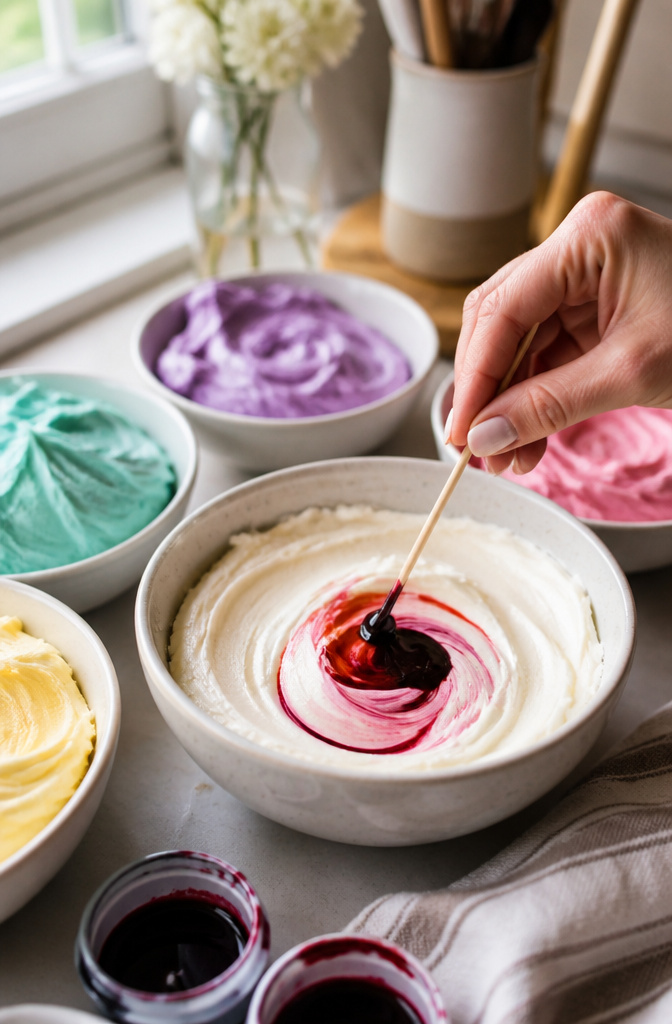
Liquid food coloring will thin your buttercream and soften it enough that petals lose their shape before they even leave the piping tip. Gel food coloring is the only kind worth buying for this work.
It is concentrated, so a drop or two from a toothpick gives you real color without watering down the frosting.
Touch the toothpick to the gel, then swirl it through a cup of buttercream. Mix thoroughly and wait fifteen minutes before you judge the result.
The color deepens as it sits, and what looks pastel at first can turn surprisingly vivid.
Red and black are the exceptions. They need more gel than other colors to reach full depth, and you may notice a slight shift in taste once you use that much.
For most flowers you will not push that far, but if you are making deep burgundy roses, plan on extra gel and accept the trade.
Timing and Storage
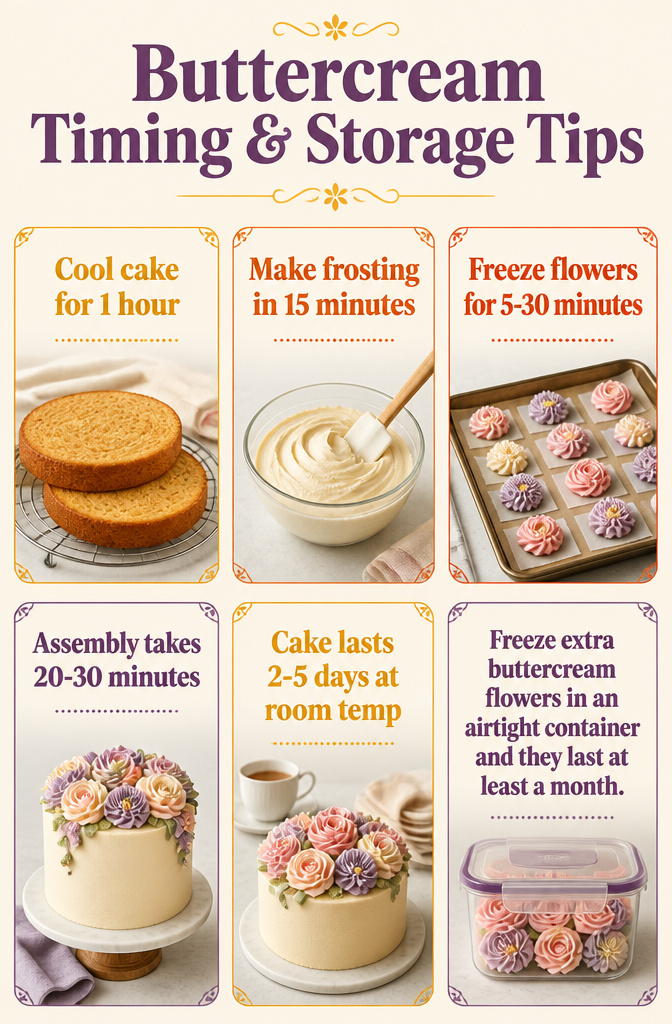
Cool your cake layers for a full hour before you start. Any warmth left in the crumb will melt the buttercream and ruin the finish.
Making the buttercream itself takes about 15 minutes, and piping the flowers depends on how many you need and how much practice you’ve put in. Your first 5 to 10 will look rough; that is normal and not worth saving.
Freeze the piped flowers on their parchment squares for at least 5 minutes, though 30 minutes gives you more handling room. Soft flowers break when you lift them.
If one sticks, let it warm on the counter for 10 seconds before you try again.
Assembly runs 20 to 30 minutes once the flowers are frozen solid. A dot of reserved buttercream anchors each flower to the cake.
A decorated cake keeps at room temperature for 2 to 3 days, or up to 5 days refrigerated. Let it sit out for 15 to 20 minutes before serving so the flowers soften to match the cake texture.
Freeze extra buttercream flowers in an airtight container and they last at least a month.
Frequently Asked Questions
What type of buttercream is best for piping flowers?
American buttercream is the best choice for beginners because it holds its shape at room temperature and freezes hard within minutes.
Its high ratio of powdered sugar to butter gives petals the structure to keep their form even in a warm kitchen. Swiss and Italian meringue buttercreams pipe smoother petals but are softer and less forgiving with temperature changes.
How do you attach buttercream flowers to a cake?
Pipe a small dot of fresh buttercream onto the flat back of a frozen flower, then press it gently onto the cake exactly where you want it.
The fresh frosting hardens quickly against the cold surface, locking the flower in place without sliding. Work fast, because frozen buttercream softens within minutes at room temperature.
How long can you keep buttercream flowers in the freezer?
Frozen buttercream flowers last at least a month when stored in an airtight container. Pipe them onto parchment squares and freeze until firm like clay before transferring to storage.
Place them on the cake the same day you serve it, then let the cake sit at room temperature for 15 to 20 minutes so the petals soften to match the cake’s texture.
How can I decorate a cake with flowers?
The easiest method is to pipe buttercream flowers onto parchment squares using a flower nail, freeze them until firm, then transfer them to your cake. Start with a Wilton #104 tip for 5-petal flowers and a #1M tip for rosettes.
Add leaves with a #352 tip tucked against the flower bases, and fill any bare spots you spot from a few feet back.
What are the best flowers to decorate a cake with?
Buttercream roses, daisies, and rosettes are the easiest flowers for beginners because they require only basic piping tips and freeze well for transfer.
Purple and pink work well as primary colors for big roses and swirls, while teal and yellow make good accent colors for smaller details. Five-petal shapes and rosettes give you full coverage without needing specialty equipment.
How to easily decorate a cake for beginners?
Start with American buttercream and just two core tips: a Wilton #104 for flowers and a #352 for leaves. Pipe onto parchment squares on a flower nail, freeze for 5 to 30 minutes, then attach with a dot of fresh frosting.
Your first 10 to 15 flowers will look rough, but your hand finds the pressure after that, so keep practicing before saving any.