How much decorating you want to do decides which of these cookies is yours.
Some need only a cutter and an oven, like the chocolate chip cut-outs made with mini chips, while others call for royal icing that has to dry hard before you can stack them, or marbled hearts you swirl with a toothpick one at a time.
Whatever you choose, rounded shapes such as hearts and eggs hold together better than shapes with thin tips that snap.
1. Peanut Butter Cut Out Cookies
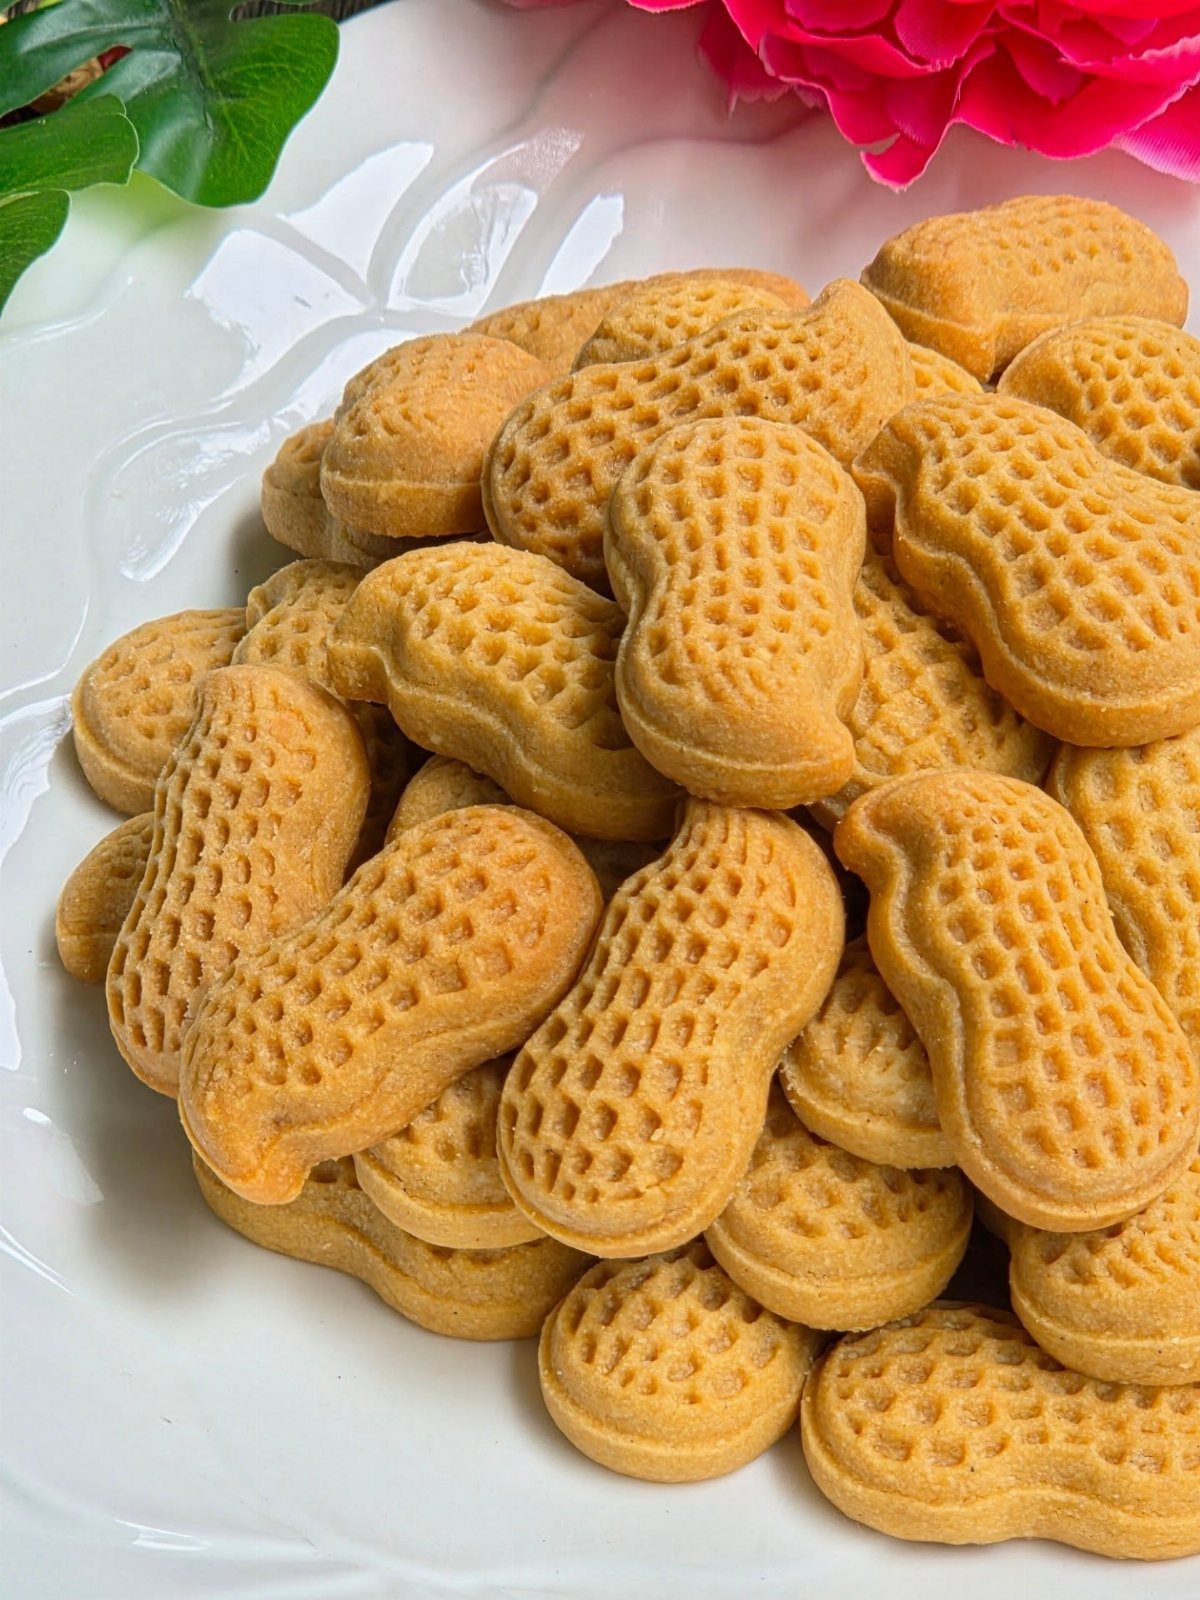
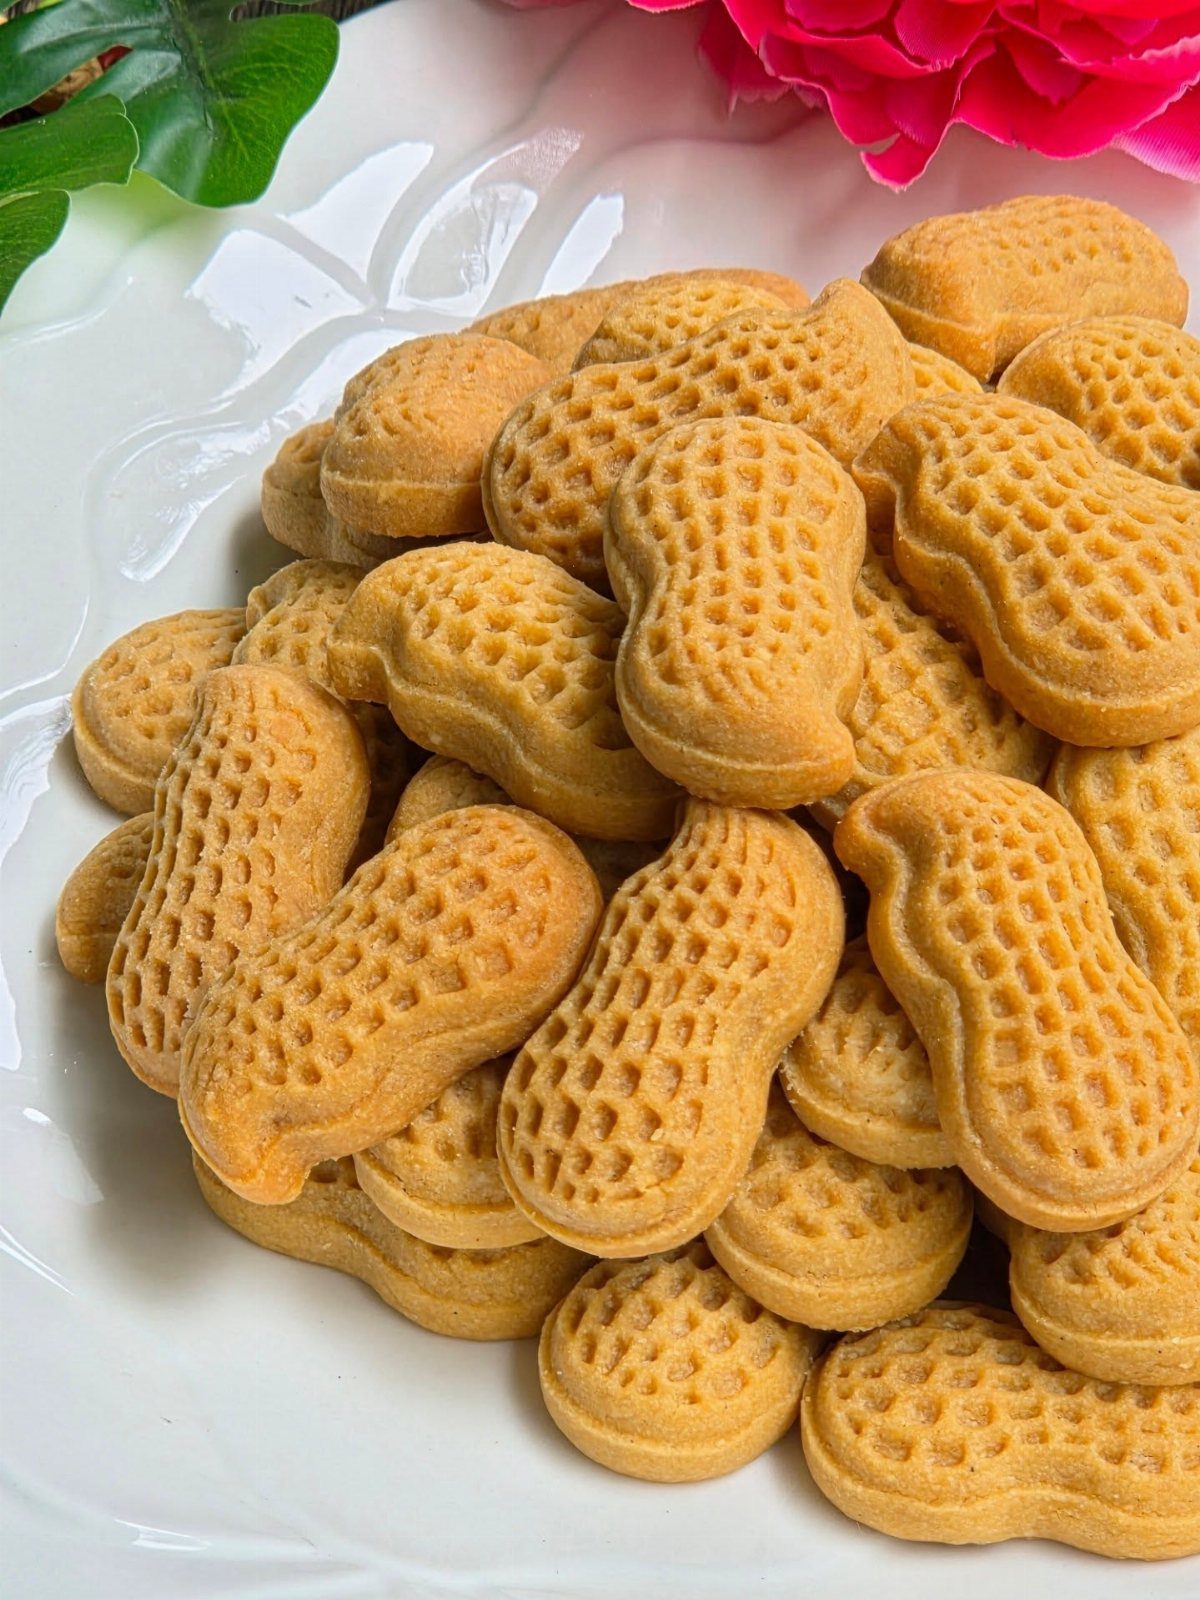
Peanut butter dough gives you a cut-out cookie with a toasty, nutty flavor in place of plain vanilla sugar. If your family splits between sugar-cookie fans and peanut butter fans, this one settles it.
Shaping the cookies like peanuts is a small joke that costs nothing extra: one cutter, no icing needed. They stack well on a plate, so they suit a snack table or a lunchbox.
2. Dog Treat Cookies

Dog treats can be rolled and cut just like holiday cookies, and peanut butter is the flavor most dogs go for. A bone cutter is the classic choice, but any shape works, and the cutter is half the fun.
Roll the dough, cut bone shapes, and bake at 350°F for 15–20 minutes. Use that as your starting point, and let the treats cool fully before handing them over.
Keep them in their own container, away from the people cookies.
3. Chocolate Chip Cut Out Cookies
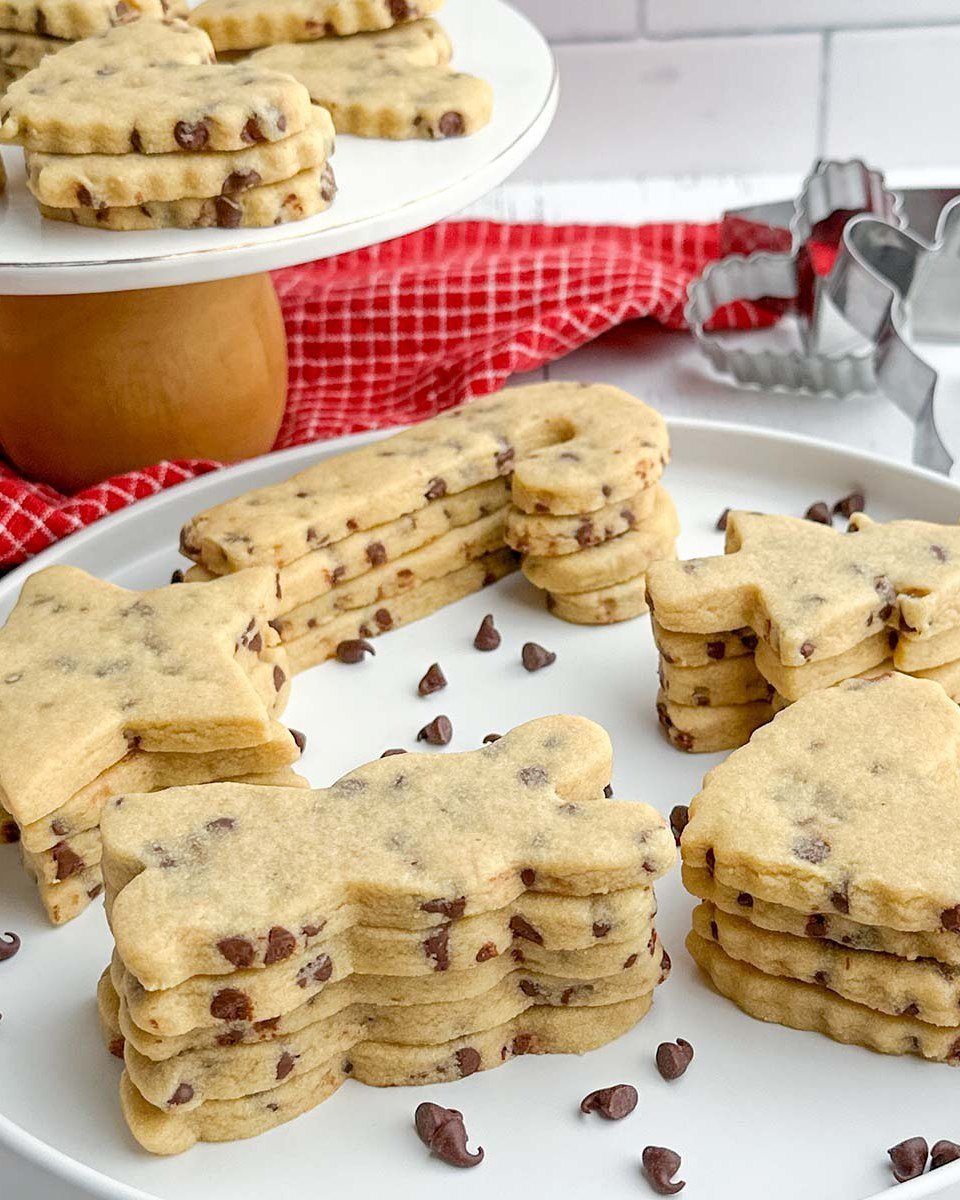
Mini chocolate chips are what make this cut-out version work. Full-size chips get in the way of the cutter and tear the edges, while minis let you stamp out stars and other shapes cleanly.
Press the cutter straight down rather than twisting it, so a stray chip doesn’t drag the dough. Simple shapes with fewer points hold up best.
These need no icing, which makes them handy when you want shaped cookies without a decorating session.
4. Brown Sugar Cinnamon Cut-Out Cookies
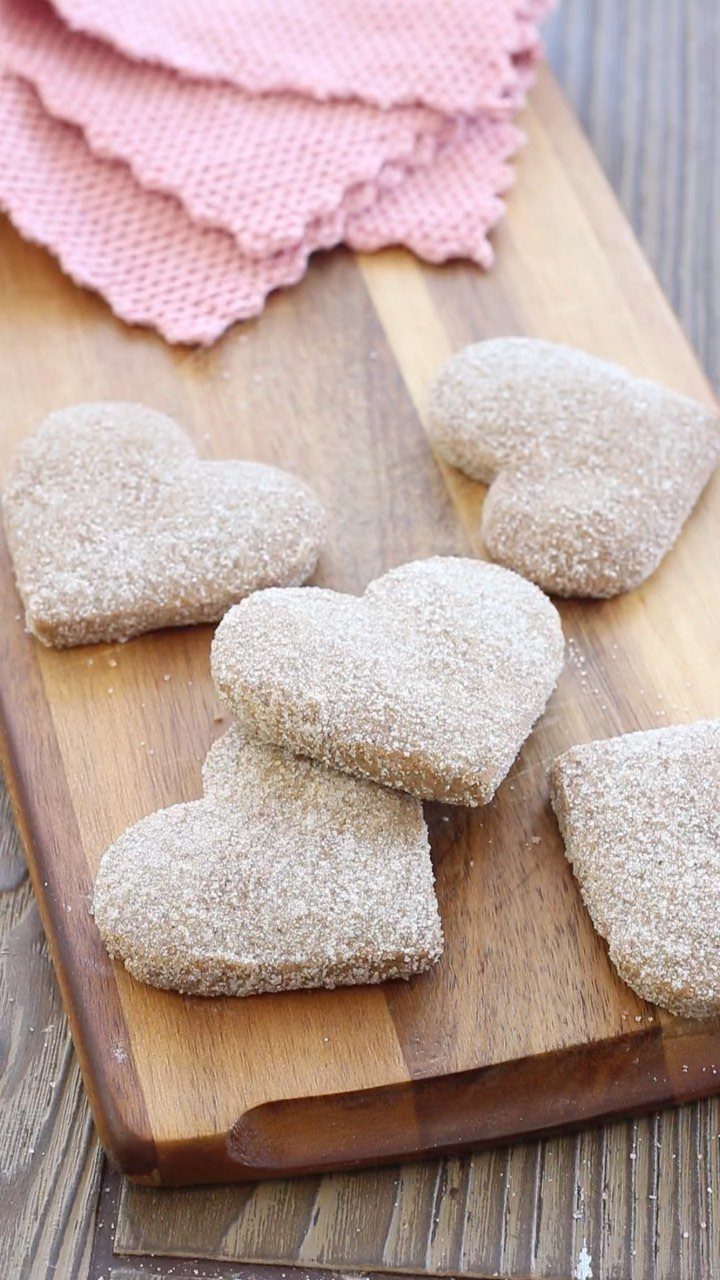
Cinnamon and brown sugar go into the dough itself, so the flavor is baked in before any decorating starts. The result is a tender cookie that tastes warmer than a standard sugar cookie.
Hearts are a good fit here. The shape is forgiving, with no thin tips to snap off, and a plain cinnamon-sugar finish looks finished on its own.
If you only have time to make one dough for a party, this is a safe one: it works for Valentine’s Day, but it isn’t tied to it.
5. Black Chocolate Cut Out Cookies
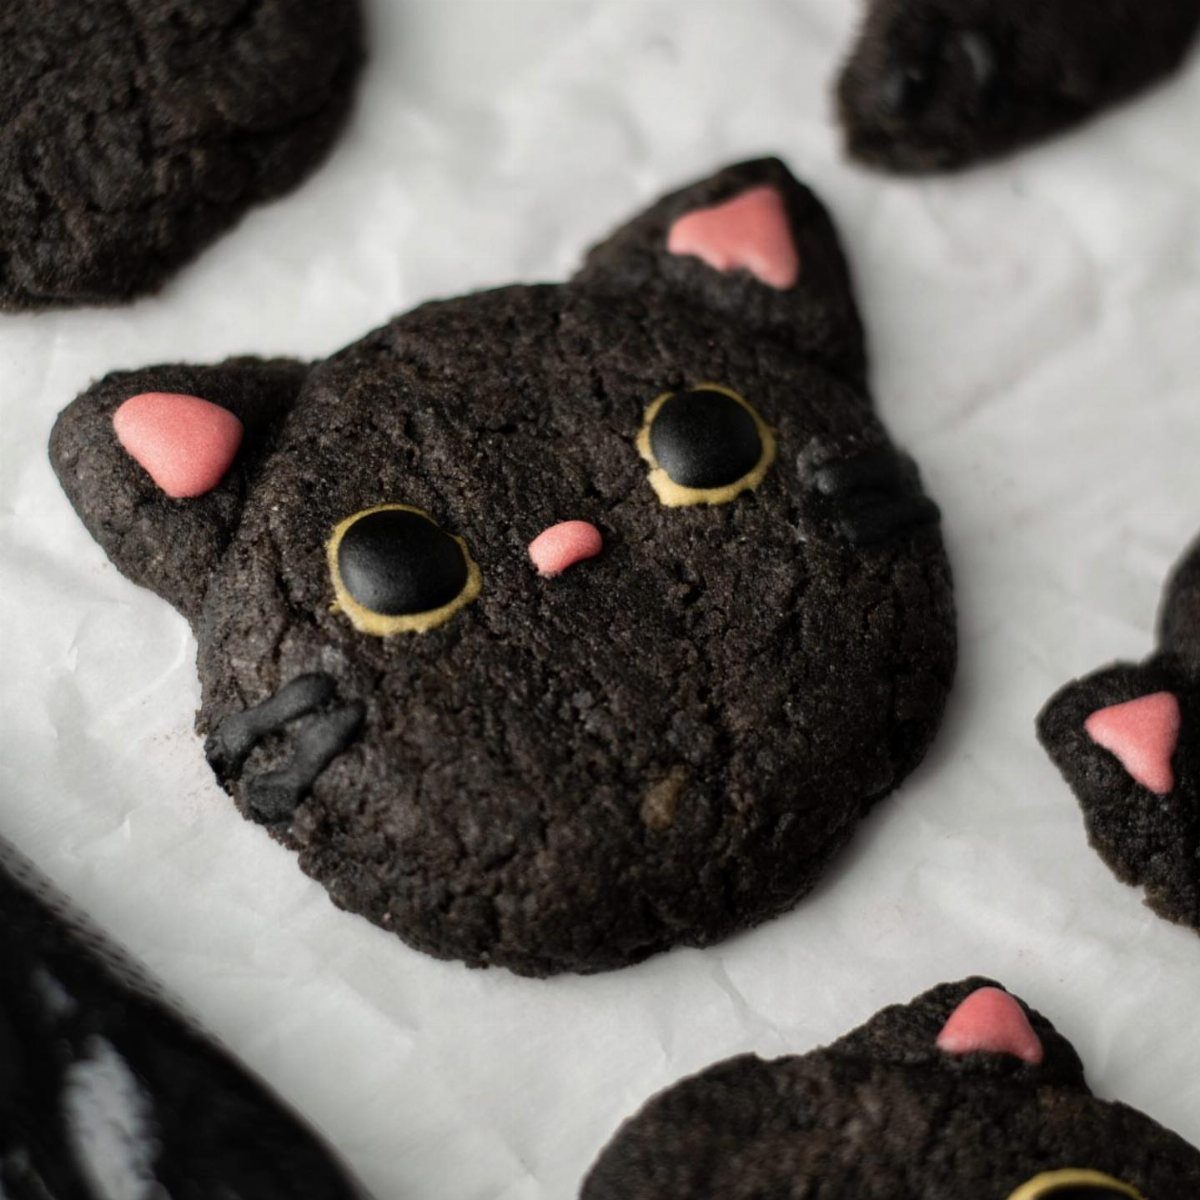
Dark chocolate dough makes a strong background for bright icing, so pink ears and noses on cat cookies stand out clearly. If you want high contrast with little effort, start here.
Pick a shape with a simple outline.
Dark dough hides browning, so watch the edges closely and pull the tray when the surface looks set.
6. Maple Cinnamon Star Cookies
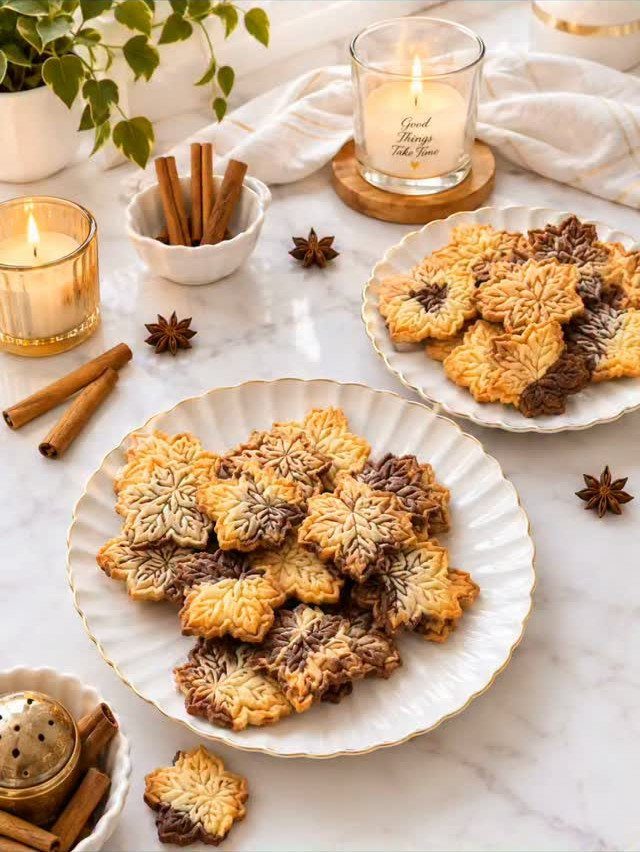
Maple and cinnamon make a pairing that fits fall and winter baking, and a star cutter gives it a holiday look without any icing. The shape is simple enough for beginners and sturdy enough to carry.
Stars can break at the tips, so roll the dough a little thicker than you would for a small round cookie. Chill the cut shapes before baking so the points stay sharp.
Serve them on a plate next to cinnamon sticks for an easy, cozy table.
7. Decorated Sugar Cookies
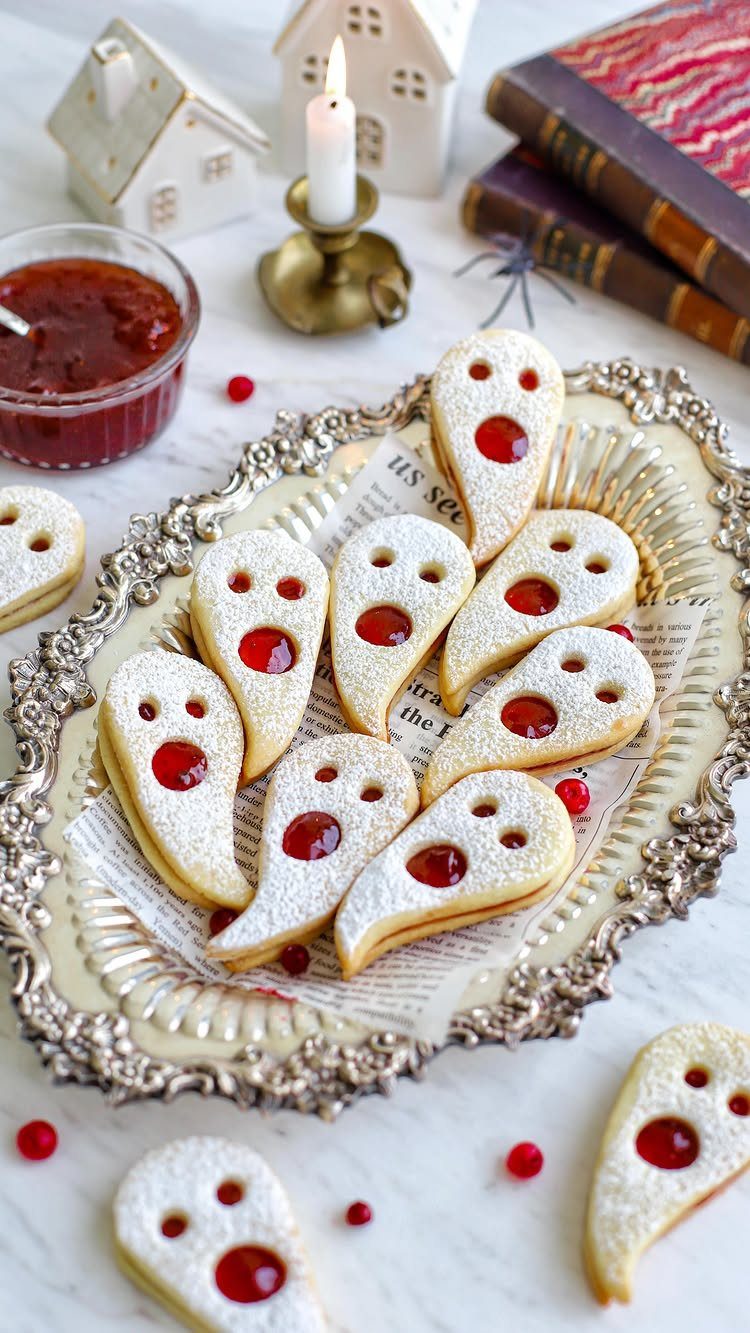
Sugar cookie dough is the all-purpose base for cut-outs: roll it, stamp a shape, and either ice it or serve it plain. Ghosts are a good beginner pick because the outline has no thin parts to snap.
Pat the dough into a flat disk, wrap it tightly, and refrigerate it for 30–60 minutes so it rolls out without sticking or spreading. Bake at 350°F on a lined sheet.
For red jam eyes like these, press the small end of a piping tip into each unbaked ghost to make 2 holes, then fill them with jam after baking.
A tip you already own works, so there’s no special tool to buy.
8. Gingerbread Cookies
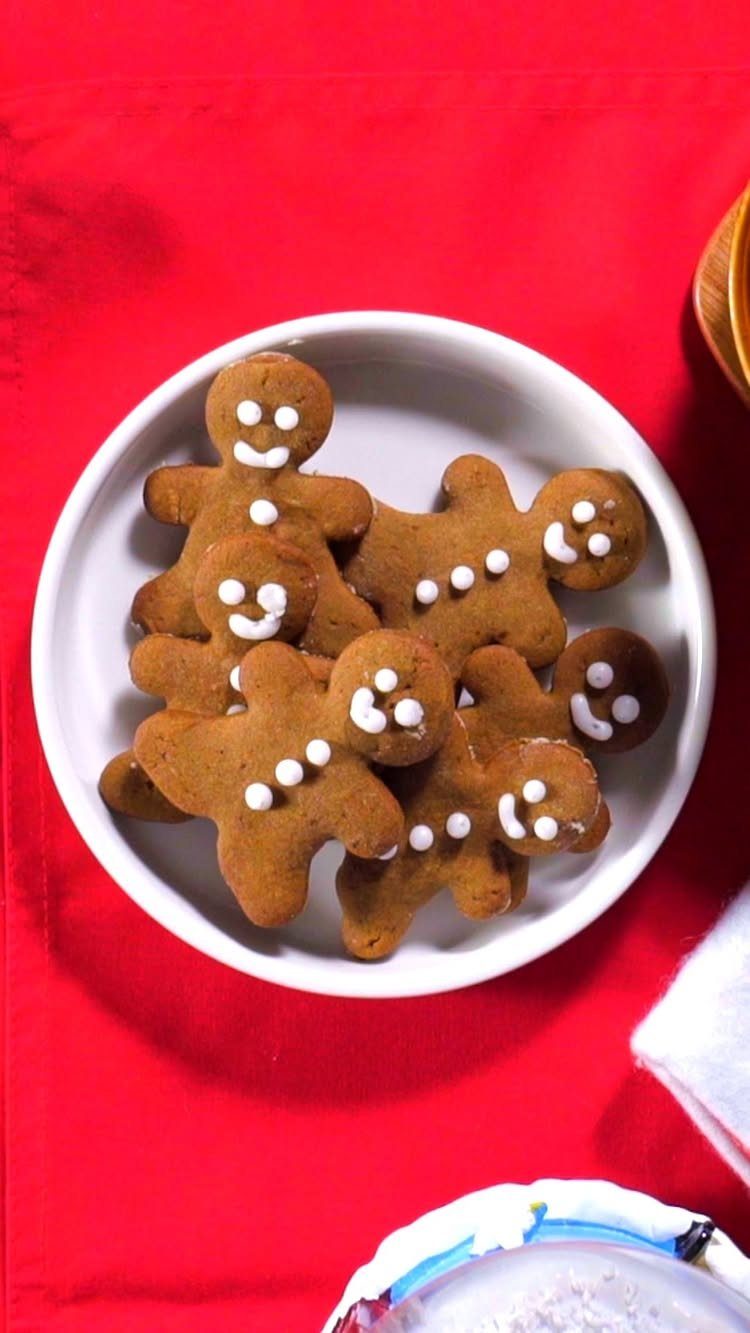
A gingerbread man is the shape most people picture first, and white icing for the face and buttons is all the decoration it needs. The spice does the flavor work, so the icing can stay plain.
A small round tip or a snipped corner of a zip-top bag handles the dots and lines. Keep the pattern simple: three buttons, two eyes, one smile.
Against a red tablecloth, white icing reads clearly from across the room.
9. Pumpkin Spice Cookies
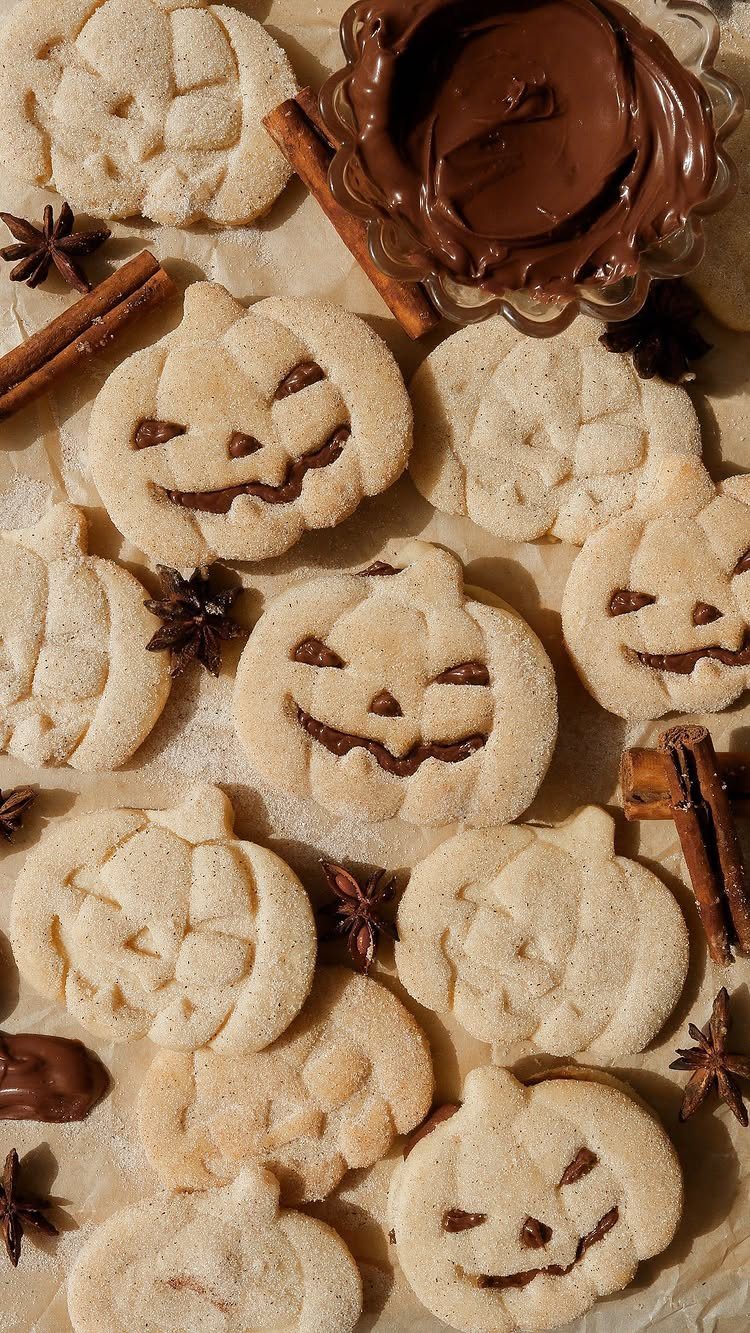
Pumpkin cutters turn a spiced cookie into a fall plate on their own. Cut the dough into pumpkin shapes and bake them, then pipe or dab on melted chocolate to give each cookie a jack-o’-lantern face.
Melted chocolate stands in for icing when you want to draw faces, and a zip-top bag with one corner snipped off gives you enough control to pipe them.
Let the cookies cool completely first, or the chocolate will slide and smear. Use a small spoon or a piping bag with a tiny cut tip for the eyes and mouth.
Cinnamon sticks and star anise look good scattered around the plate, but they’re for decoration only, so keep them off anything people will bite into.
10. Red Velvet Cutout Cookies
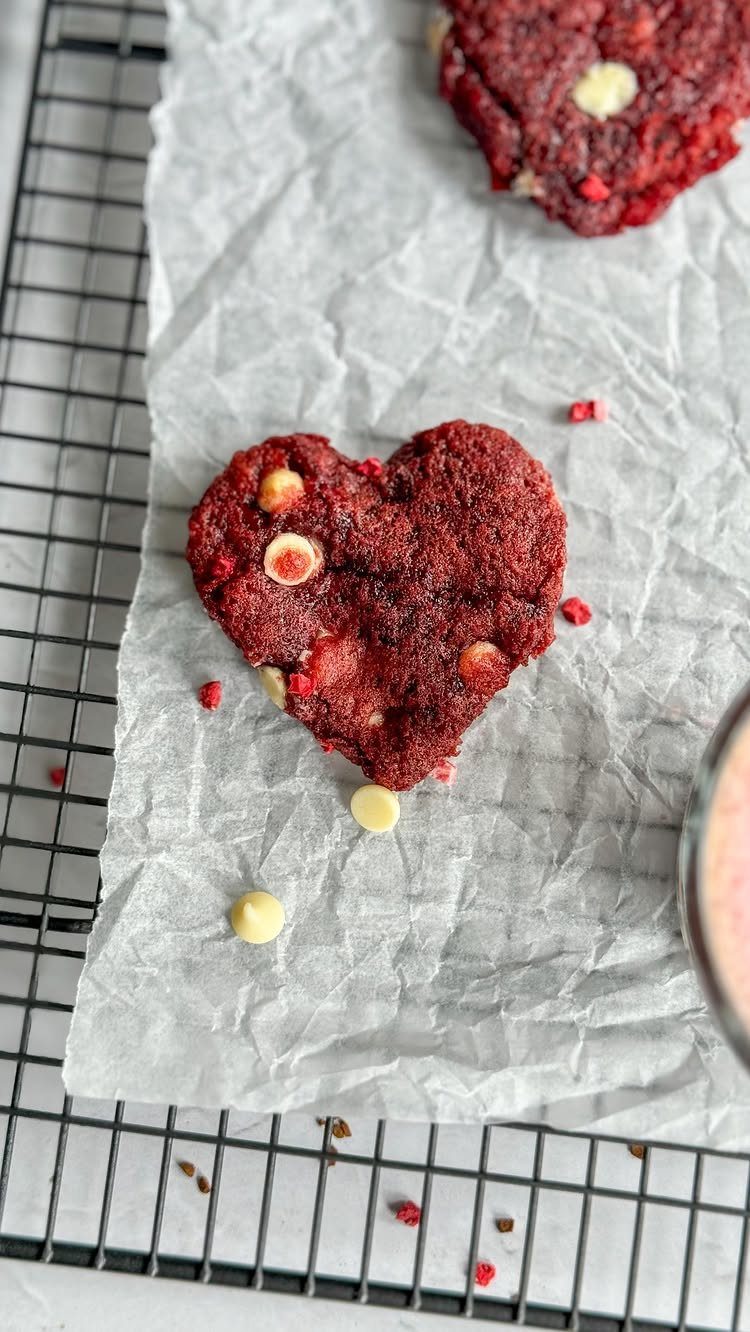
Red velvet gets its look from the deep red crumb, so a heart cutter and a few white chocolate chips are enough decoration. The white against the red is high contrast with almost no work.
Press the chips in gently after cutting, before the tray goes in the oven, so they stay put.
Move the cookies to a wire rack as soon as they’re firm enough to lift, since air under the bottoms keeps them from going soft.
This is a fine choice for Valentine’s Day when you want something that looks bakery-made but skips piping altogether.
11. Almond Cutout Cookies
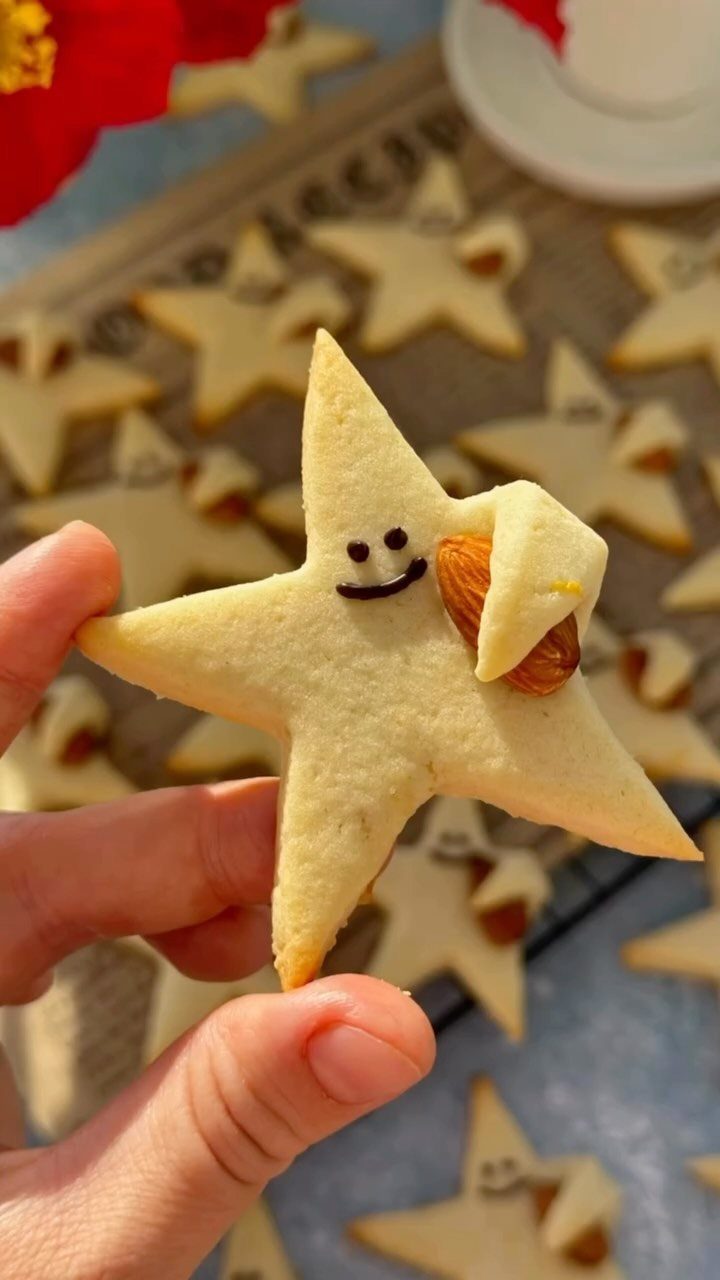
A star cutter, a chocolate smile, and one whole almond make a cookie with a face and no icing bag to wrangle. Kids can place the almond themselves, which makes this a good decorating-activity cookie.
Draw the smile with melted chocolate once the cookies have cooled. Set the almond in while the chocolate is still wet so it acts as glue.
If anyone at the table has a nut allergy, label the plate clearly, since the almond sits right on top.
12. Hazelnut Cutout Cookies
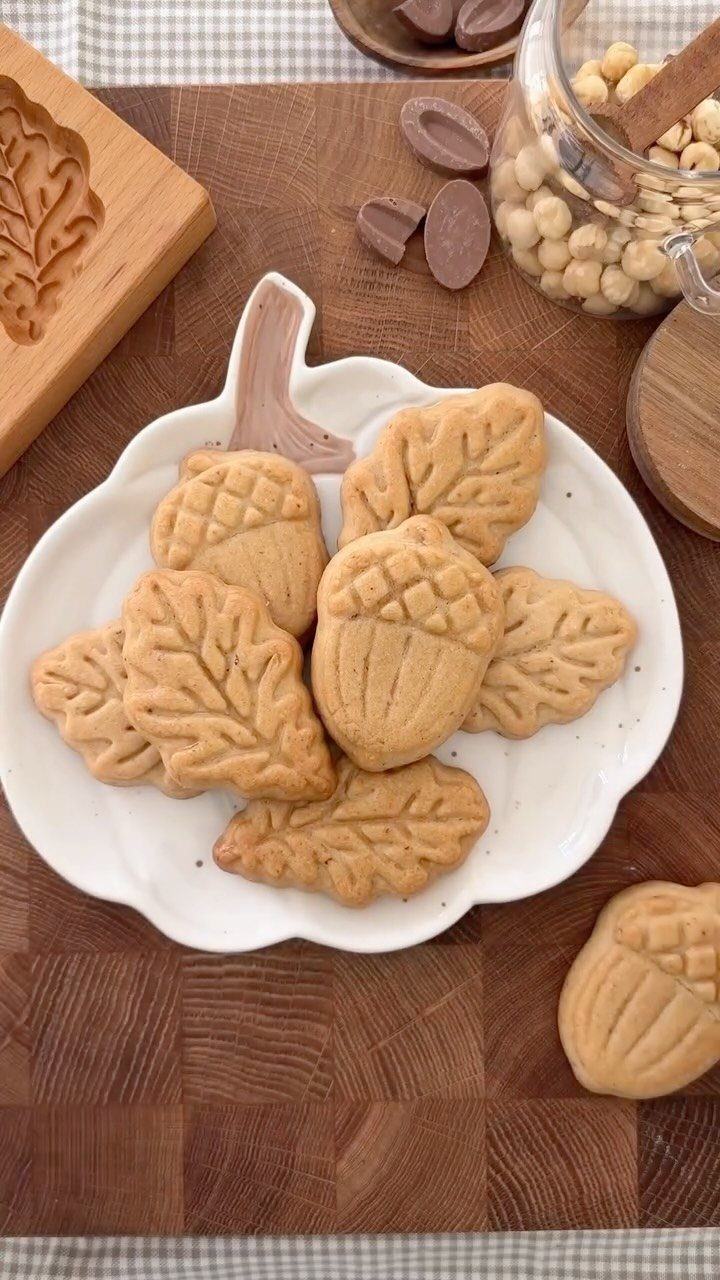
Acorns and leaves are a natural pairing for a hazelnut cookie, and the nut itself can echo the shape: a whole hazelnut makes a handy acorn cap decoration or a garnish next to the plate.
Melted chocolate can serve as the glue.
Leaf cutters with rounded edges are the easier choice, since the points on some leaf shapes can break when you lift them. Move cut shapes to the tray with a thin spatula.
Cool the cookies fully before adding any chocolate, and keep nuts labeled if you’re serving guests.
13. Pumpkin Sugar Cookies
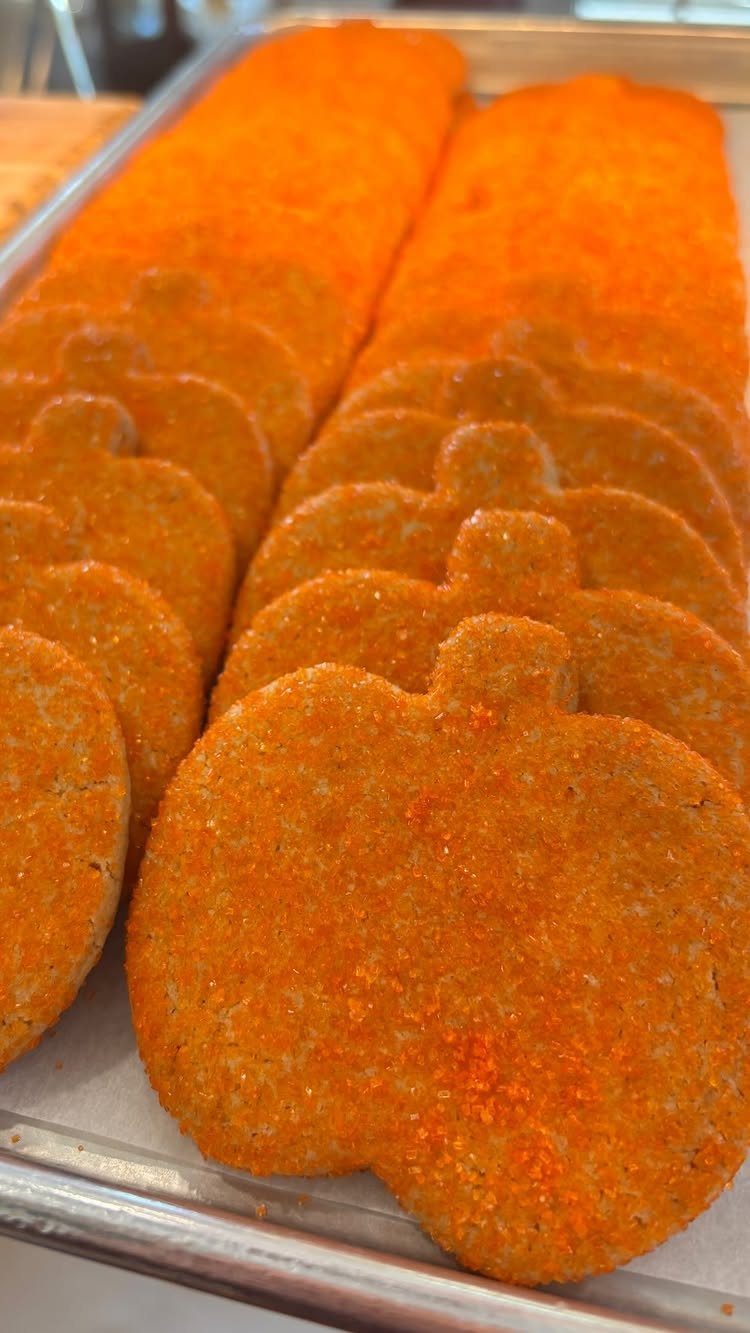
Orange sanding sugar does all the decorating on these pumpkin cookies, so there’s no icing to mix and nothing to wait on while it sets. The coarse crystals add sparkle and a bit of crunch.
Look for a pumpkin cutter with a stem and a few ridges, since the outline carries the look once the sugar is on. Shaking the sugar over the cookies from a small bowl is a job a child can handle.
14. Iced Cherry Almond Linzer Cookies
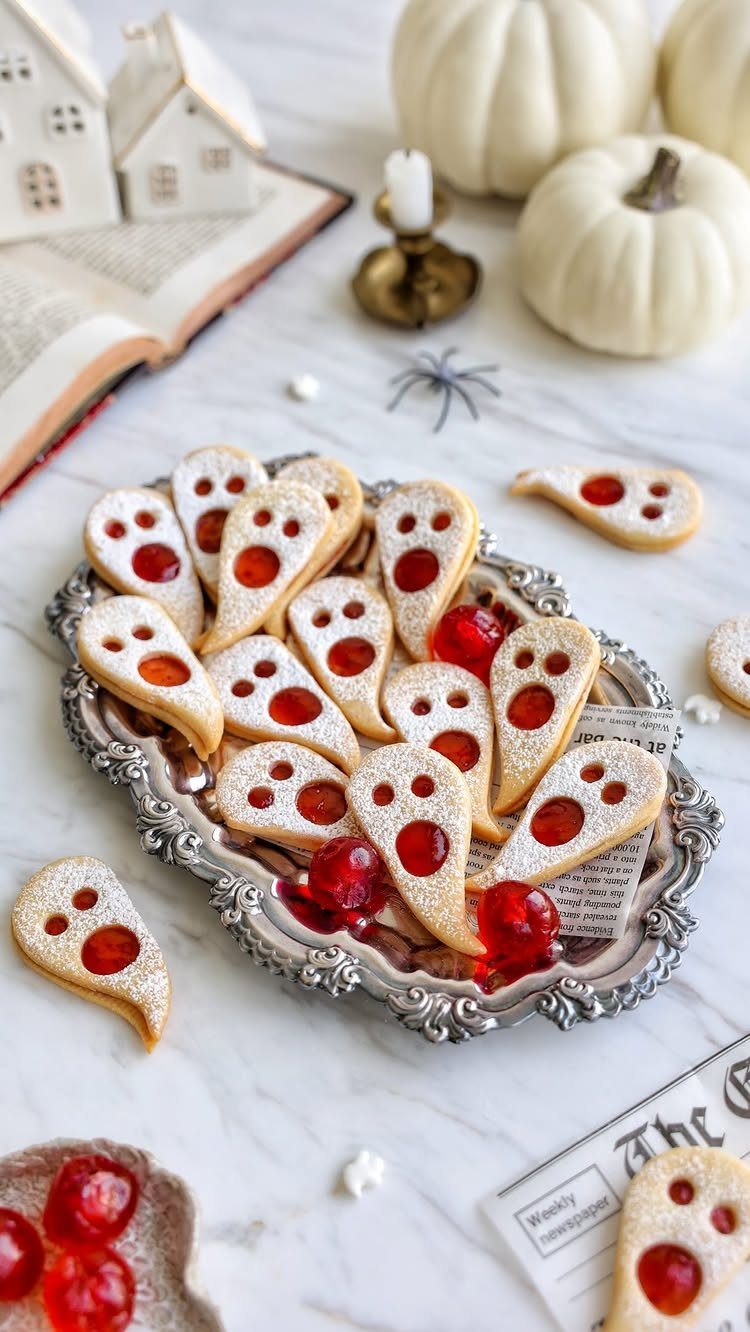
Each ghost here is a sandwich: a solid cookie on the bottom, a second ghost on top with the cherry window cut out, and jam in between.
That means twice the cookies for the same number of finished treats, so cut an even number.
Dust the tops with powdered sugar only after the cookies have cooled, or it melts into the surface. A lower-effort ghost uses jam for the eyes.
15. Raspberry Sugar Cookies
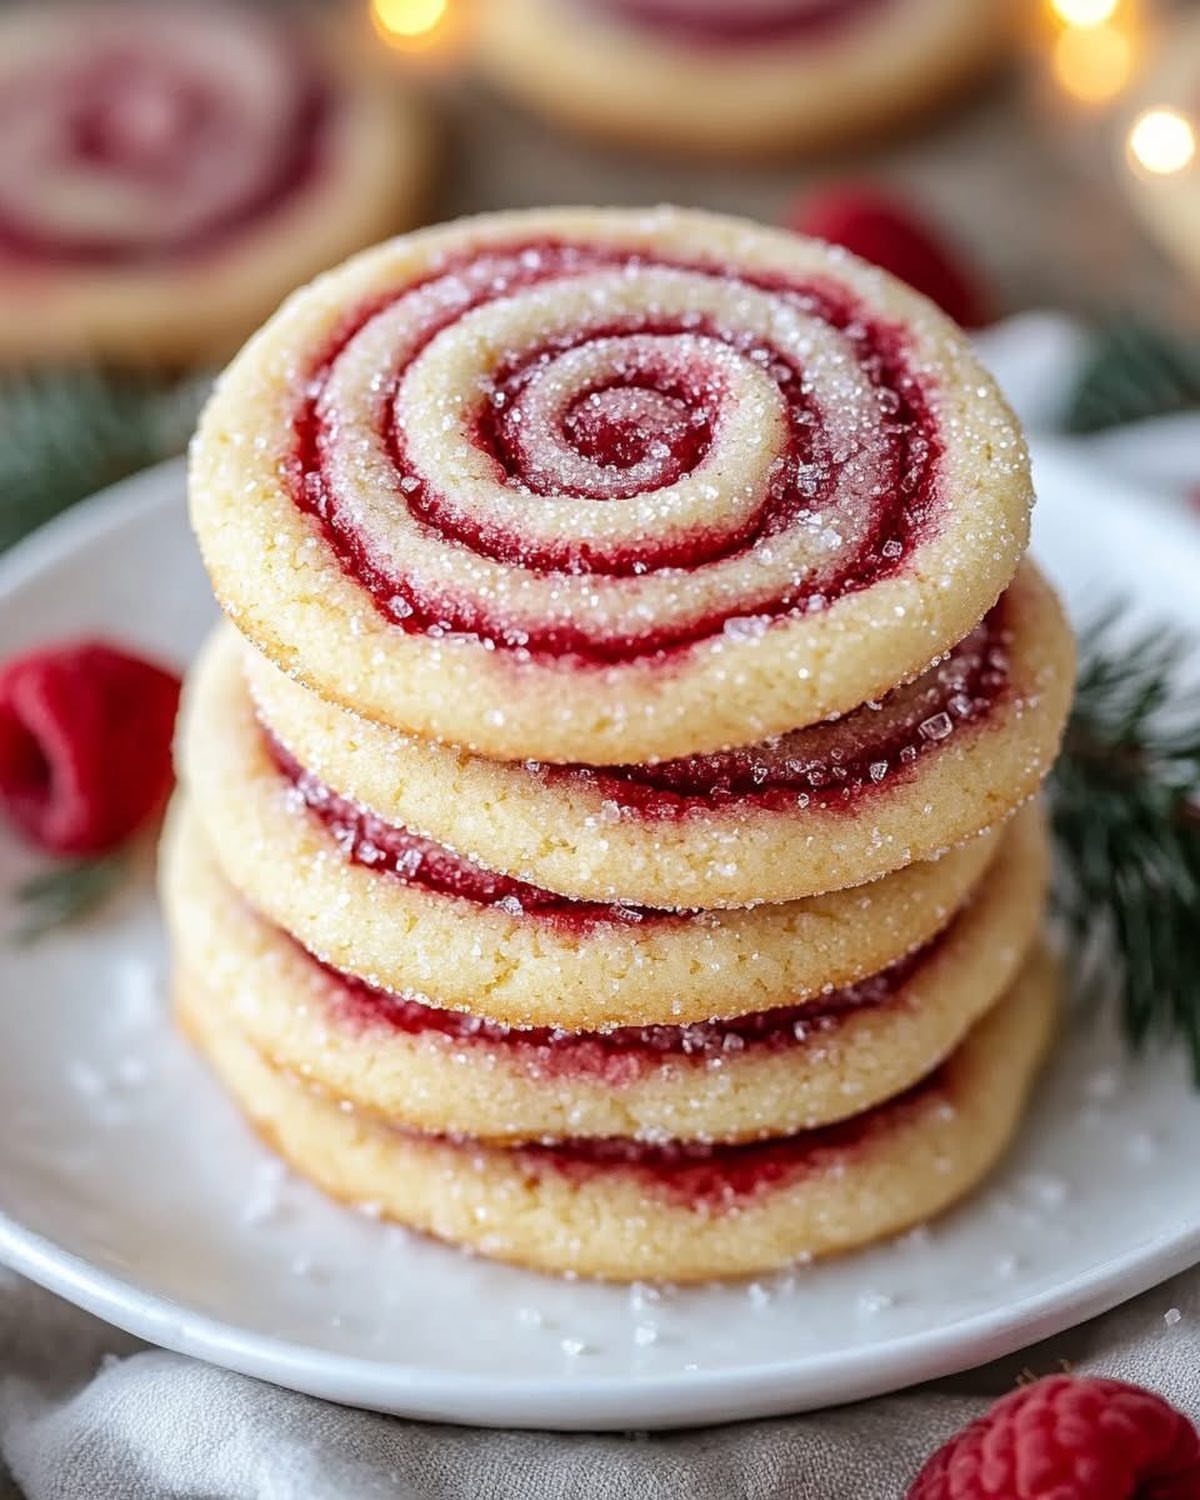
Raspberry in the dough gives you a sugar cookie that tastes like fruit, not just vanilla and butter. A spiral shape looks fancy but stacks neatly, which suits a holiday cookie plate.
Fresh raspberries on the platter echo the flavor and add color. Sprigs of pine look good tucked beside the stack, but they’re decoration only, so keep the needles away from anything people will eat.
16. Fireworks Celebration Cookies
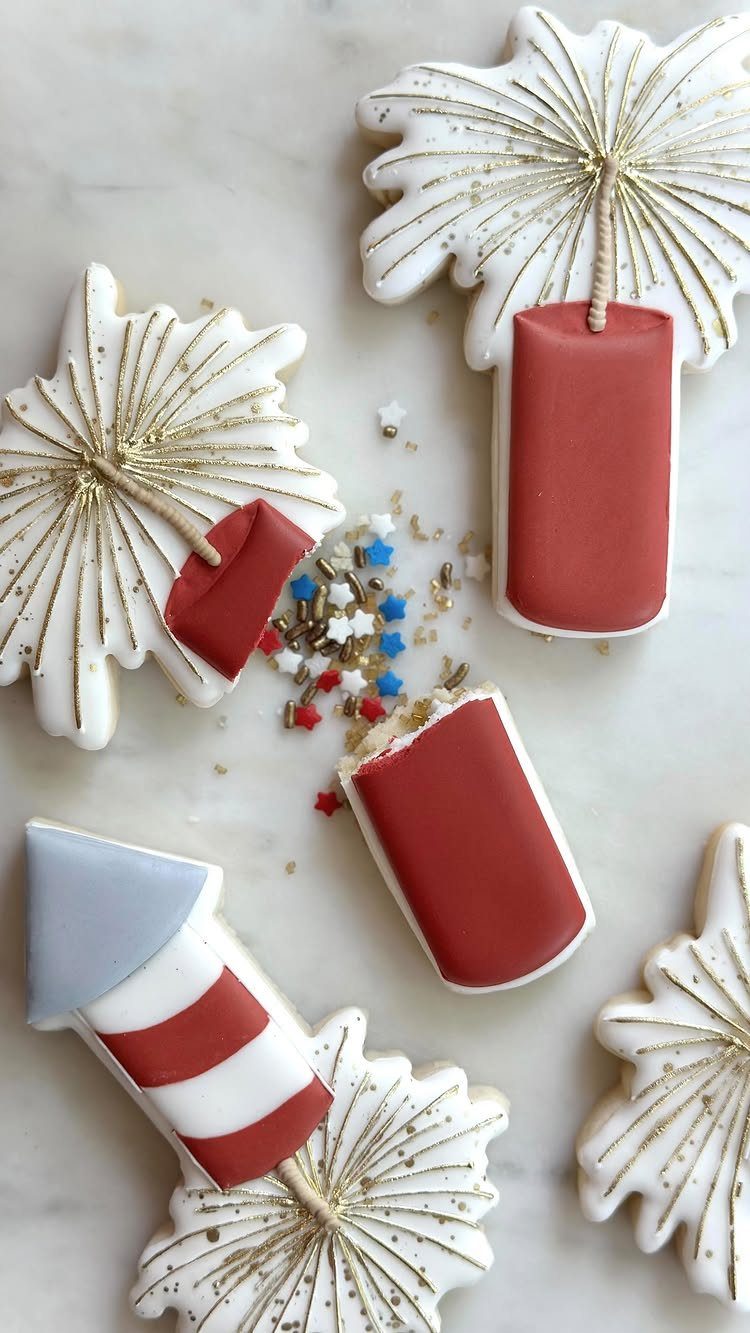
Rockets and bursts give you thin tips and fuses, and those are the parts that snap. Keep the fuses short and thick when you cut, and lift each shape with a wide spatula.
If you add gold glitter, check that the label says it’s edible, since some craft glitter isn’t.
Fireworks cookies fit a summer cookout or a New Year’s party.
17. Decorated Easter Cookies
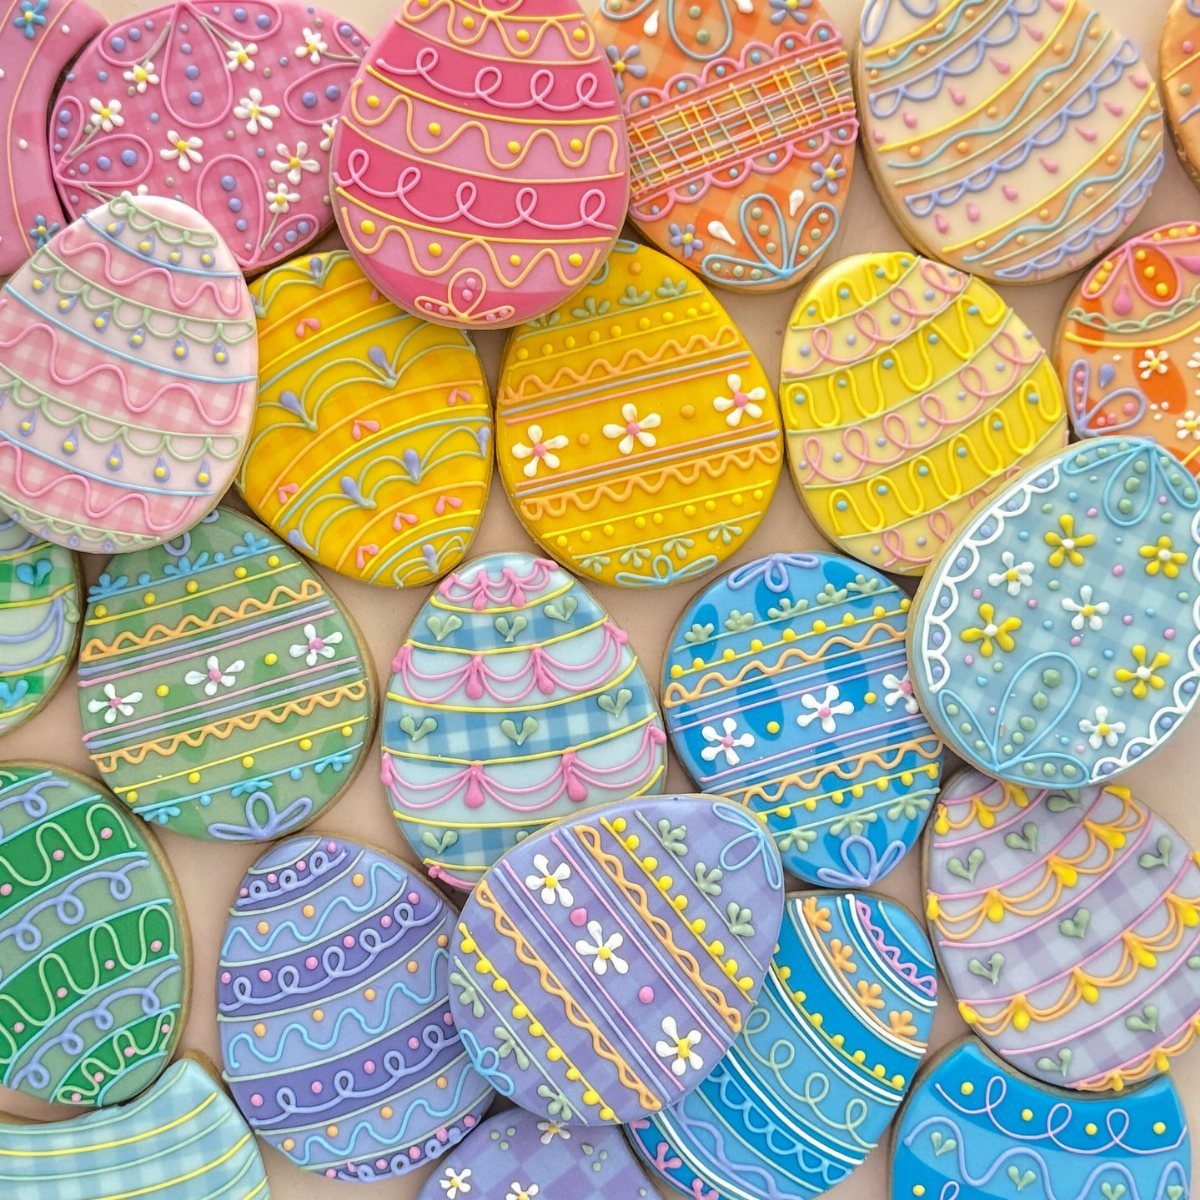
An egg is about the friendliest cookie shape there is: no points, no thin parts, and plenty of flat space for stripes, dots, and zigzags in pastel royal icing.
Royal icing dries hard, so let every cookie set completely before you stack or box them. That hardness is what makes them easy to tuck into an Easter basket or hand out at the table.
Stick to pastel colors and repeat them across the batch. A few patterns done neatly look better than a dozen done in a rush.
18. Valentine’s Day Cookies

Marbled icing seems tricky, but one toothpick does the whole job. Flood a heart with red icing, drop dots of pink on top, and drag the toothpick through while the icing is still wet.
Work one cookie at a time, because the icing starts to set within minutes. Wipe the toothpick between cookies so the colors stay clean.
A heart is a forgiving shape for this, since the swirl fills the whole surface and hides small mistakes.
19. Stained Glass Window Cookies
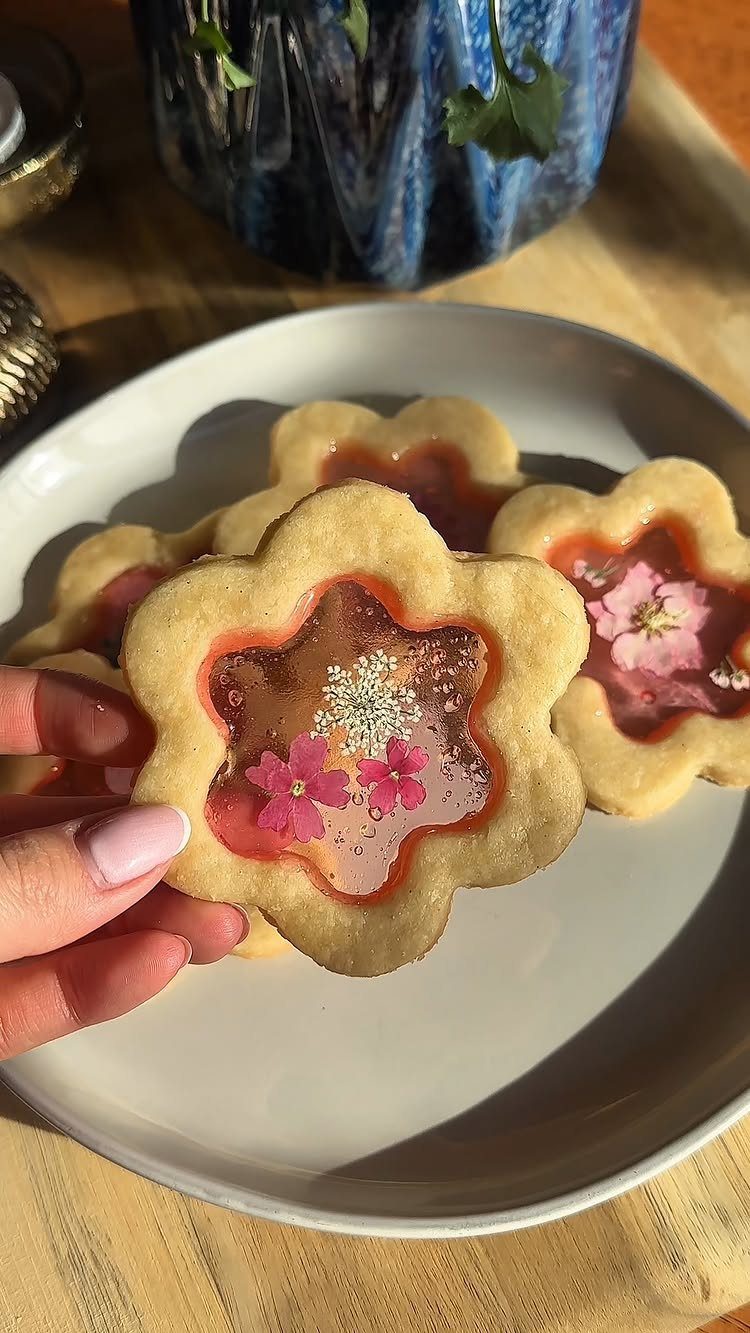
A smaller cutter pressed inside a larger one leaves the opening that makes a stained glass cookie. Fill it with translucent candy and the cookie glows like a window held up to the light.
Flower shapes work well because the rounded petals have no thin tips to snap. Buy edible flowers sold for eating, not ones from a garden or florist, which may carry sprays.
Set them on top of the candy for a pretty finish.
20. Snowman Sugar Cookies
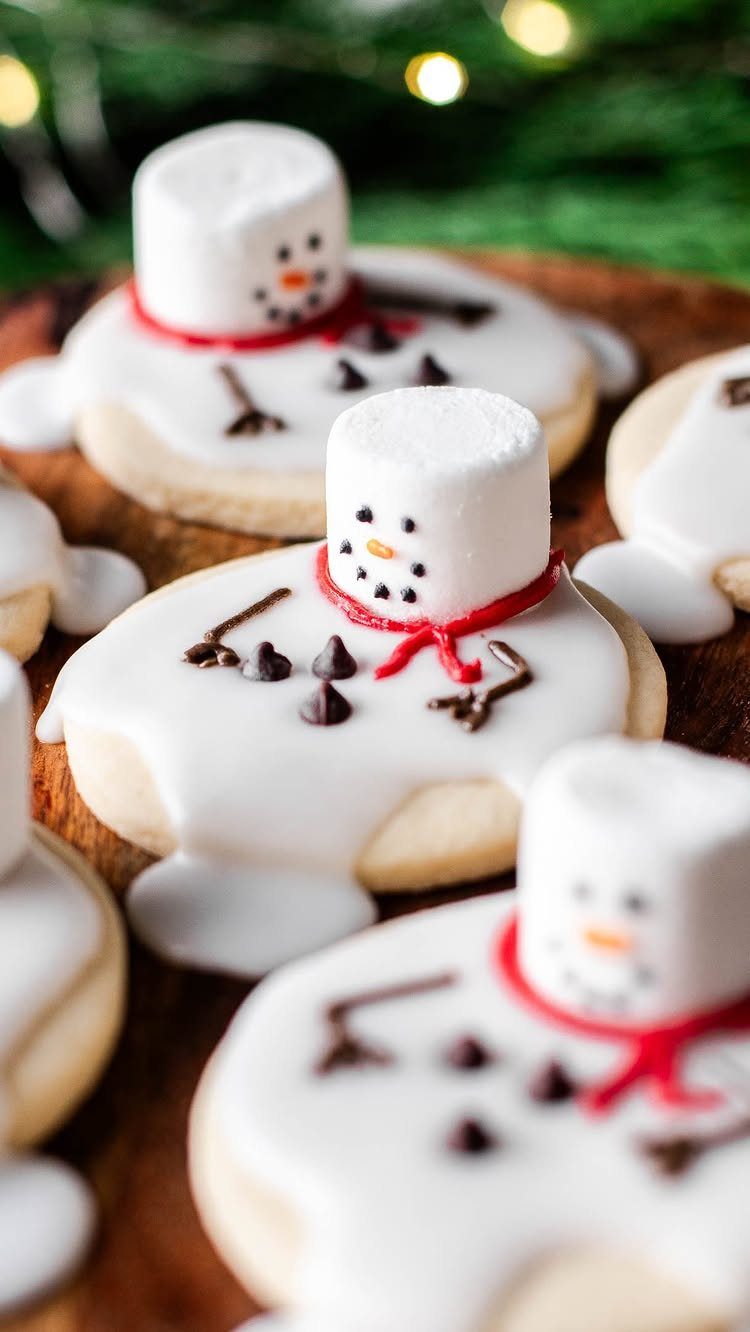
Melting snowmen are easier than upright ones, since messy icing reads as part of the joke. Royal icing works as glue.
Add the scarf last with a stripe of red. A small cutter works, and so does a plain round cookie, since no special snowman shape is required.
Give the icing time to firm up before stacking or boxing.
21. Striped Fudge Cookie Sandwiches
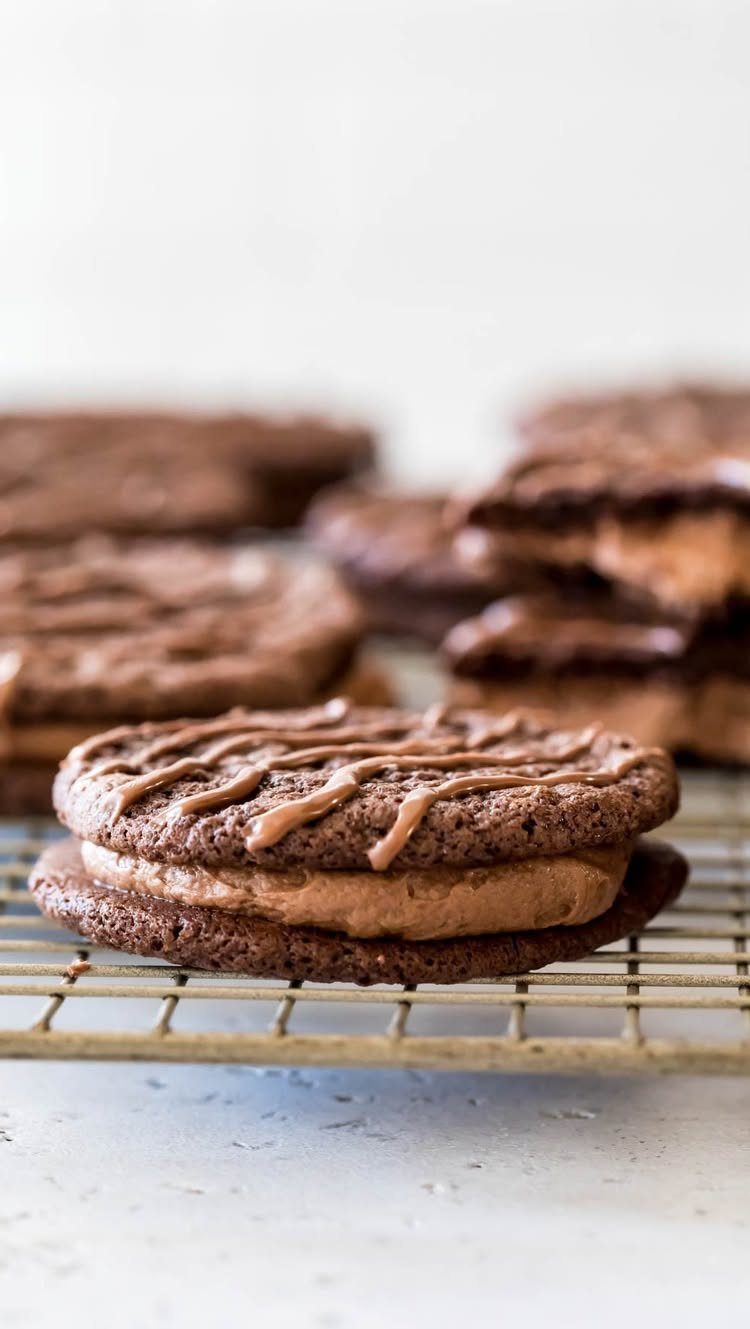
Chocolate cookies, a layer of fudge, and a few stripes on top: that’s the whole build. The stripes are what make a plain sandwich look planned.
Cool the cookies completely before you spread the filling, or the fudge slides out the sides.
Drizzle melted chocolate in straight, parallel lines from a spoon or a snipped zip-top bag, and leave the cookies on a wire rack until the stripes firm up.
Chocolate on chocolate looks subtle, so stripes in a lighter color would show up more.
22. Mini Animal Cracker Cookies
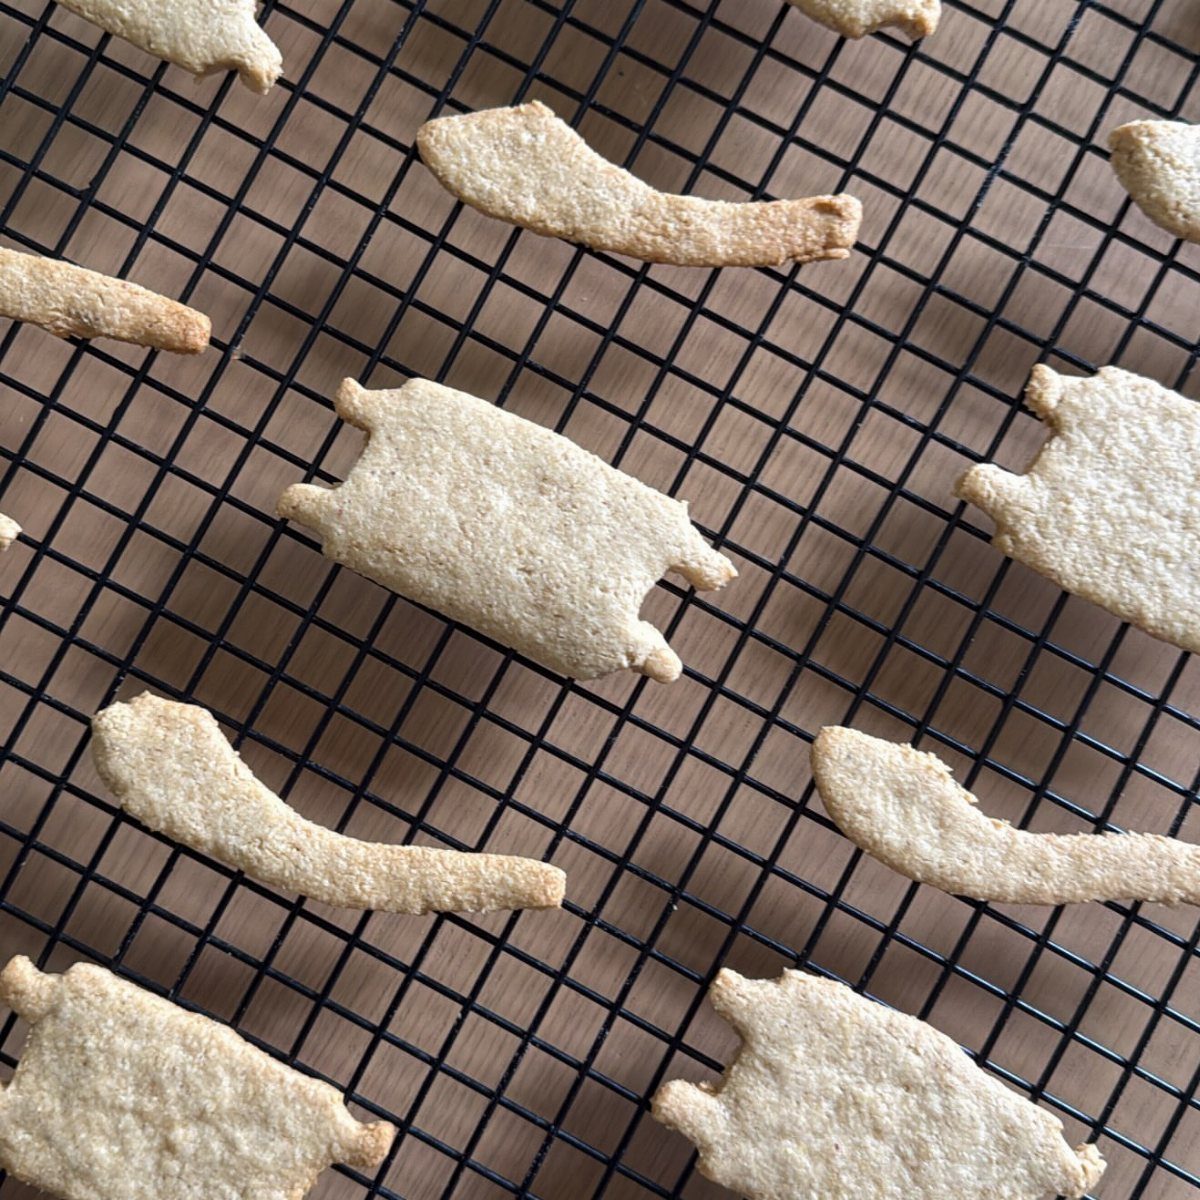
Choose the chunkiest animals in your cutter set. Short legs and thick bodies survive lifting and baking, while long trunks and skinny tails tend to snap.
Roll the dough evenly so the whole tray bakes at the same pace, and slide each cutout onto the sheet with a thin spatula. Small cookies brown fast, so watch the edges.
Slide the baked cookies onto a wire rack so air can circulate underneath while they cool. A bowl of these makes an easy snack for kids, and they’re simple enough for small hands to help cut.
23. Colored Pencil Cookies
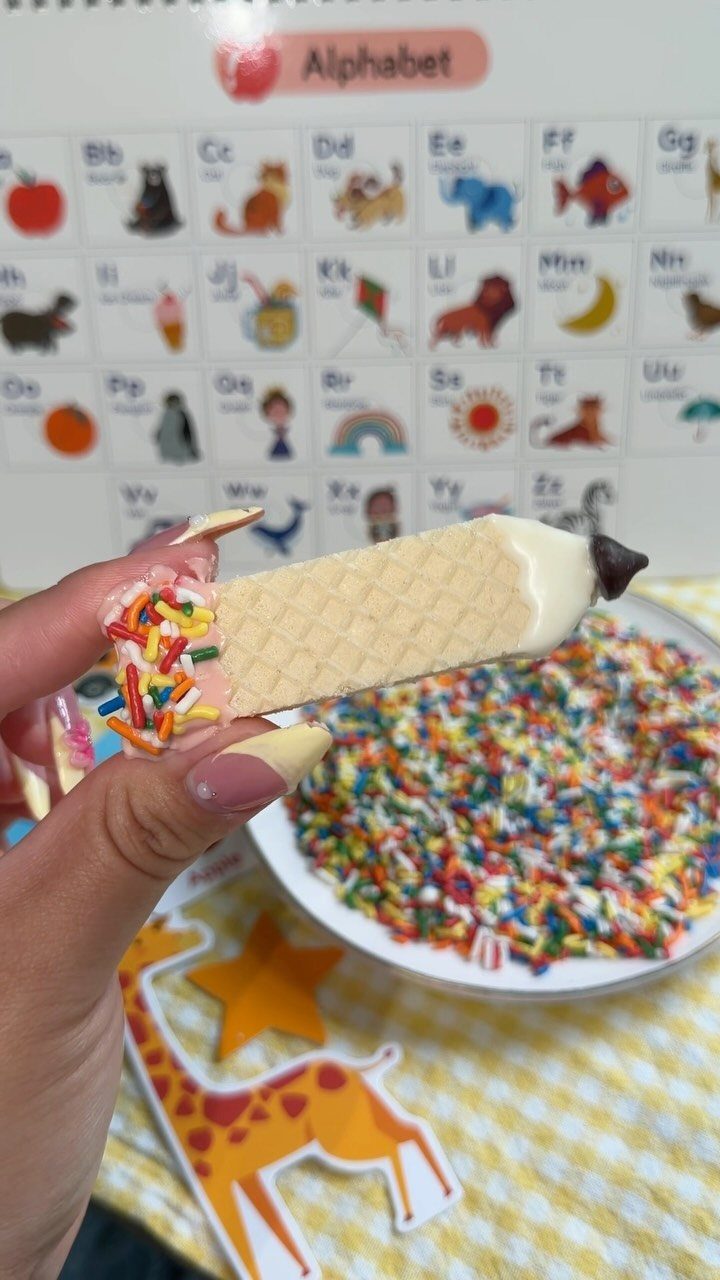
A pencil is a long rectangle with a pointed tip, which makes it one of the easiest themed shapes to cut and a natural for a back-to-school table.
One baker dipped theirs in white chocolate and then covered them in colorful sprinkles. Add the sprinkles right after dipping, while the chocolate is wet, because they won’t stick once it sets.
Give each pencil its own sprinkle color, and the finished set will resemble a box of crayons.
24. Butterfly-shaped Cookies
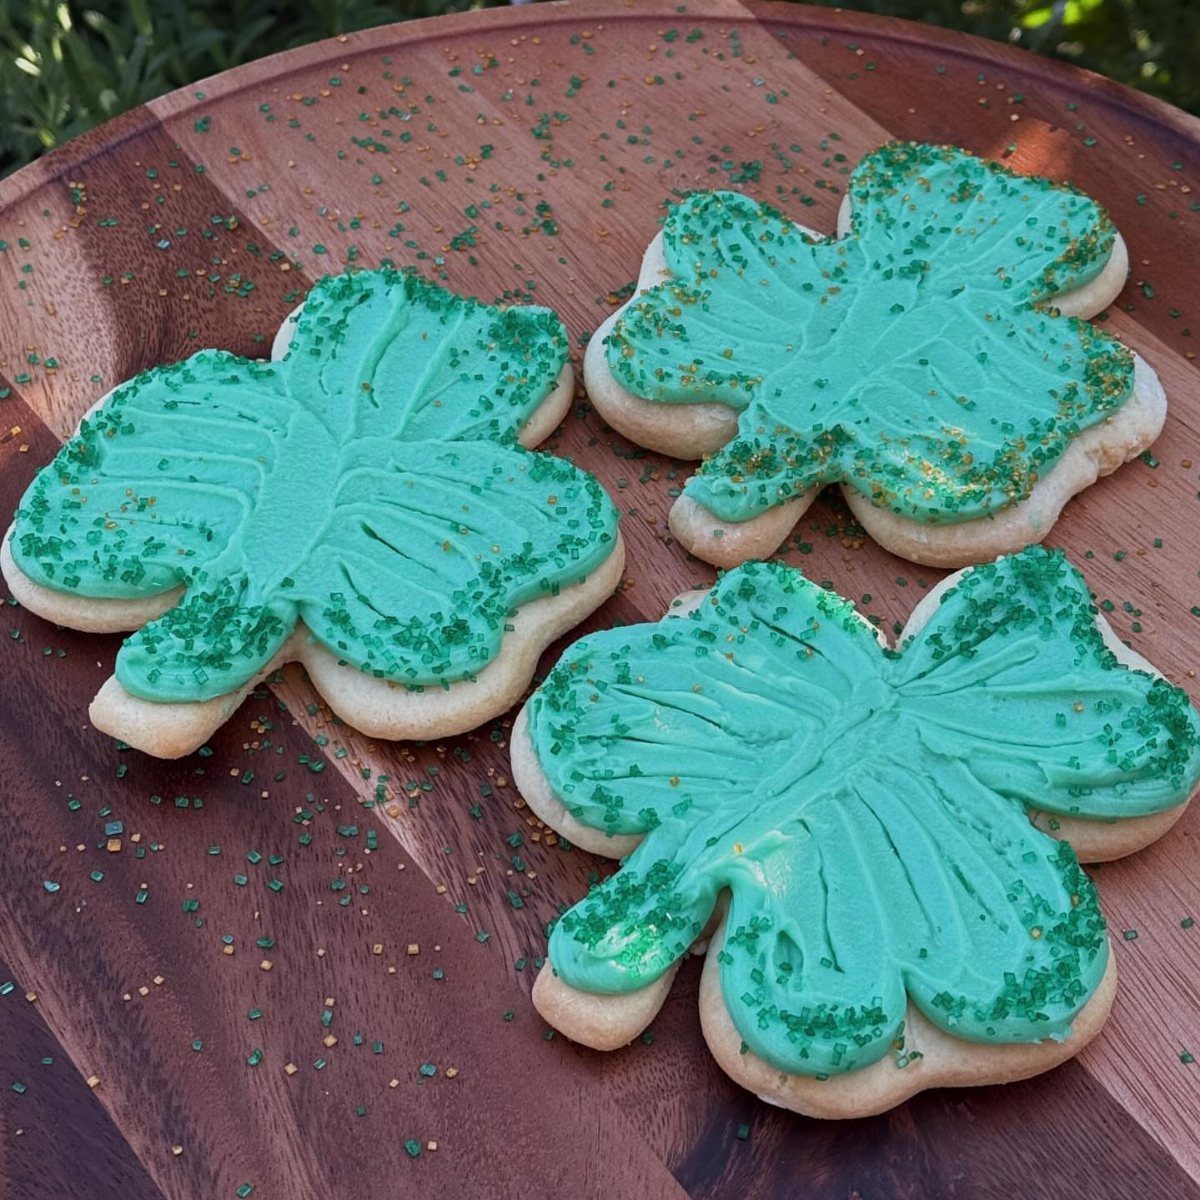
Wings give a butterfly cookie its shape, so pick a cutter with rounded wings over spiky ones. The curves bake evenly and carry less risk of broken points.
Cover each cookie with teal frosting, then scatter green sprinkles on top right away, while the frosting is still soft. They won’t stick once it sets.
Three cookies in one color pair look tidy on a board. Stick to 2 colors and let the wing shape do the rest.
25. Coffin-shaped Cookies
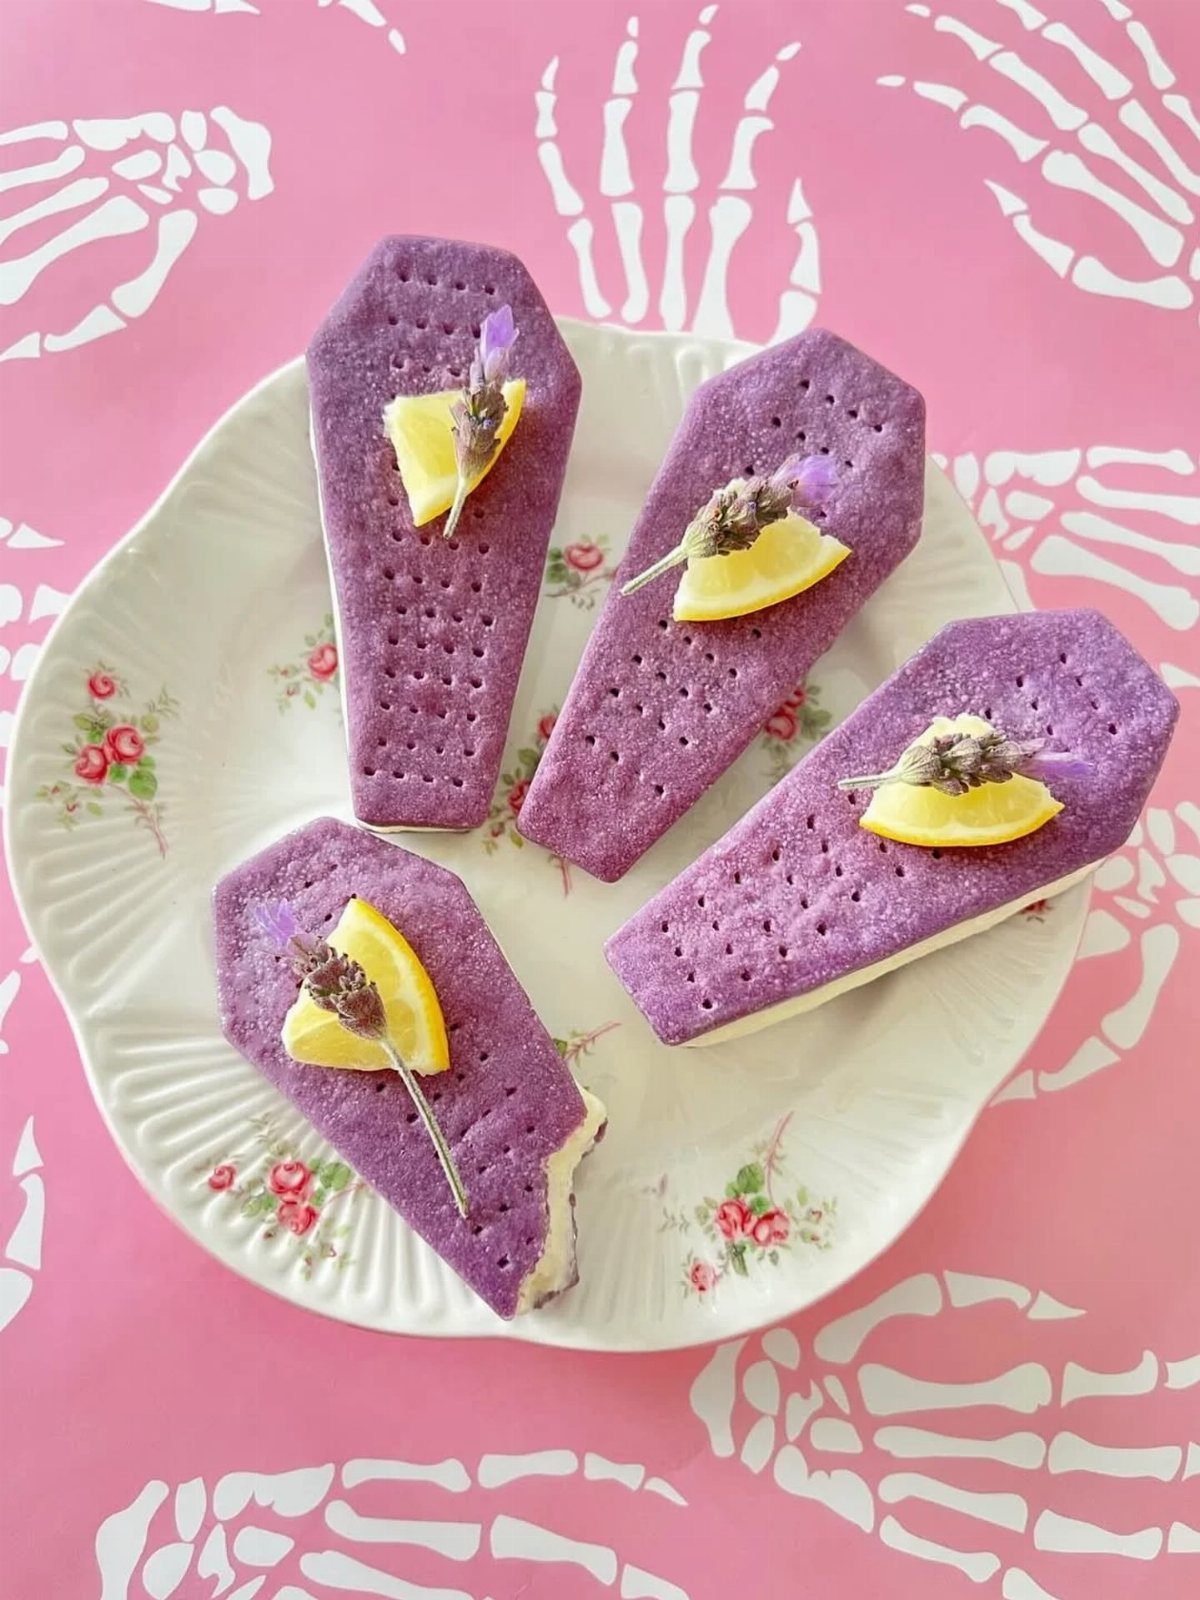
Purple coffins with lemon slices and lavender sprigs make a Halloween plate that looks pretty first and spooky second, which suits a party where some guests dislike gore.
A coffin is a long hexagon, so the outline does most of the work. Chill the dough well before cutting so the corners stay sharp.
If you copy the lavender, buy a kind sold for cooking. Florist stems may carry sprays.
26. Leaf-shaped Cookies
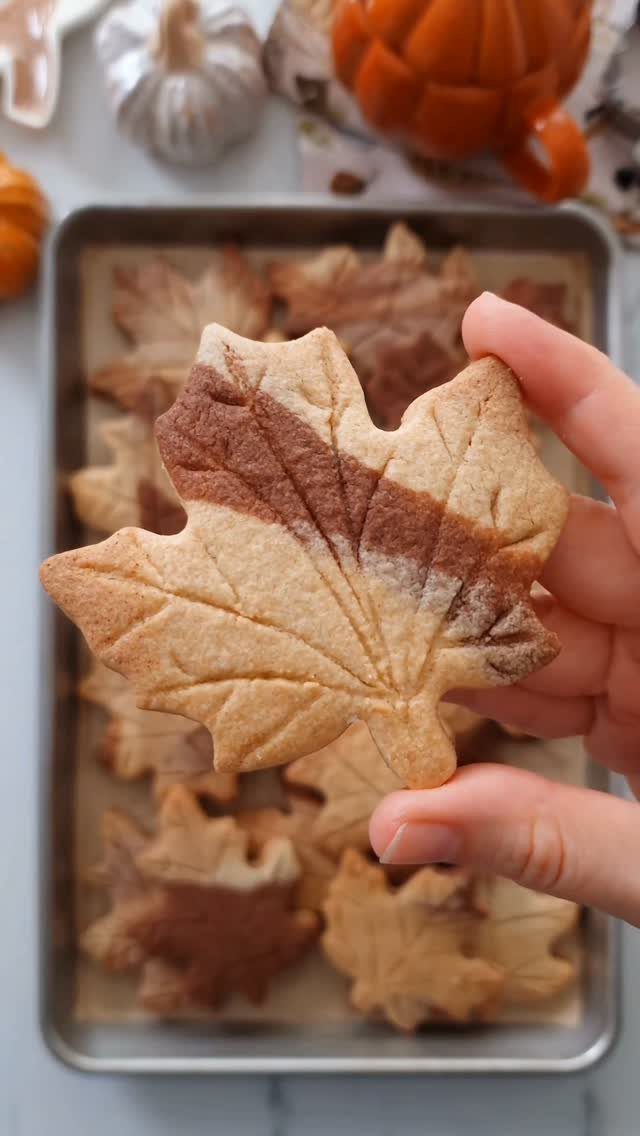
A single brown line down the middle reads as the center vein of the leaf. Pulled down the middle from stem to tip, it reads as the center vein.
A full tray of identical leaves looks planned, not repetitive.
A few mini pumpkins beside the platter turn the cookies into a fall centerpiece with no extra work.
27. Egg-shaped Fried-egg Cookies
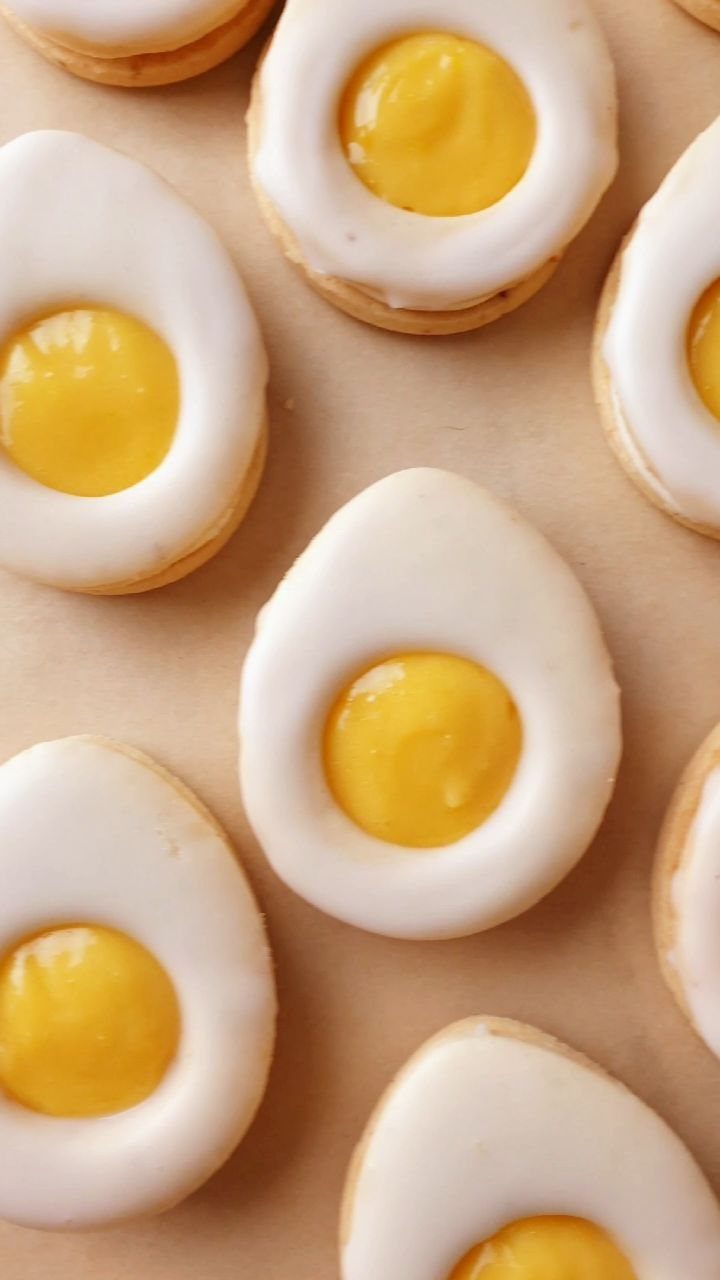
Breakfast jokes work well on a cookie plate, and a fried egg is one of the easiest. Ice each egg shape white, let it set, then add a round yellow center.
Waiting matters: yellow dropped onto wet white icing bleeds and turns the yolk muddy. A small round tip or a spoon dab gives you a clean circle.
These suit a brunch spread or an April Fools’ dessert, since people will do a double take before they bite.
28. Pie-shaped Cookies
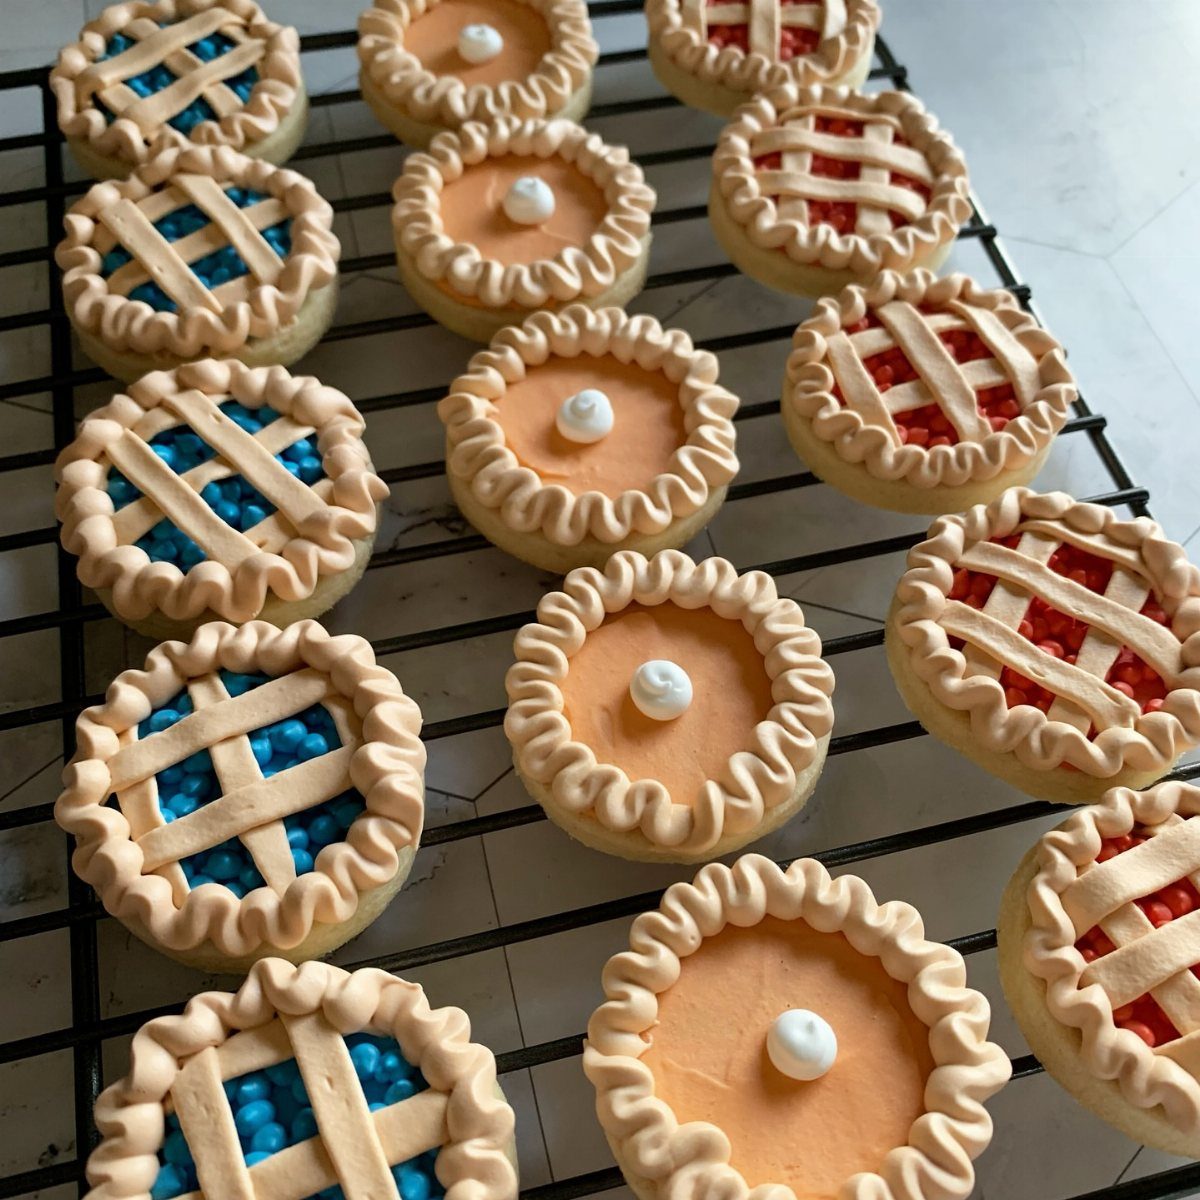
Mini pies in cookie form give you crimped edges, a bright filling, and sometimes a lattice top, all in one bite.
The lattice is the fussy part, because thin strips snap when you lift them, so start with plain tops if you’re new to cut-outs.
Orange, blue, and red fillings make a tray look like a bakery case of different flavors. Let the fillings set before you stack or pack the cookies.
These work well for a summer cookout or a potluck dessert table.
29. Squirrel Cutout Cookies
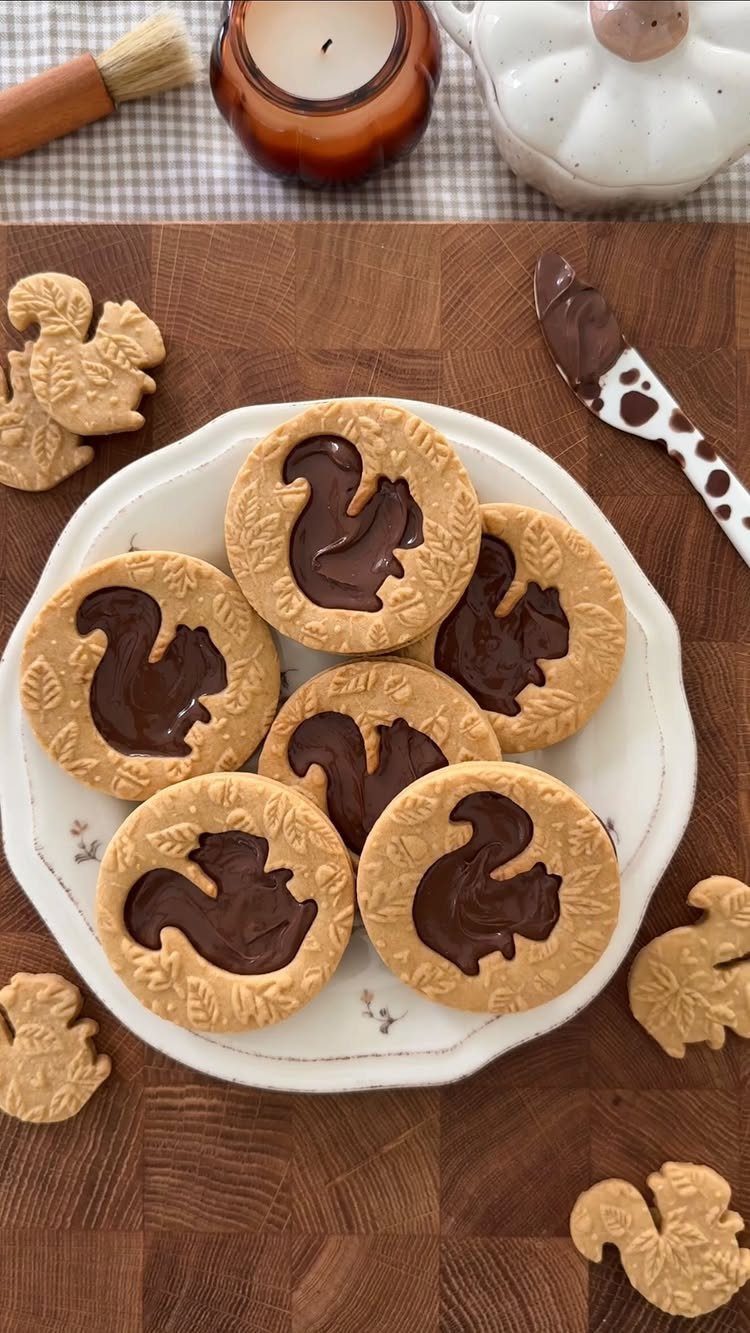
Cut a squirrel out of the middle of a round cookie, fill the hole with dark chocolate, and you have a window-style cookie with a woodland theme.
The squirrels you cut out bake into plain cookies, so one batch of dough gives you two looks and nothing gets re-rolled and wasted.
Fill the openings after baking, once the cookies are cool, with melted chocolate from a spoon. A chunky squirrel with a thick tail is less likely to break than a thin, curled one.
30. Heart-shaped Cinnamon Cookies
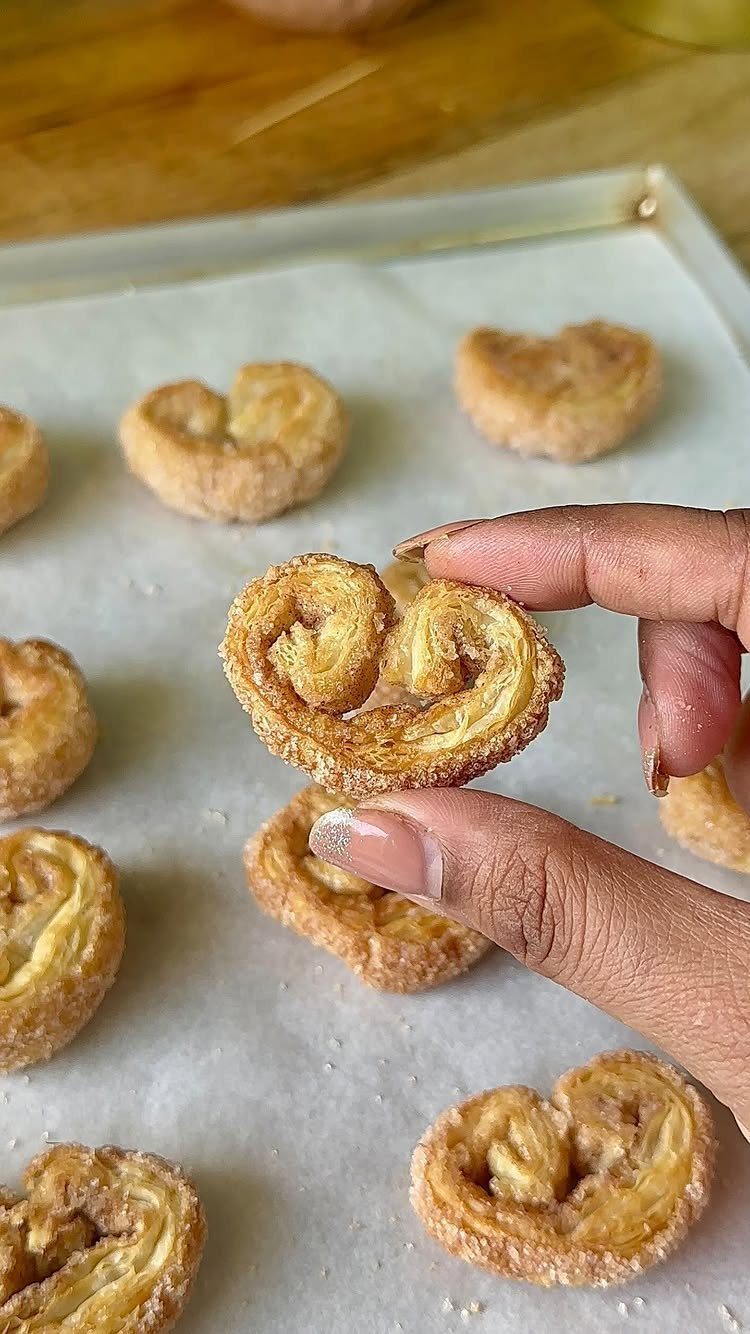
Cinnamon sugar goes on before the cookies bake, not after.
One baker spread sugar on both sides of the dough and then rolled it flat with a rolling pin, which presses the crystals into the surface so they don’t fall off.
Hearts are forgiving here because there are no thin tips to snap. Line the baking sheet with parchment, and the sugar that melts at the edges won’t weld the cookies to the pan.
These are quick enough for a Valentine’s Day weeknight.
31. Heart-shaped Iced Cookies
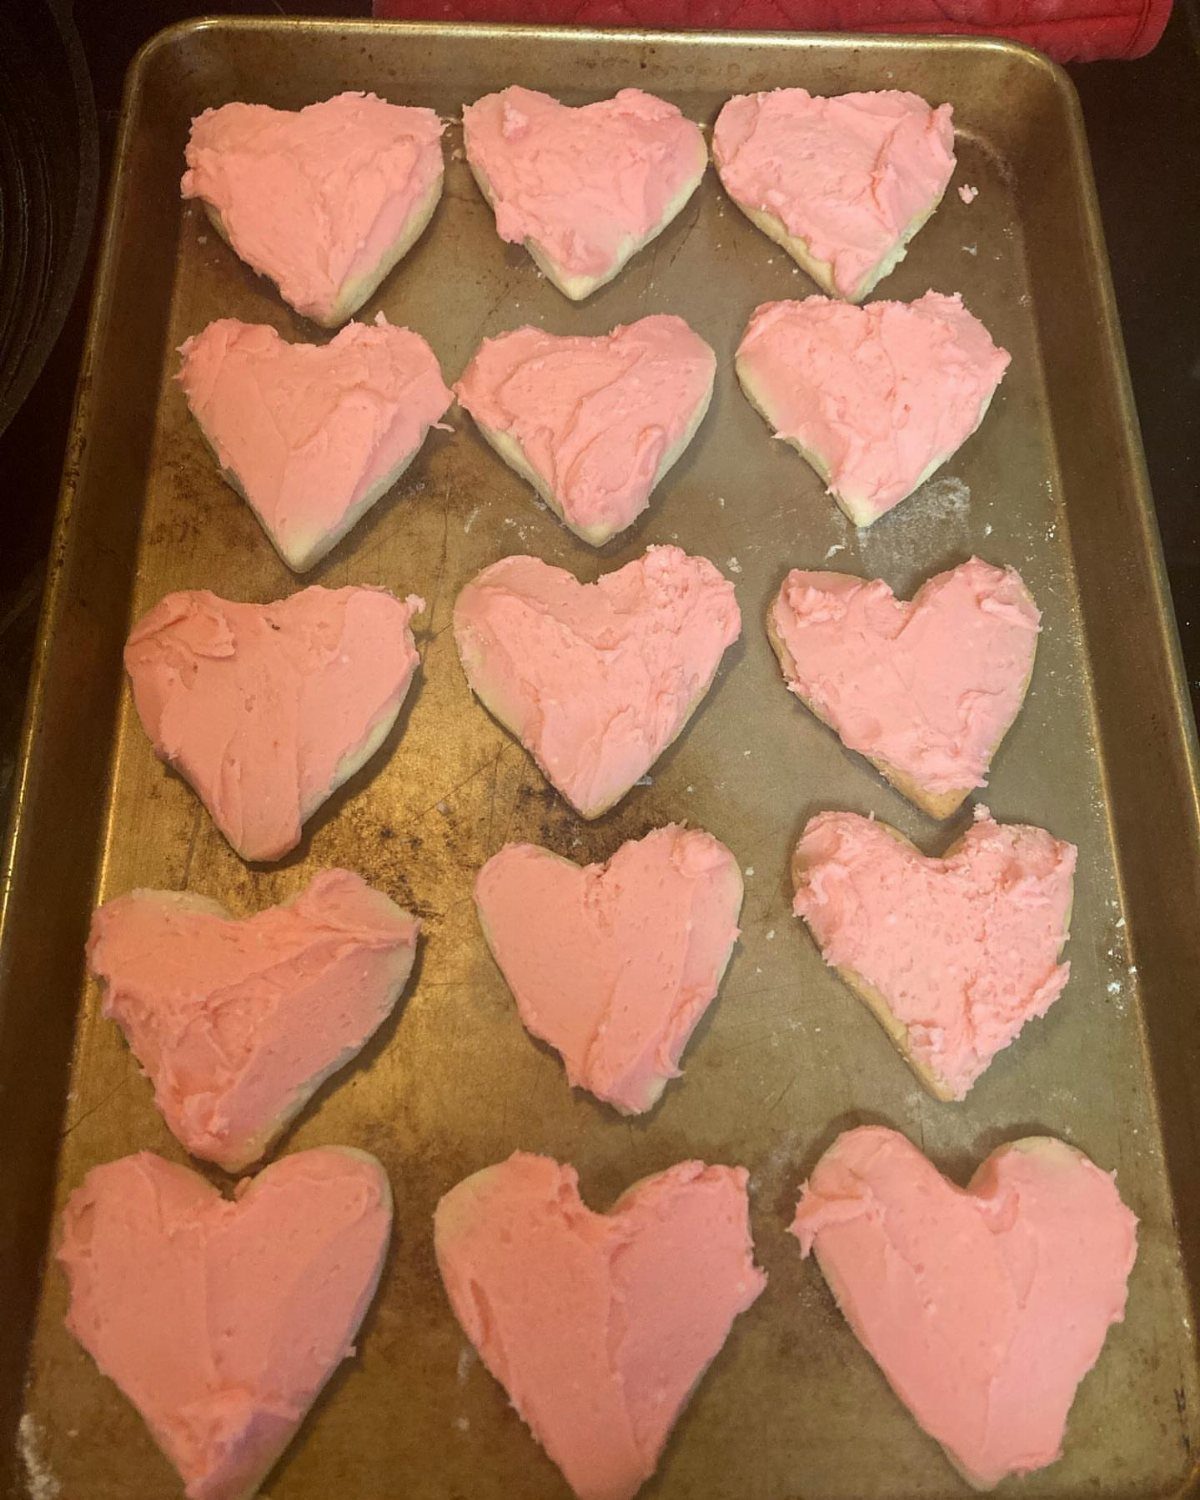
Pink frosting on a heart cookie reads as Valentine’s Day with no extra decoration. A single flat color also keeps the job quick, so a full baking sheet of fifteen is realistic on a weeknight.
Frost only after the cookies have cooled all the way.
Warm cookies melt the pink icing, and it slides off the edges. Spread it with the back of a spoon or a small offset spatula, and leave the frosting to firm up on the tray before you stack anything.
If you want a little more, add sprinkles right after frosting, while it’s still soft.
32. Heart-shaped Sugar Cookies
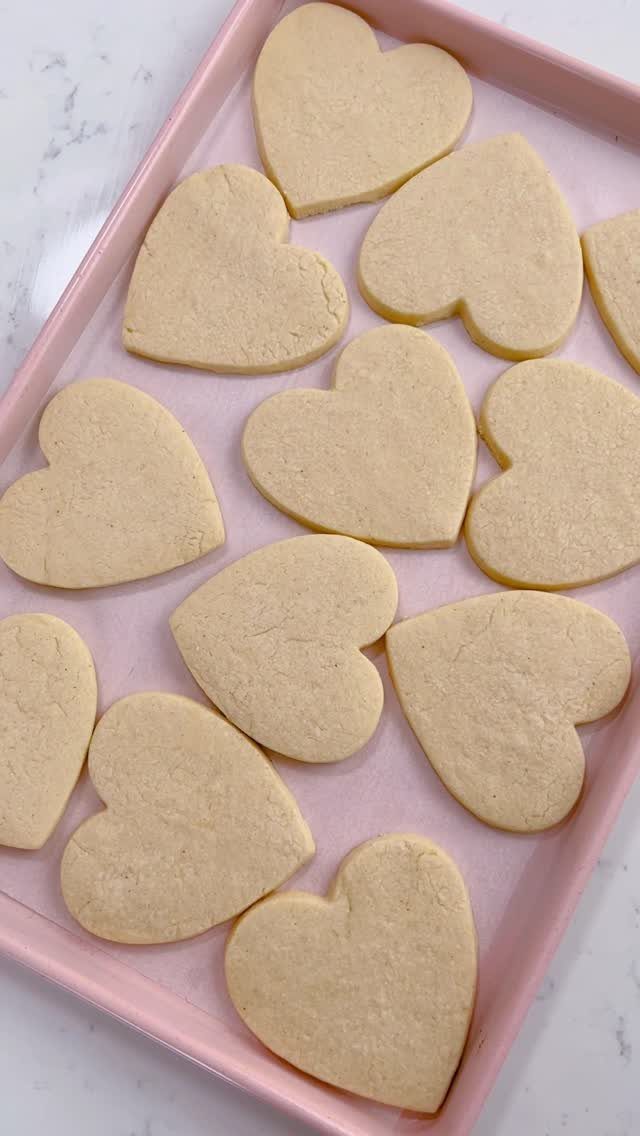
A plain golden sugar cookie cut into a heart works as a base for any decorating idea, and it’s just as good left plain. Skipping the icing means there’s no mixing, no drying time, and almost no cleanup.
Hearts bake evenly because they have no thin tips, so a tray of them tends to color the same all over.
Parchment keeps the bottoms from sticking to the sheet. Once the cookies are baked, slide them onto a wire rack.
Frost them later if you change your mind; an undecorated cookie takes icing well once it’s cool.
33. Heart-shaped Chocolate-dipped Cookies
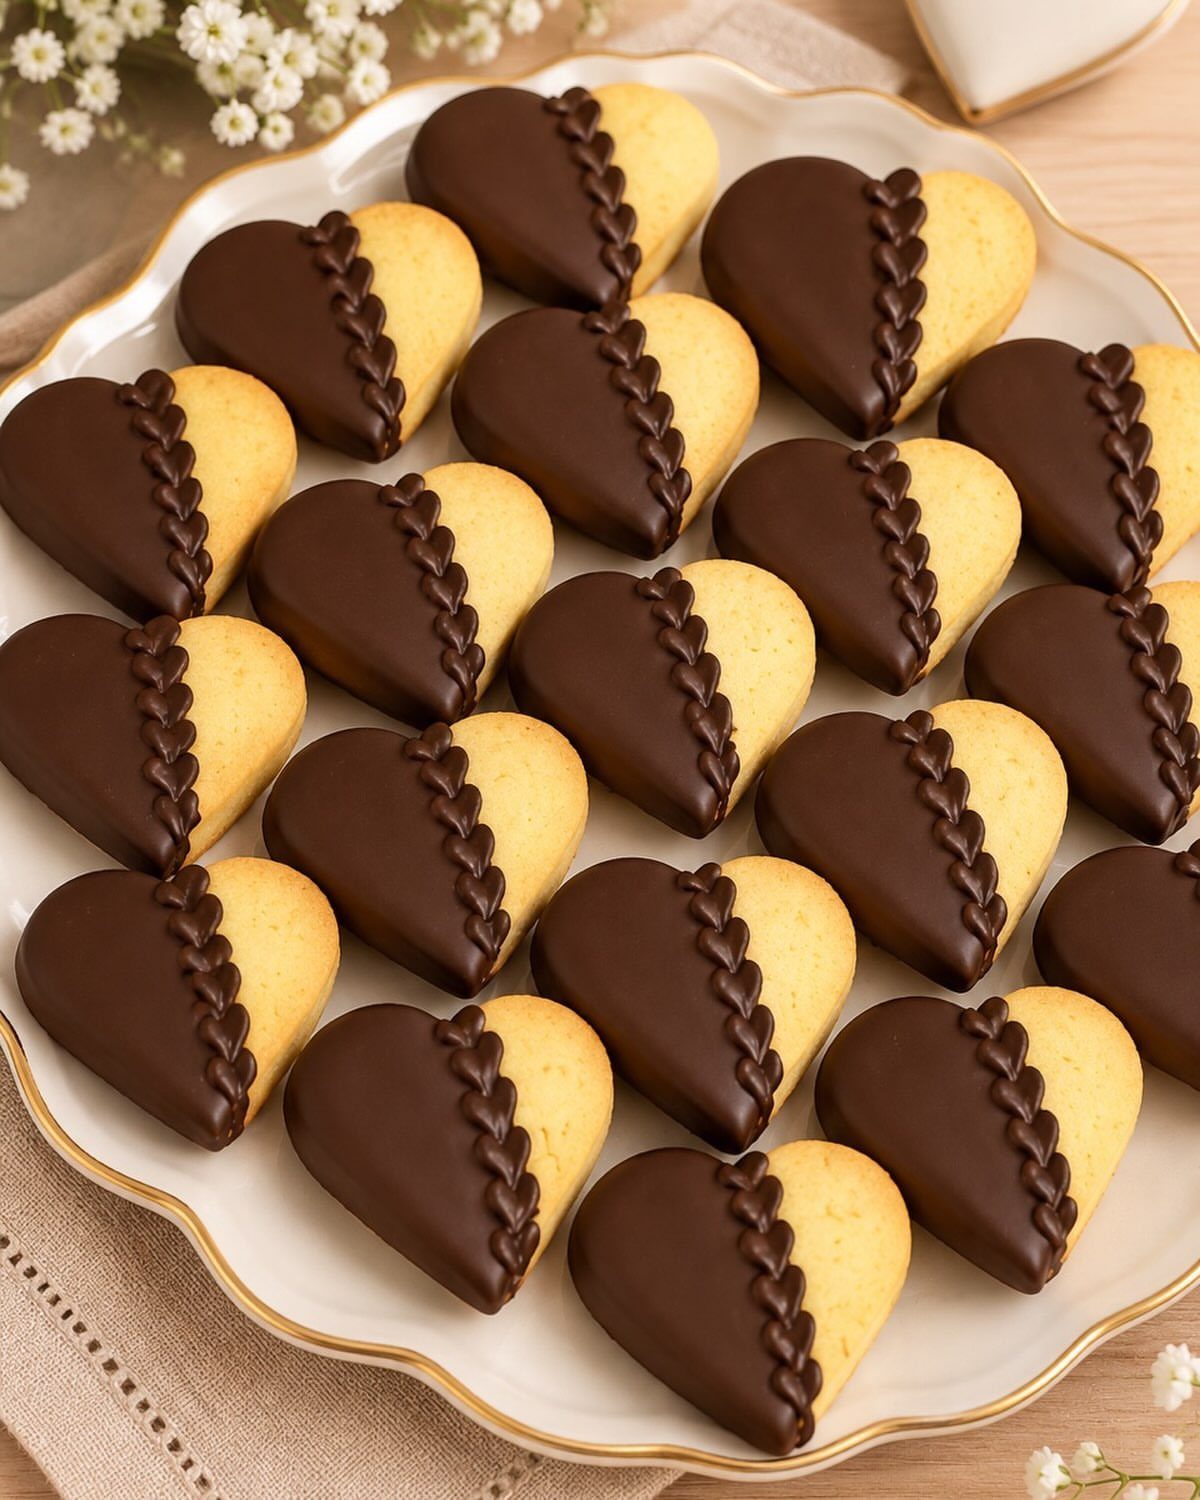
Dipping half of each heart in dark chocolate gives a cookie that looks finished with one step. A piped border along the edge of the chocolate, as on these, makes it look bakery-made.
Hold the cookie by the point of the heart, dip one half, and let the extra chocolate drip back into the bowl.
Set the cookies on parchment until the chocolate hardens. Make sure the cookies are fully cool first, since warm cookies melt the coating.
A white plate makes the dark chocolate stand out.
34. Heart-shaped Jam Cookies
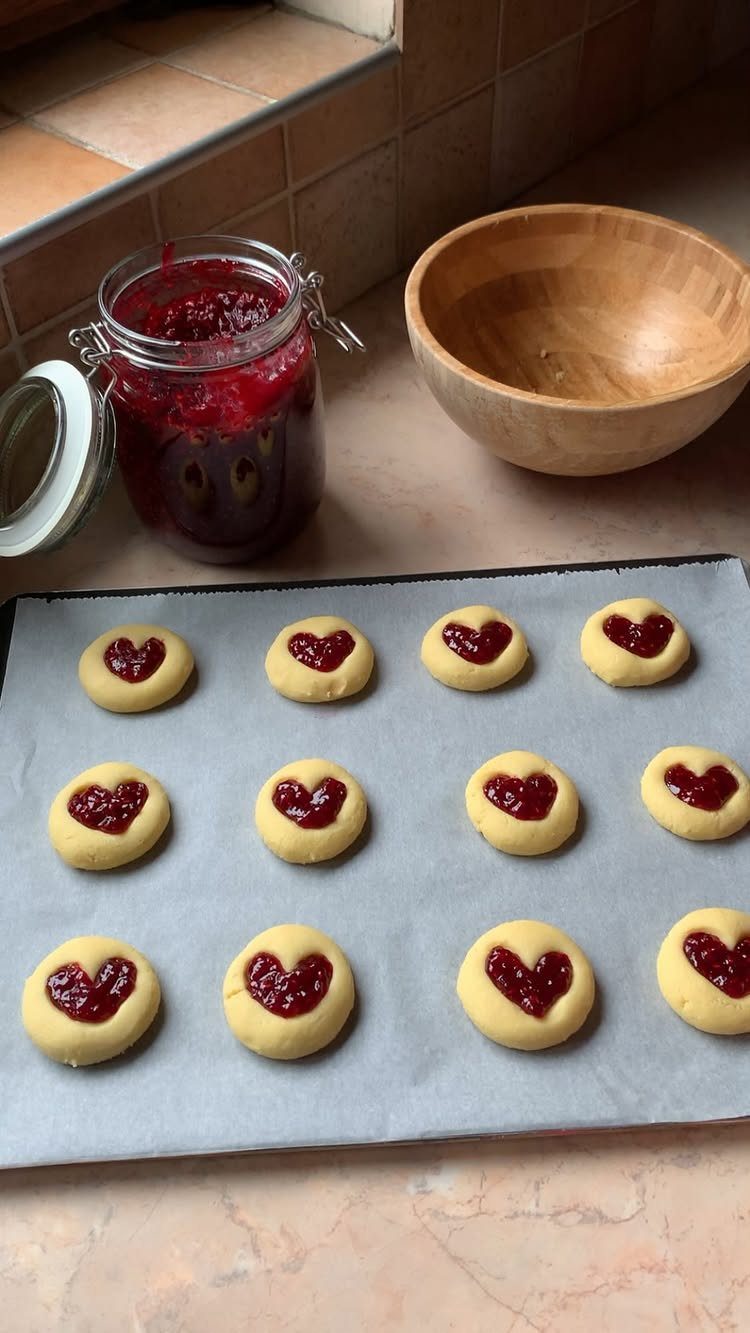
Here a heart is cut from the center of a round sugar cookie, and the opening is filled with red jam. The round cookie stays sturdy, which makes this friendlier for beginners than a cookie with thin edges.
Use a small heart cutter, and cut the centers before the cookies go in the oven.
A spoon is enough to fill each opening. Thick jam holds its shape better than a loose, runny one.
Keep the cookies on the parchment-lined sheet while the jam settles.
35. Hello Kitty Cutout Dough
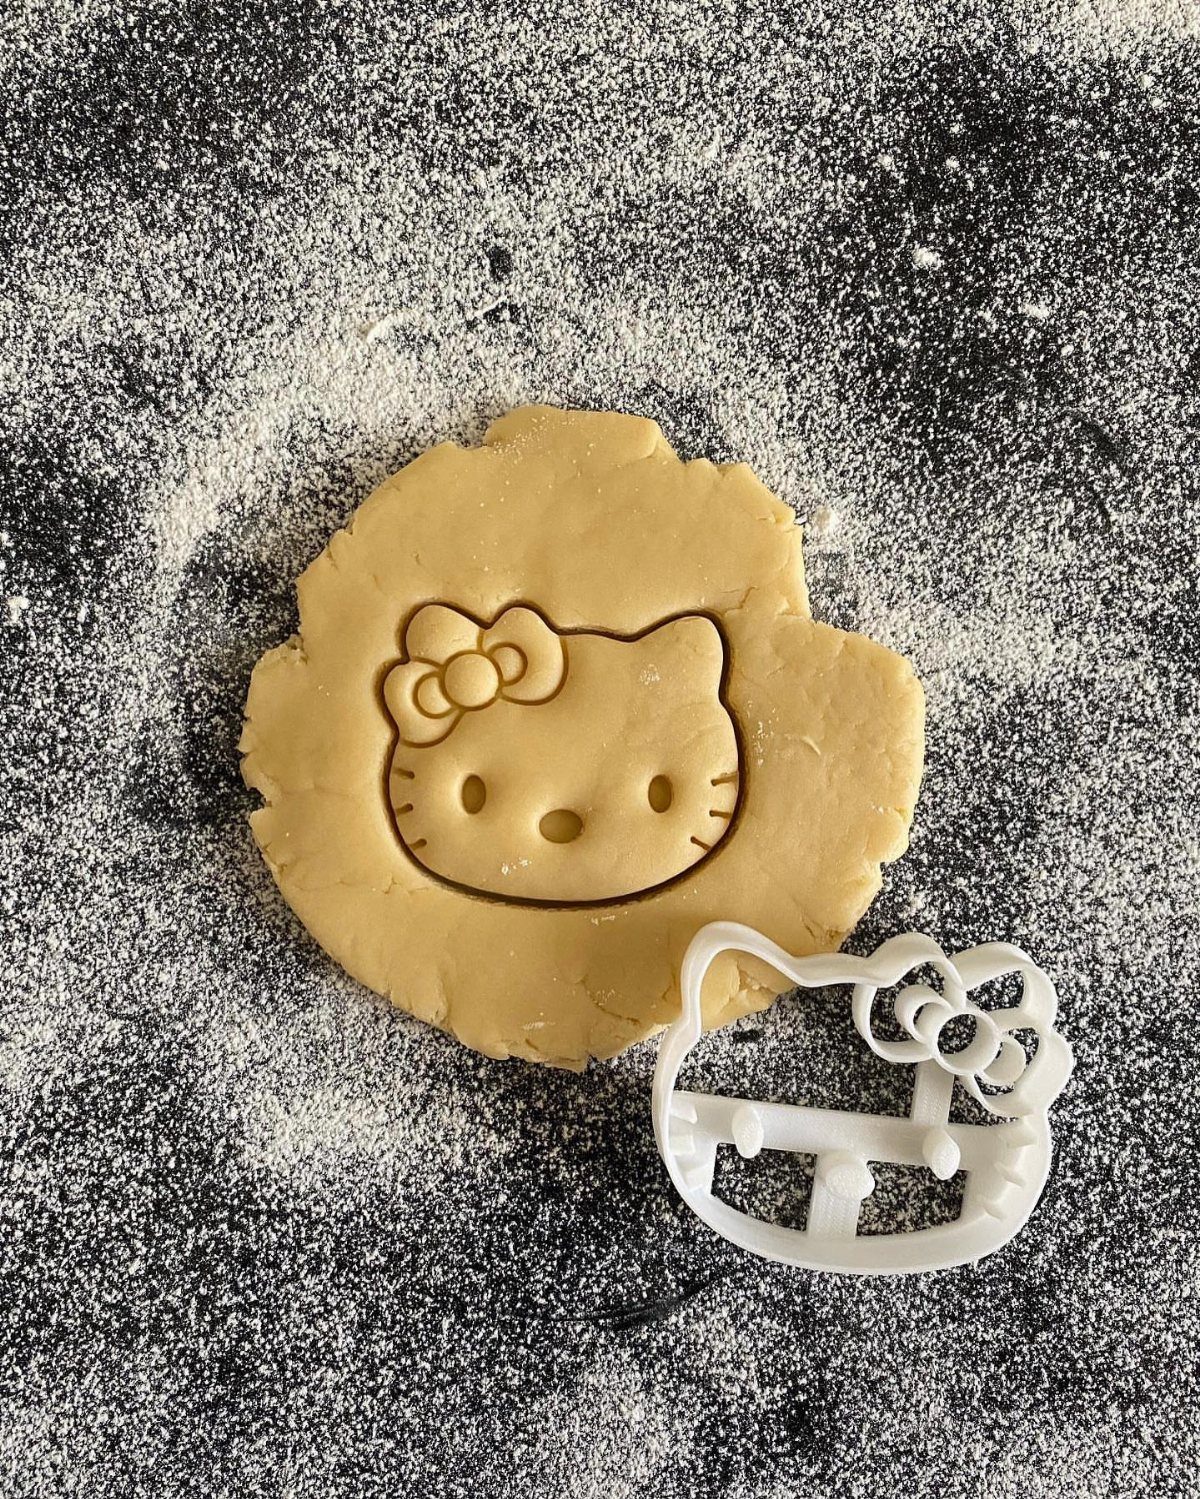
A plastic character cutter presses a clear outline into the dough, fine details included. Dust the cutter and the work surface with flour so the dough releases cleanly.
Press straight down, wiggle slightly, and lift the cutter away. Lift each shape onto the baking sheet with a thin spatula so the dough doesn’t stretch out of shape.
If the dough feels soft, put the cut shapes in the fridge for a few minutes before baking. The edges and details stay sharper.
Keep Dough Cold
A long rest also improves flavor and hydrates the flour, and 4 hours up to overnight is a good plan when you have the time.
Short on time? Chilling the cookie dough takes 2–4 hours in the refrigerator or 30–45 minutes in the freezer, and the dough’s edges start to dry after 24 hours.
A wrapped disk keeps up to 3 days in the refrigerator or up to 3 months in the freezer. It turns rock-hard with a long chill, which makes a rolled sheet easier to work with.
Cut from one portion at a time and keep the rest in the refrigerator. Once the shapes are on the tray, chill them for 10 minutes in the refrigerator or 5 minutes in the freezer so they spread less in the oven.
Roll and Cut Cleanly
Sandwich the dough between 2 sheets of parchment paper and roll it out right there. You get a clean surface with almost no extra flour, and flour is what makes cookies dry and tough.
The pin can only press down as far as the guides allow, so every cookie bakes at the same pace.
If you do flour the counter, flour the cutters too, and keep both light. For chocolate dough, dust with cocoa powder or a flour and cocoa mix so no white streaks show on dark cookies.
Roll smaller portions rather than one huge slab; they stick less and stay more even. Gather the scraps and press them together instead of kneading, and re-roll no more than 3–4 times.
Decorate and Store Cookies
Pick the finish by the look you want:
- Royal icing: crisp lines and detailed designs.
- Spread or pipe buttercream when you want a soft, creamy topping.
- Glaze icing: quick and glossy, for a simple finish.
- Press sprinkles onto the cut shapes before they go in the oven, and the decorating is finished when they come out.
For the freezer, leave the cookies bare, stack them in a large freezer-safe container with wax paper between the layers, and use them within 3 months.
Frequently Asked Questions
What cookies can you make into shapes?
Nearly any rolled dough works: sugar cookie, peanut butter, gingerbread, brown sugar cinnamon, chocolate, or chocolate chip made with mini chips.
Regular chocolate chips catch on the cutter and rip the edges, so mini chips are the better pick if you want a clean stamped shape.
Pick outlines without thin tips, like hearts, stars, eggs, and ghosts, because those hold up best when you lift them.
What are some unique cookies I can make?
Try a ghost sandwich: cut a window in the top cookie, spread jam between 2 ghosts, and dust with powdered sugar once cooled.
A window-style squirrel works too, with the cutout filled by melted dark chocolate. For a fried-egg cookie, cover a cut shape with white icing, wait until it hardens, then press a round yellow yolk into the middle.
To make stained glass cookies, cut a small window in the center of each one and fill it with crushed hard candy, which melts clear in the oven and looks like colored glass once it cools.
How thick should I roll cut-out cookie dough?
Most recipes land around ¼ inch. Roll closer to ⅛ inch for crisper cookies or up toward ½ inch for softer, thicker ones.
Keep the thickness even across the whole sheet so everything bakes at the same pace. Stars and other shapes with points can go a little thicker, which helps keep the tips from snapping.
Why didn’t my cookies hold their shape?
Warm dough is the usual cause. Soft dough spreads and blurs the edges, so chill it before you roll, then freeze the cut shapes for 10–20 minutes while the oven heats if they still feel limp.
Also check that the butter wasn’t too soft or overbeaten, that the cookies go on a cool, parchment-lined sheet, and that the tray isn’t crowded. If they still spread, cut back on the baking powder.
How do I tell if my cookies are baked?
Look for puffed centers that are no longer shiny and edges that are just turning golden. Most cut-outs take about 9–11 minutes at 350°F, with smaller cookies done closer to 9 minutes and large ones closer to 11.
Dark doughs hide browning, so judge them by whether the surface looks set. Leave the cookies on the hot pan for about 5 minutes so they firm up, then slide them onto a wire rack to finish cooling.