
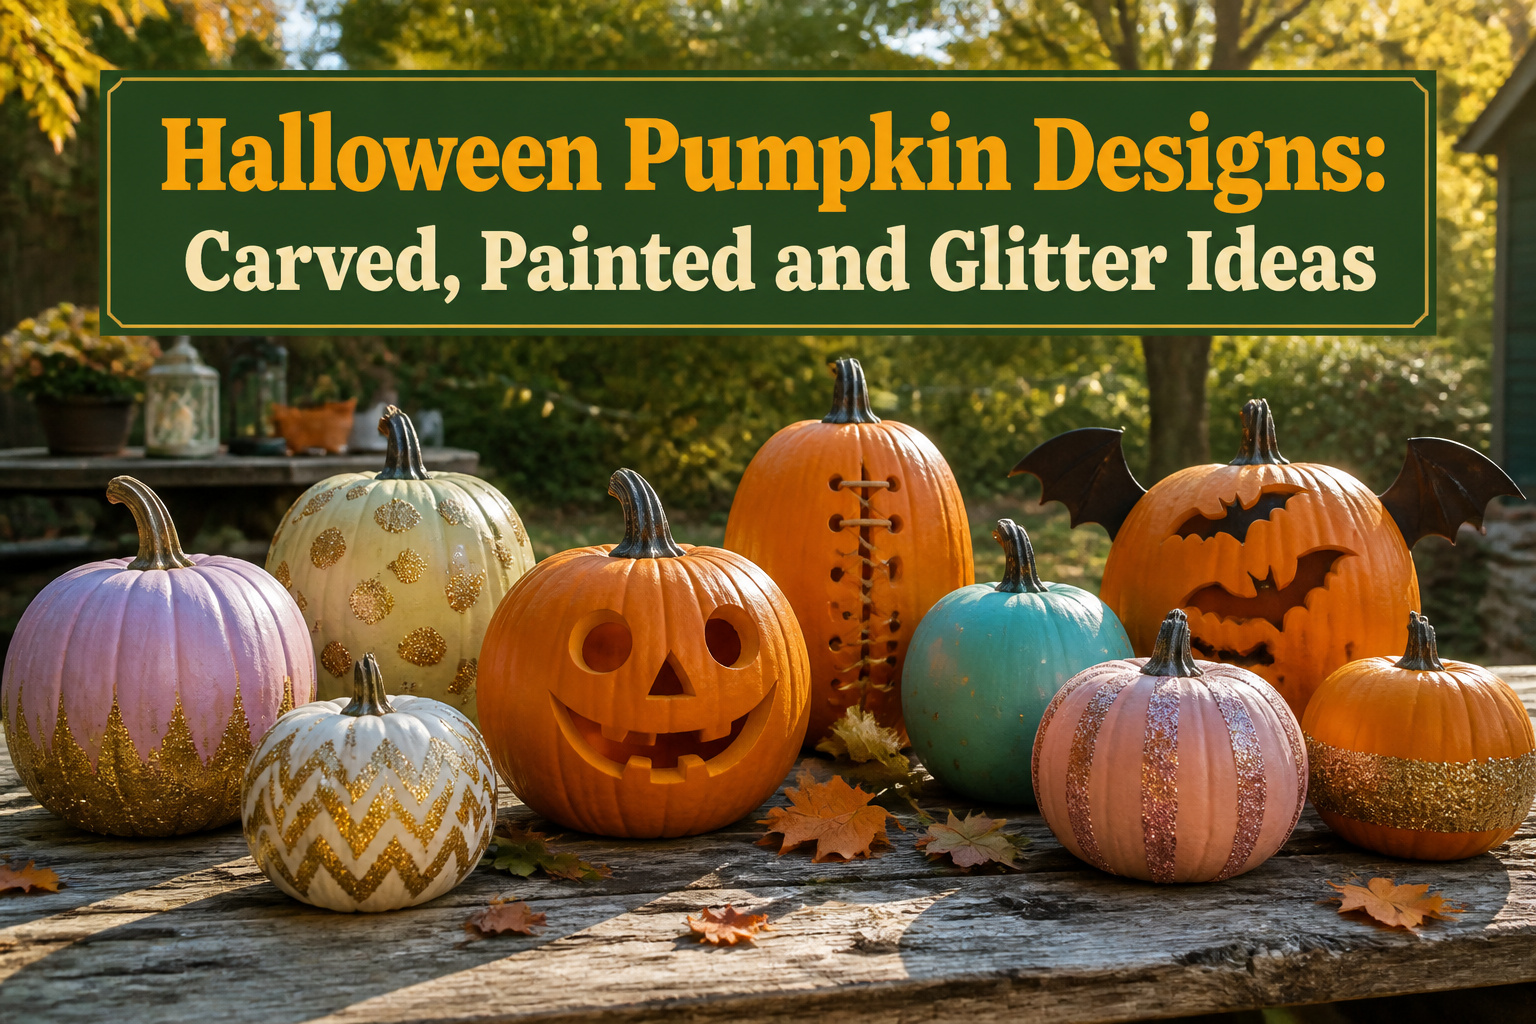
Halloween pumpkin designs range from butcher’s twine and lacerated rinds to pastel base coats and glitter plates, and the deciding factor is how long you need them to survive October weather.
Carved stitches and bat wings glow for three to five days before collapse; painted surfaces hold two to three weeks longer because the intact skin keeps bacteria out.
That durability gap is what makes the potato peeler and the spray adhesive can worth keeping on the same shelf as the serrated knife.
1. Stitchface Pumpkin
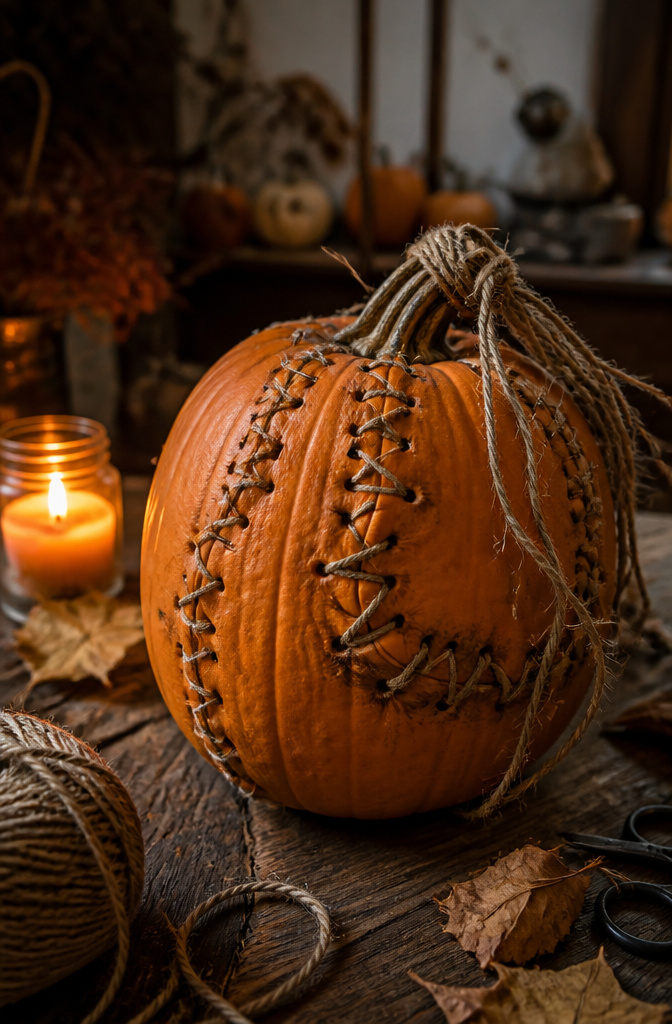
A stitched pumpkin starts with vertical gashes carved deep enough to open the flesh. Run twine through the slits from top to bottom, pulling tight so the sections pucker and gap.
Use thick butcher’s twine or cotton cord, not embroidery floss, or the lines disappear into the orange skin and the tension collapses overnight.
The raised stitch comes from lacing across the outside, not sewing through. Knot the twine at the stem, then zigzag it through the gashes like you are closing a wound.
Leave the ends long and trailing. A little fraying helps.
The appeal is the rough look of someone working fast, in low light, with whatever was in the junk drawer. Uneven spacing, crooked lines, and one side pulled tighter than the other all read as deliberate.
Try to make it symmetrical and you lose the effect. Go for the look of something assembled in a hurry and left out in the damp, and it works every time.
2. Big Pumpkin Eating a Small Pumpkin
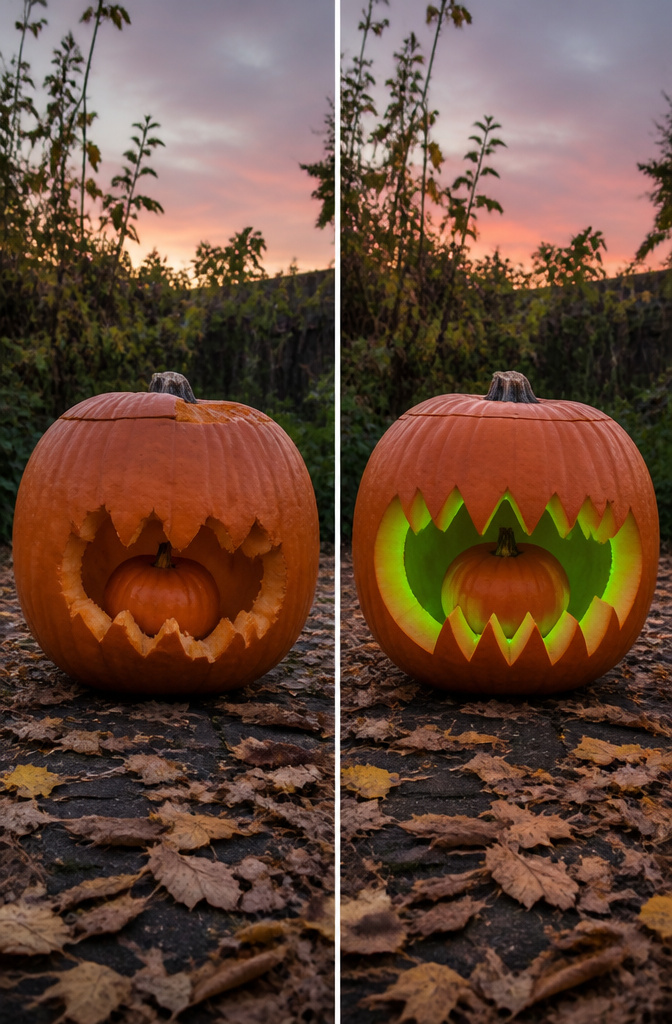
Two pumpkins are the move here, but the size gap has to be obvious or the joke falls flat. You want a large one and a clearly smaller one, not a medium and a small that look like siblings.
Measure the smaller pumpkin’s width before you cut, then carve an opening in the big one just wide enough to wedge the little guy in at an angle.
The teeth take the most time. You can skip them if you are short on time; the design still reads as a bite without them.
Use toothpicks to anchor the small pumpkin inside the mouth so it does not slip overnight. A green light underneath turns the whole thing from cute to properly spooky after dark.
3. Bat Pumpkin Design
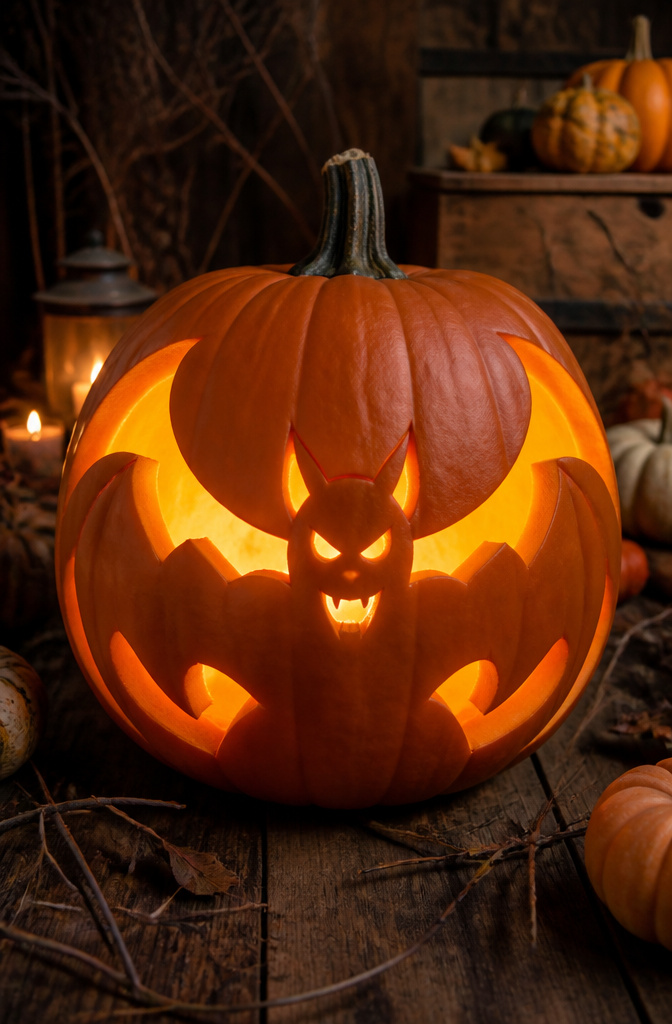
A bat carved into a pumpkin works best when you use the whole surface as the body and let the wings wrap around the sides.
Cut the wing shape in one continuous line from near the stem, down through the widest part of the pumpkin, and back up to meet the body on the other side.
The natural curve of the pumpkin gives the wings a lift that reads as motion even when the pumpkin sits still.
For the face, keep the cutouts small and place them in the upper third.
Two narrow eyes and a simple V-shaped mouth give you the classic silhouette, or swap in a wider, angular jawline if you want the Batman nod without quoting the logo directly.
The bat reads in daylight because the raised body stays orange against the carved wing cavities, so don’t over-carve the center.
Light it from within and the wings glow as two solid crescents while the body stays dark. A taller pumpkin works better than a squat one here; you need the vertical space for the ears and the wingspan.
Scrape the interior wall behind the wings to about half an inch thick so the light comes through evenly, but leave the body section thicker so it blocks light and stays visually solid.
4. Classic Jack-O-Lantern
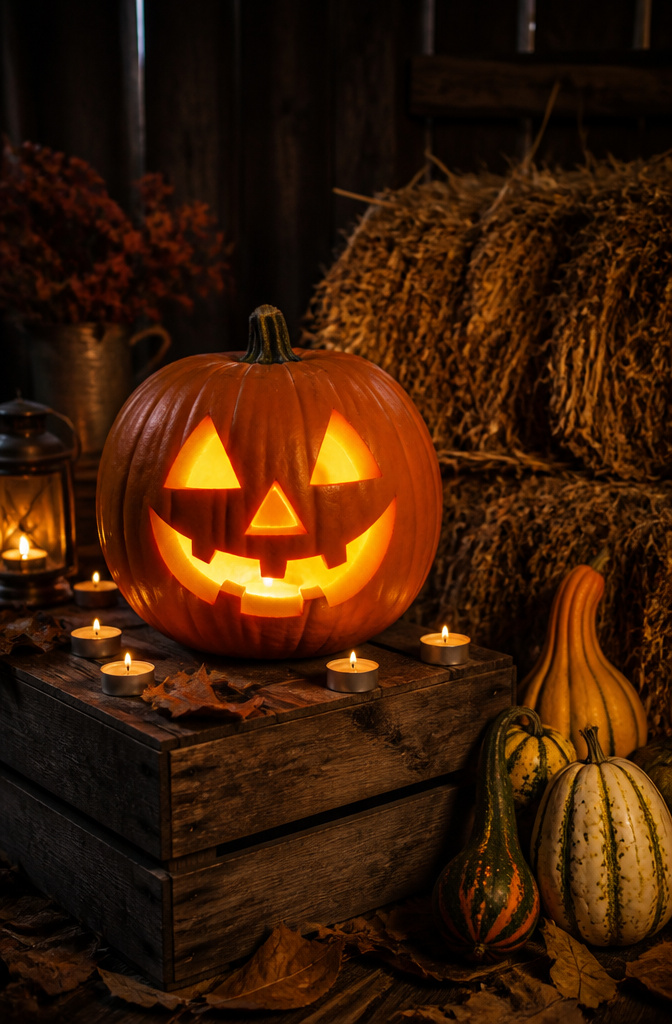
The triangular eyes and jagged smile still outlast every trend because they read instantly from the sidewalk. This pumpkin explains itself.
That is why it persists.
Most sloppy results come from one mistake: cutting the shapes too small. A jack-o-lantern needs negative space.
When the eyes are dime-sized slits, the candle inside cannot push light through, and the face collapses into a dark smudge. Cut the triangles at least two inches on each side, even on a smaller pumpkin.
The proportions feel wrong as you draw them, but the illumination fixes that after dark.
The mouth is where beginners consistently misjudge. They cut the jagged teeth as individual triangles pointing up and down, then watch the pieces fall out entirely.
What you want instead is a continuous upper or lower jaw. Cut the smile line clean through, then carve triangular notches that stay attached at the base.
The teeth remain solid, the structure holds, and you still get that classic grimace without the pumpkin grinning itself to pieces on your porch step.
5. Zombie Pumpkin
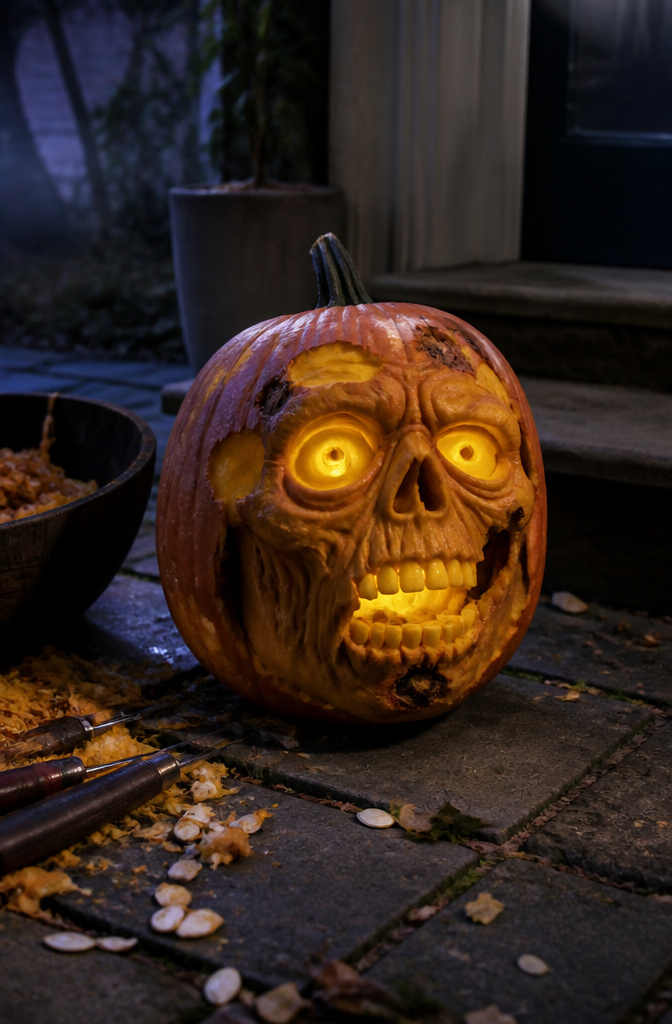
A zombie pumpkin lives or dies on texture. You want the sunken cheeks and torn skin that read as rotted flesh, not a generic monster face.
Start with a linoleum cutter or a clay loop tool for the shallow, scooped areas. The curved blade pulls out clean crescents of pumpkin wall without slicing straight through, which is what gives you that collapsed, hollow-cheek look.
Wall thickness is your depth control. Thinner walls behind the eyes and mouth let light glow through as a sickly yellow.
Leave thicker ridges between those hollows to cast shadows and read as raised, swollen tissue. Work from the outside in, taking shallow passes.
If you cut too deep on the first try and punch through to the hollow center, that spot is gone. There is no patching a pumpkin.
You will have to redesign around the hole, shrinking the eye or moving the gash sideways, and the revised shape almost always looks forced.
For the gore, scrape the inner wall until it is almost translucent in streaks. Those patches transmit the brightest light and read as exposed membrane.
A wire brush dragged across the surface in short strokes adds stringy, fibrous detail that catches candlelight like torn sinew. Skip the fake blood.
It pools at the base and rots within two days, and the smell is worse than the look.
6. Skull Pumpkin
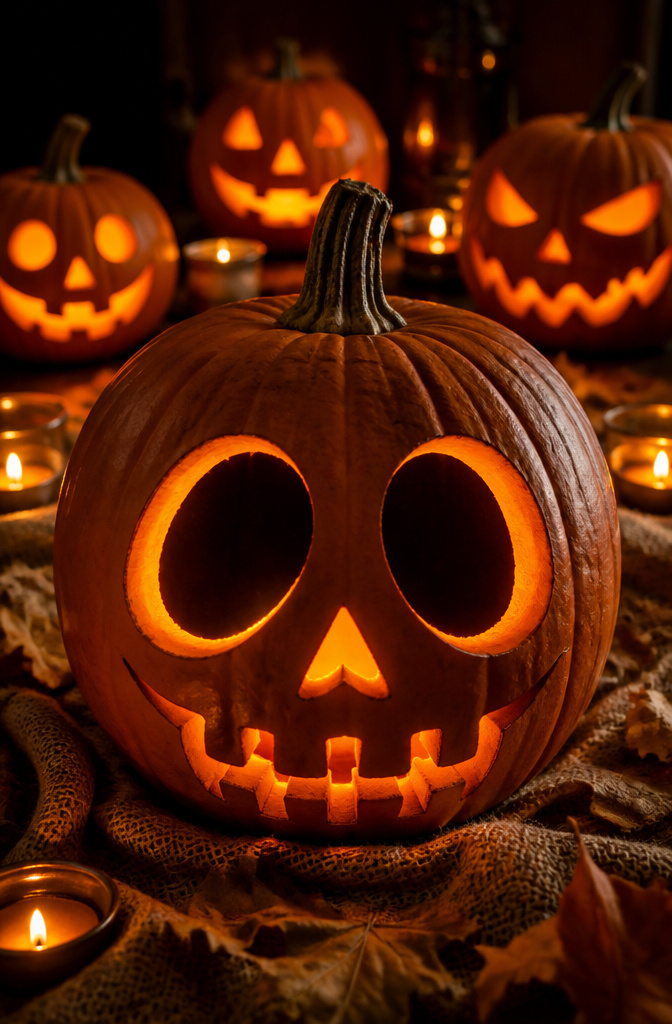
A skull reads on a pumpkin only if you simplify the anatomy to three big shapes: two oversized eye sockets and a triangle nose sitting above a row of teeth.
The jaw and cheekbones you see on an actual skull do not translate at pumpkin scale; they blur into ridges that look like random gouges from ten feet away.
The eye sockets need to go deeper than you think. Pumpkin walls are thicker at the center and thinner toward the stem, so the first cut shows orange pulp where you expected hollow shadow.
Scrape out another quarter inch of flesh behind each eye, working from the center outward, until light passes through as a flat black void rather than a glowing orange bowl.
This is the difference between a skull and a surprised cat.
The nose cavity is the weak point. A triangle cut straight through removes a wedge of wall that the upper teeth sit directly below, leaving a narrow bridge of flesh that cracks under its own weight during carving.
Instead, cut the nose as a shallow triangle first, no more than half an inch deep, then hollow the interior with a loop tool from the inside of the pumpkin before you open the full shape.
The face keeps its structure, and you still get the dark void you need between the eyes.
7. Scarecrow Pumpkin
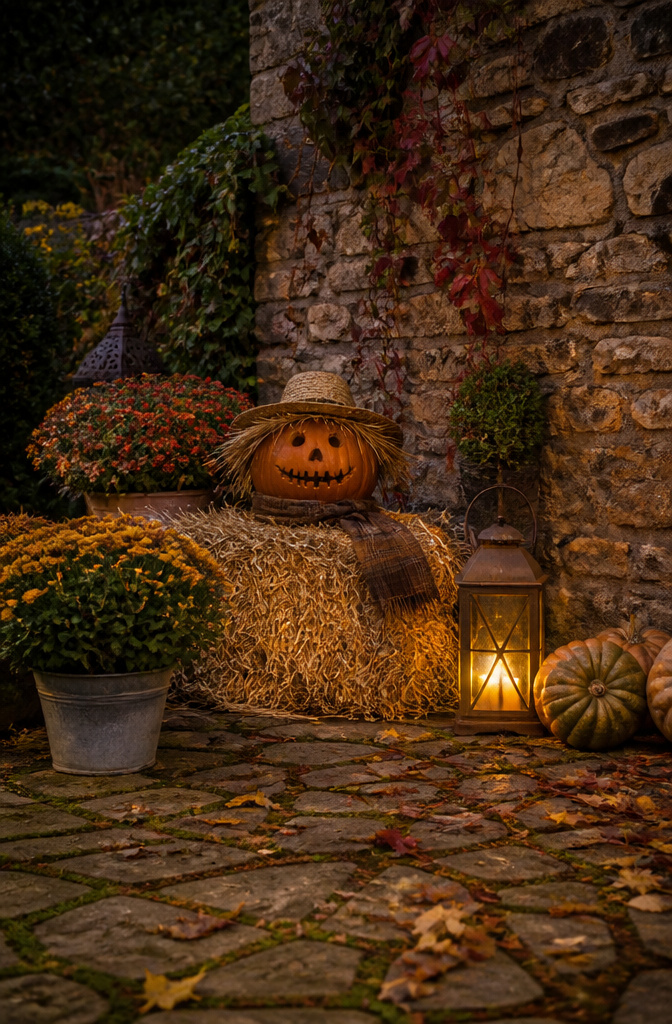
A scarecrow pumpkin works best when you build the face around the hat, not the other way around. Choose a tall, narrow pumpkin so the brim of a straw hat or an old bucket hat sits naturally above the eyes.
For the expression, keep the mouth simple: a stitched line or a few short cuts that look like burlap seams. The eyes should be uneven and slightly lopsided; perfect symmetry works against the scarecrow look.
Attach straw or fabric with hot glue instead of pushing wires through the rind. Piercing the wall lets air in and collapses the pumpkin in about three days.
Run a line of glue along the hat brim, press handfuls of raffia or torn muslin into it, and hold for ten seconds. Do the same for a patchwork scarf at the neck.
Work fast: hot glue sets hard on cold pumpkin skin.
Add all accessories after you carve. The face needs to breathe overnight so the cut edges skin over slightly; glue fumes trapped in fresh openings turn the flesh soft and gray.
Set the pumpkin out for a day, then glue the hat and patches in place the next morning. The straw will dry and stiffen as the pumpkin cures, which only helps the weathered look.
8. Painted Pumpkins
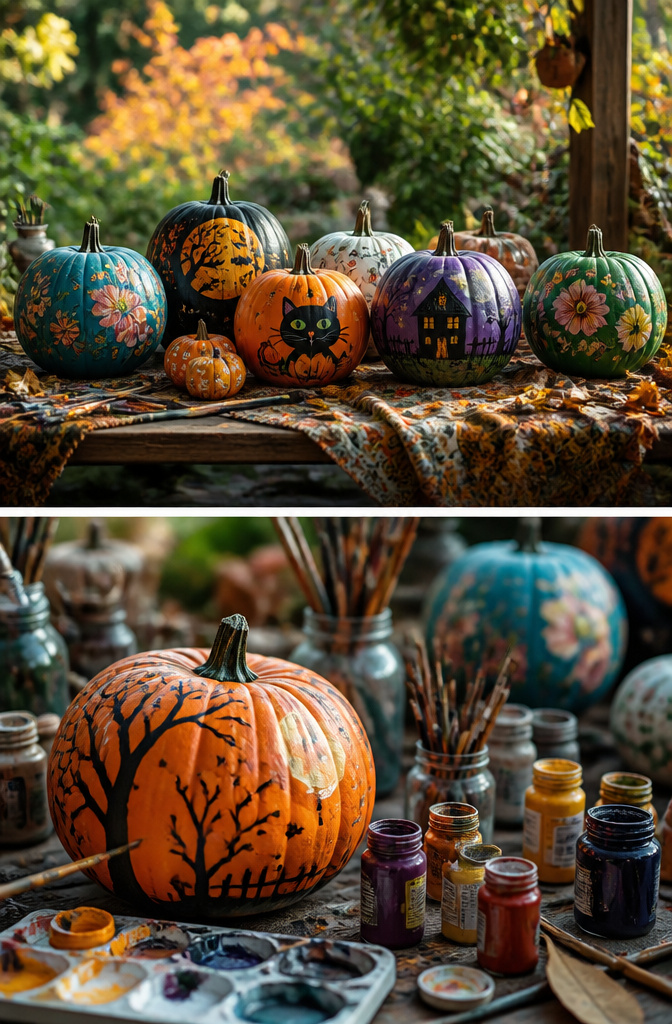
Paint gives you halloween pumpkin designs that carving simply cannot. Where a knife limits you to holes and lines, a brush lets you paint moonlit scenes, geometric patterns, or a perfect replica of your kid’s favorite cartoon character.
Start by scrubbing dirt from the pumpkin’s surface, then wipe it down with rubbing alcohol. Any residue left behind will fight the paint, and by day three you’ll find flakes in your porch boards.
Sponge brushes and basic craft paint are the right tools here; the sponges hold enough pigment to cover the waxy skin in two coats and cost less than a latte.
For sharp-edged designs, tape your stencil flat and dab paint straight up and down. Pull the stencil off while the paint is still wet.
Waiting risks a ragged edge where the paint bridged the cut.
Painted pumpkins last two to three weeks longer than carved ones because the intact skin keeps bacteria and air out. No shriveling, no collapse, no fruit flies collecting in the hollow center.
You still get the seasonal decoration; you just skip the mid-October funeral march to the compost bin.
9. Glitter Pumpkins
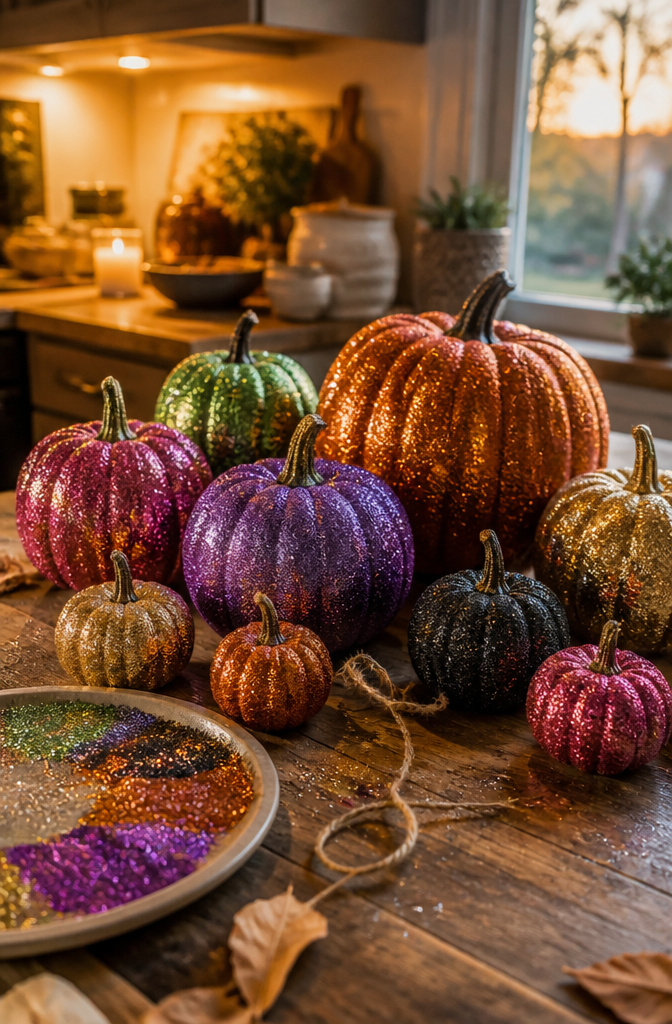
Glitter pumpkins are the easiest way to get Halloween sparkle without touching a knife, and they work best on small pumpkins you can carry through the door before rain hits.
A pumpkin that fits on a windowsill or mantel is the right size; anything big enough to need both arms stays outside where wind and dew strip the glitter into sad streaks.
Spray adhesive holds longer than glue brushed on by hand, especially through the temperature swings of October nights.
Work over a sheet of newspaper inside a cardboard box, not a bare table, unless you want your kitchen floor to twinkle until spring.
Press the pumpkin straight down into a plate of glitter rather than sprinkling from above; less floats into the air, and you get an even coat on the first try.
Seal the finished pumpkin with a clear acrylic spray so the sparkle survives being moved around. Without that top coat, you will find glitter on the dog, the couch, and your kid’s lunchbox for weeks.
10. Pastel Pumpkins
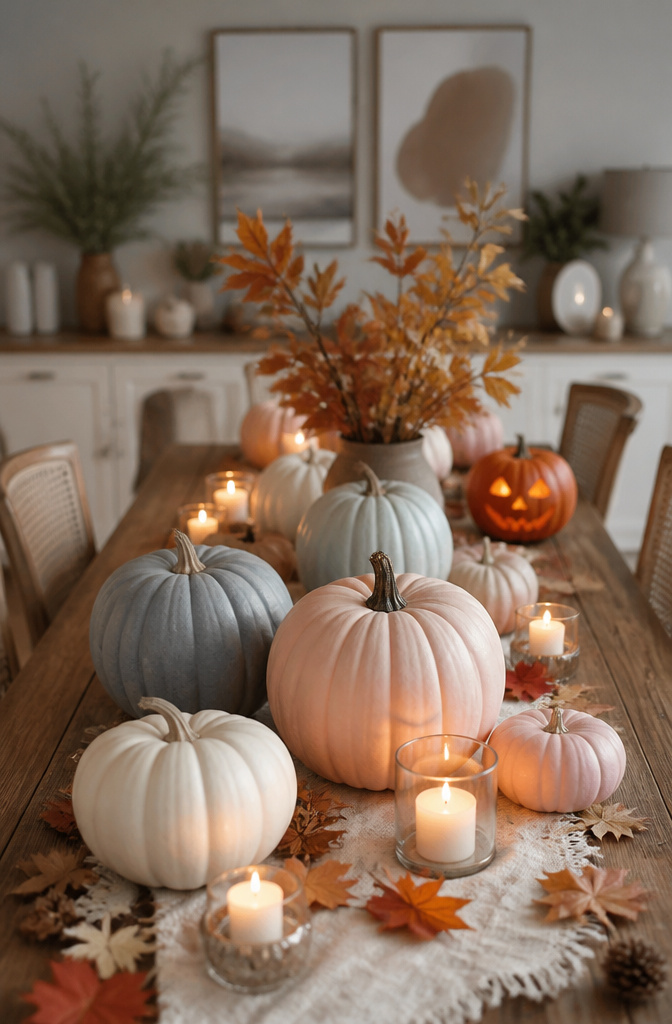
Pastel pumpkins work when you want Halloween on the table without the usual orange-and-black shout. Start with a base coat of warm white or very pale gray straight over the orange rind.
These two tones cover in two to three coats, where cooler pastels like mint or lavender need four or more and still read uneven against the pumpkin’s natural warmth.
The orange underneath is not your enemy here; it is the undertone that makes the final color feel grounded rather than Easter-egg.
In a mixed display, set these quieter pieces where the eye lands after the carved jack-o’-lanterns. They function as visual rest, giving the traditional designs more impact by contrast.
A pale pumpkin beside a flickering face also reads as moonlight, which is a logic that holds up on a porch or a dining table. Skip the glitter on these; matte finish keeps the softness intact.
If you have children carving at the same table, the painted pastels give them a role in the finished look without requiring knife skills.
Carving Techniques That Save the Design
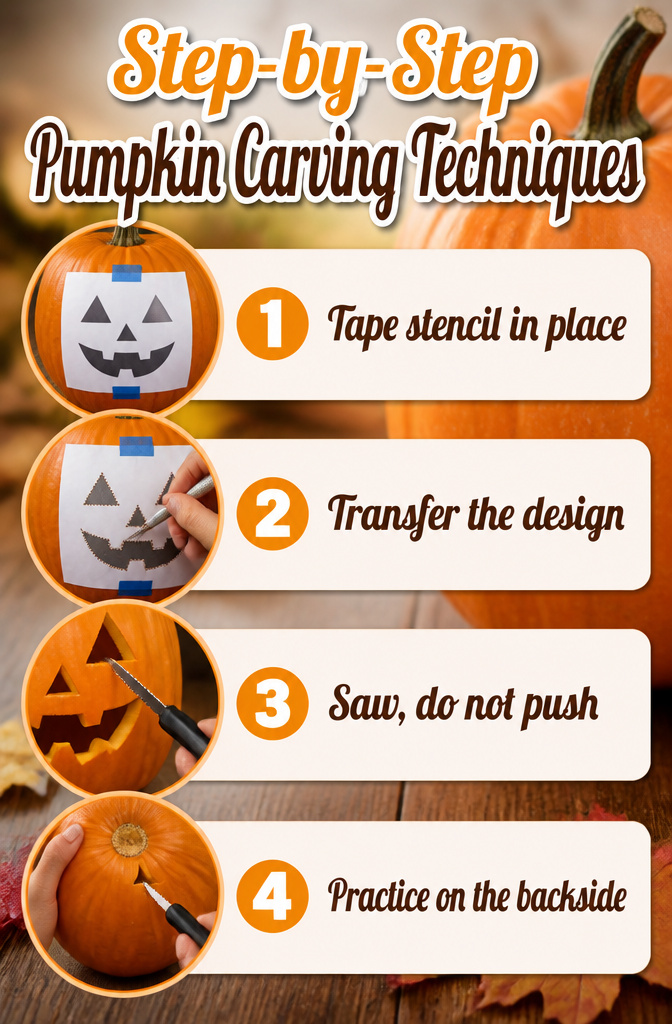
- Tape your stencil in place with painter’s tape or stencil tape. Because the surface is curved, you will have to work in sections and adjust as you go. A random pattern using select shapes from the stencil is easier to manage than forcing the whole design.
- Transfer the design before you cut. Poke dots through the stencil along the lines, or trace with a tool that scores the skin without punching through. This gives you a roadmap you can actually see once the paper comes off.
- Saw, do not push. A back-and-forth motion with a small serrated knife keeps control and follows curves. Pushing straight through is where the face collapses or the tooth breaks off.
- Practice the motion on the back or the bottom first. The rind there is the same thickness, and a mistake does not cost you the design you planned to show.
Painting vs. Carving
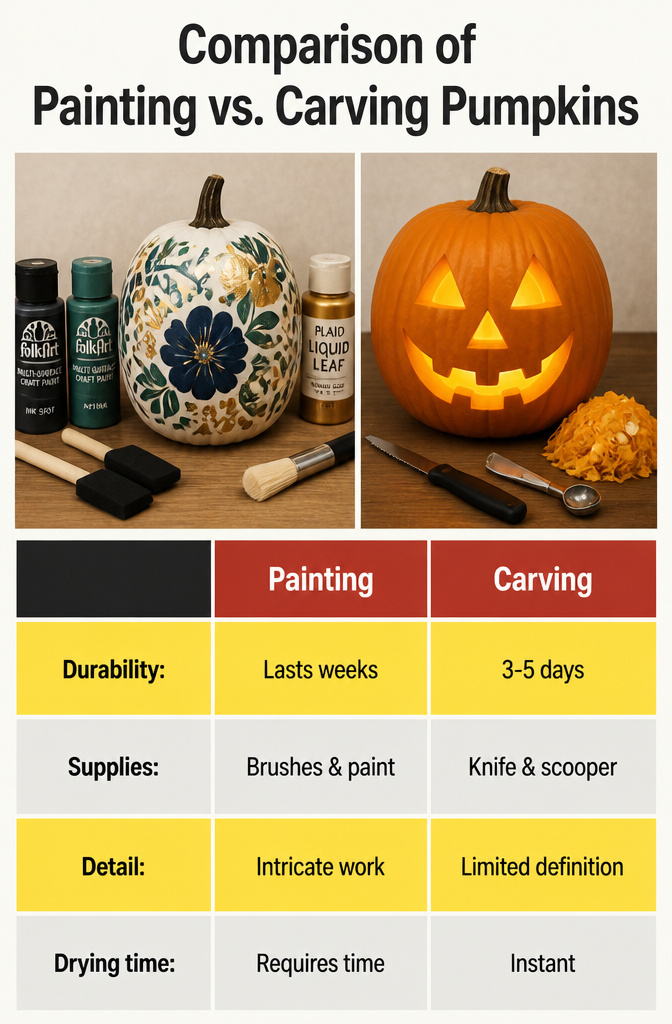
Painting a pumpkin wins on durability. A carved jack-o’-lantern softens inside three to five days in October weather.
Paint stays intact for weeks, which matters if you set designs out early or have kids who want their work visible through the holiday.
The difference comes down to supplies. Carving needs a knife and a scooper.
Painting needs sponge brushes, craft paint, and if you want shimmer, glitter paint. FolkArt Multi-Surface Craft Paint in colors like "Ink Spot" or "Patina" grips pumpkin skin well; Plaid Liquid Leaf gives a metallic finish if that fits your theme.
Foam pouncers or stencil brushes work better than regular bristles for covering the curved surface without streaks.
Some designs simply work better painted. Intricate patterns, fine lettering, or anything requiring a honeycomb stencil lose definition when carved.
Paint also keeps the pumpkin intact, so it lasts as decor and still roasts afterward if you want the flesh.
Carving is faster and needs no drying time, but painted surfaces let you layer colors and fix mistakes with another coat rather than starting over.
Last-Minute Designs Under 30 Minutes
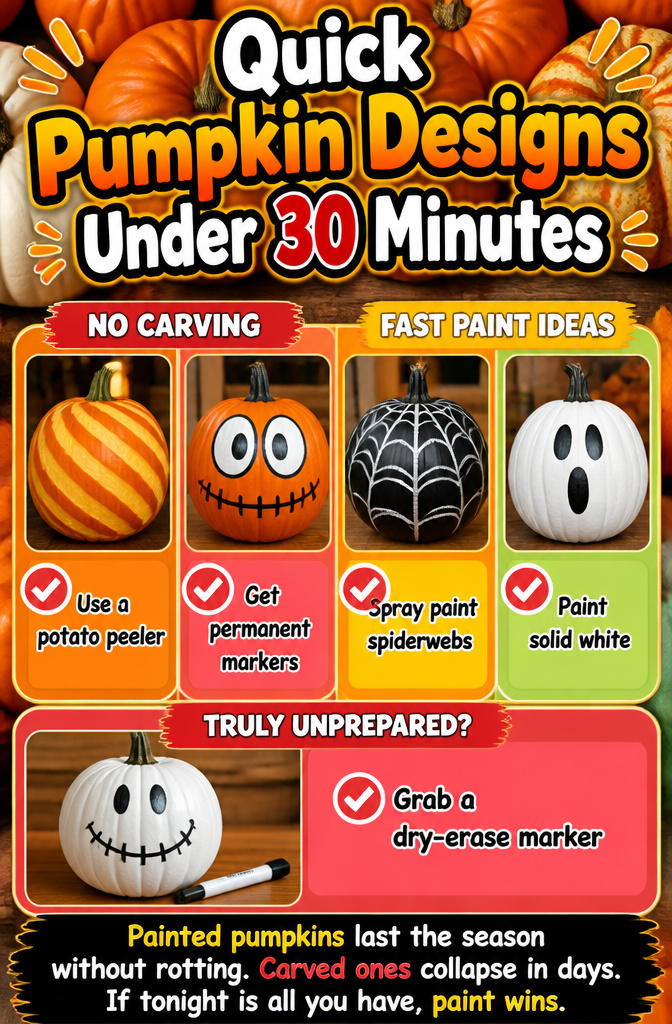
A kit and a free evening are not required to get a pumpkin on the porch. These four designs finish fast with what you already own.
- Grab a potato peeler first for shallow etching. Strip away skin in stripes, chevrons, or a simple spiral. No candle needed; porch light does the work.
- Skip carving entirely and reach for permanent markers. Draw wide cartoon eyes and a stitched-looking mouth in thick black lines. Fill color in with highlighters if you have them. Takes ten minutes, no scooping.
- Masking tape and spray paint make a spiderweb fast. Tear tape into thin strips, stick a radial pattern, paint the whole pumpkin black, and peel before it dries fully. Peel when tacky, not dry, or the tape shreds.
- For the truly unprepared, just paint the thing solid white and draw a face with a dry-erase marker. Smudge and redraw until you like it, or leave it blank and call it a ghost.
Painted pumpkins last the season without rotting. Carved ones collapse in days.
If tonight is all you have, paint wins.
Frequently Asked Questions
What are some easy pumpkin carving ideas?
Use a potato peeler for shallow etched stripes or spirals, draw cartoon faces with permanent markers, create a spiderweb with masking tape and spray paint, or paint the pumpkin solid white and draw a face with dry-erase marker so you can smudge and redraw until you like it.
Carved pumpkins collapse in days, so if time is short, paint wins.
How do you paint a pumpkin?
Start by scrubbing dirt from the surface, then wipe it down with rubbing alcohol so residue does not fight the paint. Sponge brushes and basic craft paint cover the waxy skin in two coats.
For sharp-edged designs, tape your stencil flat and dab paint straight up and down, then pull the stencil off while the paint is still wet to avoid ragged edges.
What are the best materials for painting pumpkins?
Sponge brushes and basic craft paint are the right tools; the sponges hold enough pigment to cover waxy pumpkin skin in two coats. FolkArt Multi-Surface Craft Paint grips pumpkin skin well, and Plaid Liquid Leaf gives a metallic finish.
Foam pouncers or stencil brushes work better than regular bristles for covering curved surfaces without streaks.
What are some creative pumpkin decorating ideas?
For non-carved options, try painted moonlit scenes, geometric patterns, glitter pumpkins, or pastel pumpkins in warm white or pale gray over the orange rind.
What are some easy pumpkin design ideas for kids?
Painted pumpkins give children a role without requiring knife skills. Try solid colors with drawn faces, pastel pumpkins that read as moonlight, or simple glitter pumpkins sealed with clear acrylic spray.
Permanent markers and highlighters let kids draw wide cartoon eyes and stitched mouths in about ten minutes with no scooping needed.
Painted pumpkins also last two to three weeks longer than carved ones, so kids’ work stays visible through the holiday.