The best snack ideas for halloween party range from assembly-only to oven-required, and the deciding factor is how much time you actually have before the doorbell rings.
Most of these fall apart if you build them too early, banana ghosts brown within minutes of cutting, and even Oreo spider legs start drooping after two hours.
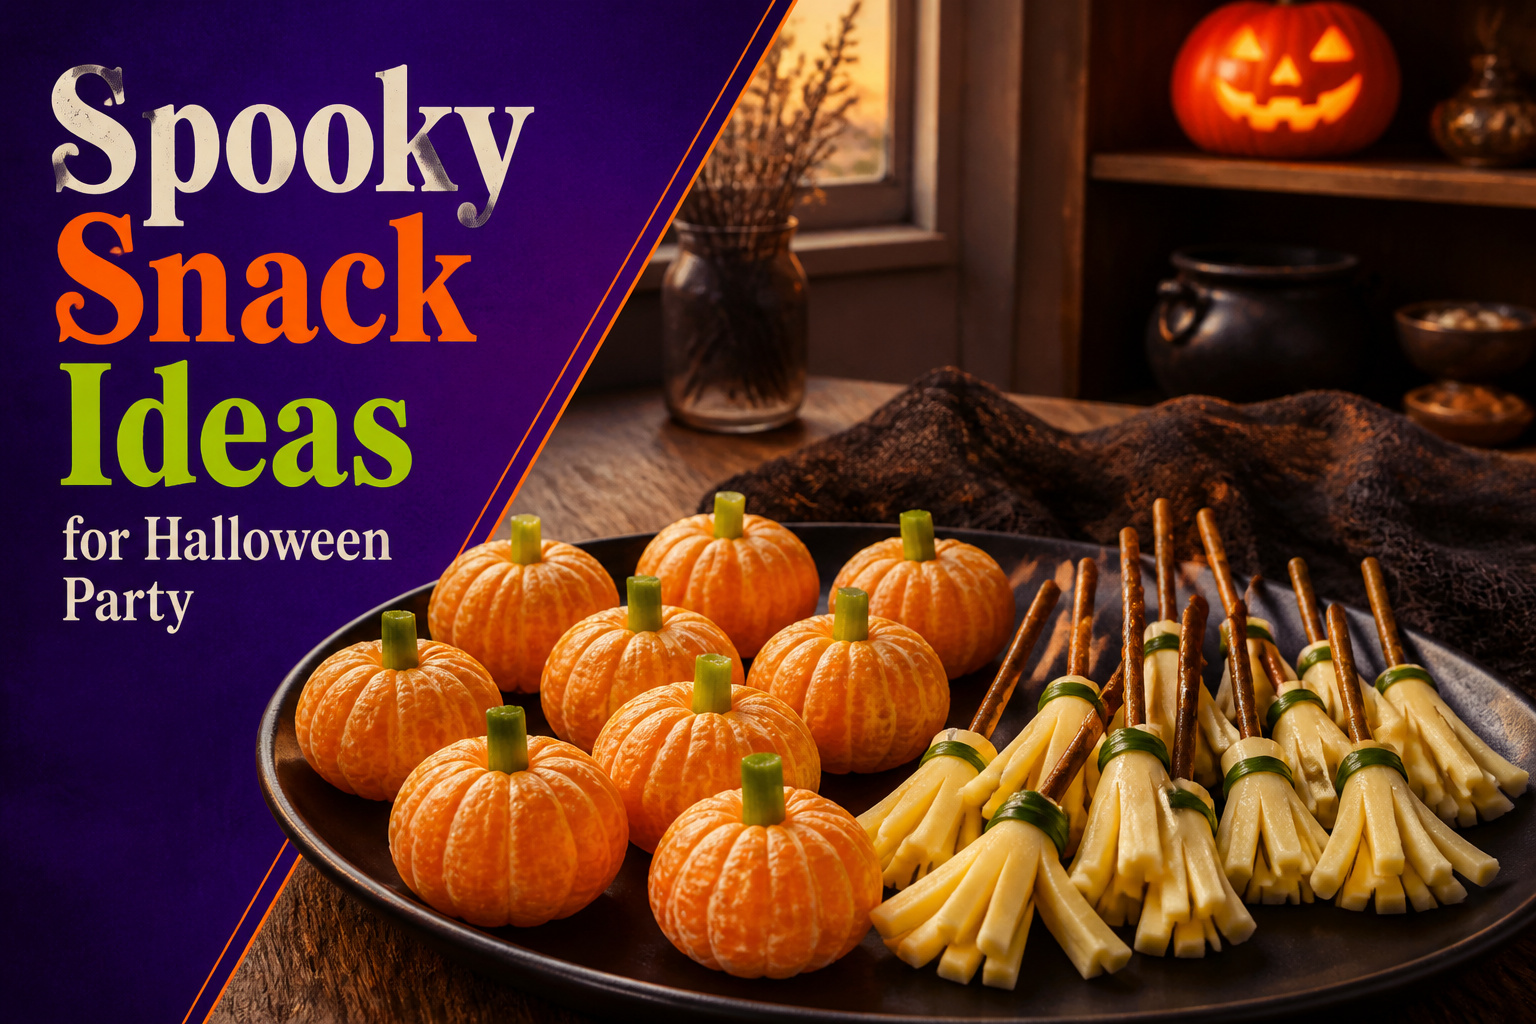
The ones that do hold, like clementine pumpkins and cheese broomsticks, need nothing but peeling and slicing.
1. Mummy Dogs
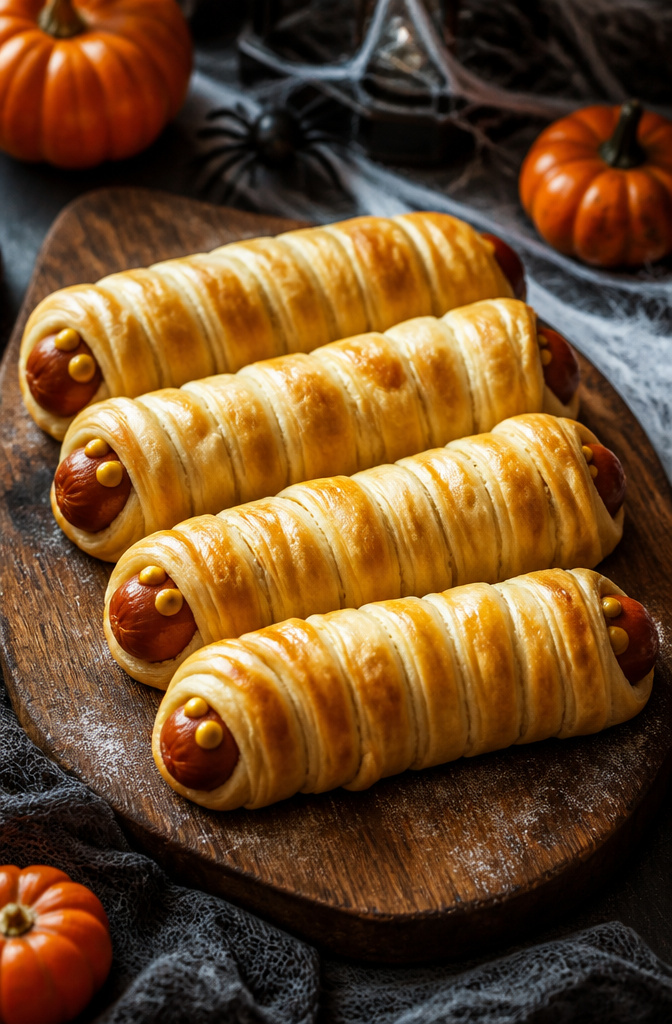
Hot dogs wrapped in crescent dough show up in five of the top-ranking Halloween party roundups for a reason. They work, they take fifteen minutes of actual effort, and even picky eaters grab two.
Start with refrigerated crescent roll dough, the kind in the cardboard tube. Unroll it and cut each triangle into thin strips, about a quarter-inch wide.
Wrap the strips around each hot dog in crisscross layers, leaving a small gap near one end for the face.
That gap is where the mustard eyes go, so do not cover it completely or you will end up dotting mustard on dough and watching it slide off in the oven.
Bake at the temperature printed on the crescent package, usually 375°F, for 12 to 15 minutes. The dough should turn golden and feel set to a light touch.
Taste of Home’s test kitchen puts the total time at 35 minutes and yields 20 appetizers, which squares with real prep once you factor in unrolling, slicing, and wrapping.
The recipe creator, Jessie Sarrazin from Livingston, Montana, notes that refrigerated crescent rolls make these snacks quick and easy, and that they are great by themselves or with a included dipping sauce.
Refrigerated crescent rolls make these Halloween snacks quick and easy. They’re great by themselves or with the included dipping sauce!
A 35-minute total with store-bought dough means you can assemble these while the oven preheats and still have time to clean the cutting board before guests arrive.
2. Witches’ Brooms
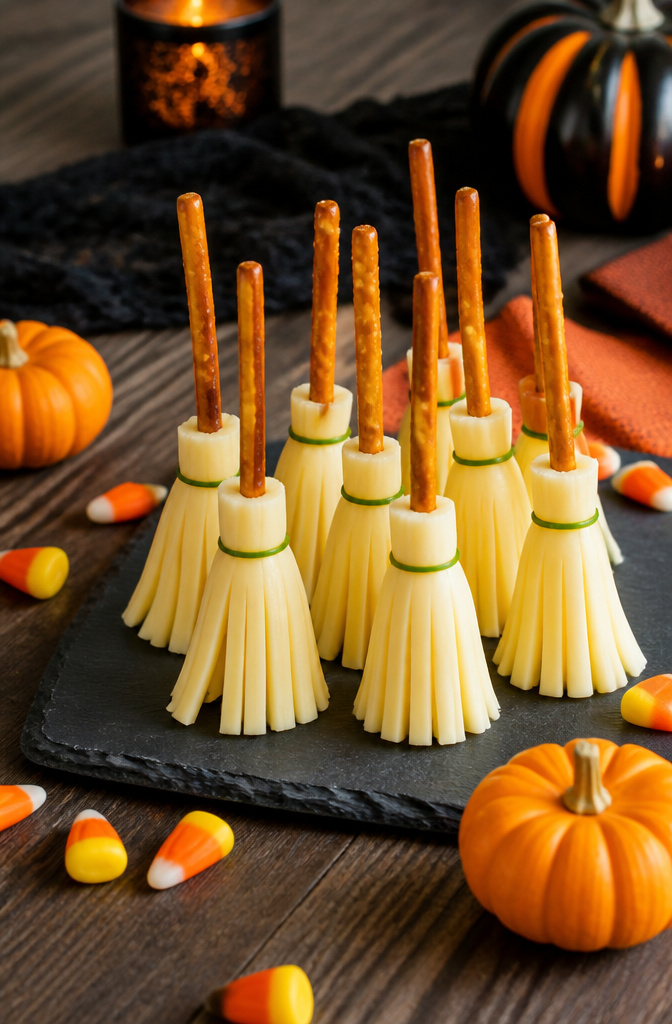
String cheese broomsticks are the snack idea every list mentions, and there is a reason. You need two ingredients: individual string cheese packets and small pretzel sticks.
Unwrap one cheese stick and use a knife to cut thin slices into one end, stopping about an inch from the other end.
Fan those slices out so they look like bristles, then push a pretzel stick into the uncut end for the handle.
Slice the cheese halfway up rather than all the way through so the broom frays without falling apart.
If you push the pretzel into a solid end with no prep cuts, the cheese splits down the side and the broom falls apart.
The partial slices give the pretzel a clean entry point and keep the bristles fanned where you want them.
These hold up fine on a snack board for a couple of hours, so you can assemble them ahead.
They add a little protein to the table, which balances the sugar-heavy stuff, and kids can grab them without napkins or mess.
3. Banana Ghosts
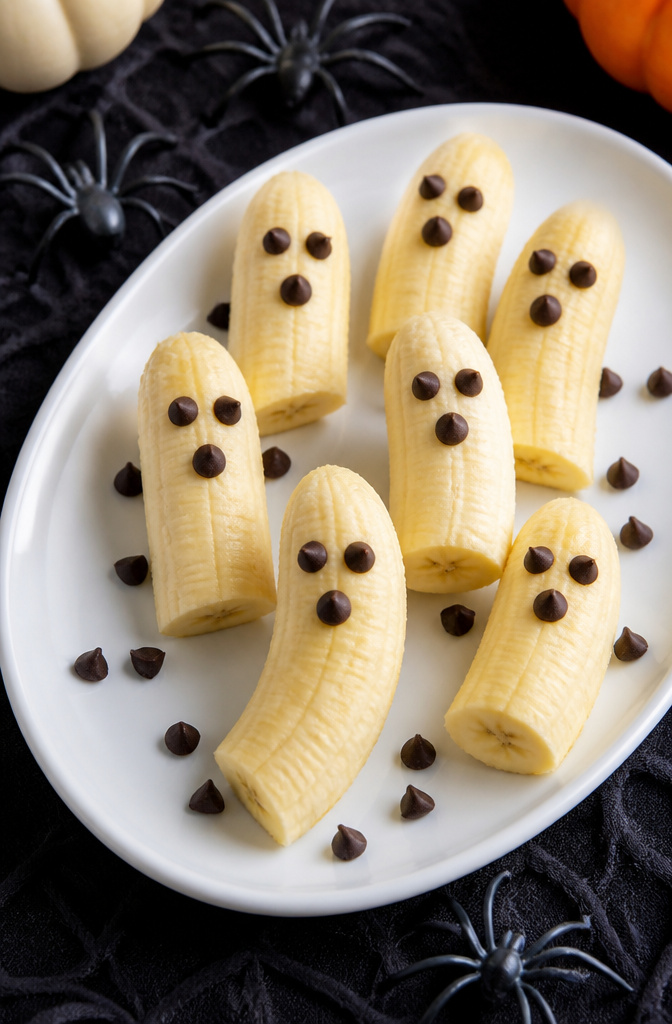
Peel a banana, halve it crosswise, and press two mini chocolate chips in near the top for eyes and one lower down for a mouth. That is the entire recipe.
The only real question is when you make them, because the cut surface starts browning within minutes and the whole thing looks sad fast.
If you are serving these at a party, you have two workable paths. The first is to prep them two hours ahead, brush the cut faces with lemon juice, and keep them airtight in the refrigerator.
The lemon juice does slow the browning, but guests will taste it, and not everyone wants a citrus ghost.
The second path is simpler: set out the bananas and chips as a station and let people assemble their own right before eating. No browning problem, no cleanup of browned rejects, and it takes thirty seconds per person.
For a party where you want food to look ready when guests walk in, the station approach wins.
If you need platters out and done, lemon juice and a tight container in the fridge gets you maybe two hours of acceptable color. Past that, the brown wins.
4. Clementine Pumpkins
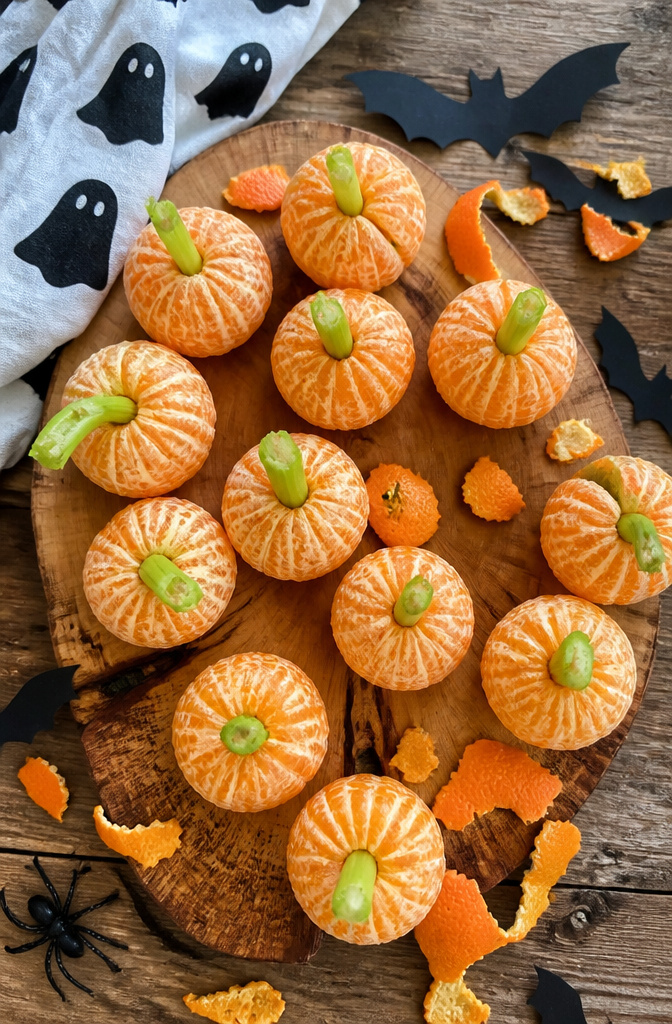
Small oranges peel cleaner than large ones, so clementines or tangerines win over full-size navels here. The membrane clings less, and you are less likely to tear the segments into a pulpy mess that will not hold a stem.
Once peeled, break a celery stalk into pieces short enough to wedge into the hole at the top where the segments meet.
Cut from the upper end of the stalk if you want to keep a leaf or two attached; it reads more like a pumpkin stem and less like a stick.
Push the celery in just far enough that it stays upright without splitting the fruit.
These land on the table as a quiet counterweight to the sugar-heavy snacks surrounding them. No bowls to wash, no oven time, and the only prep is peeling and breaking a stalk.
If you are already buying clementines for lunchboxes, this is the snack that uses what you have.
5. Spider Web Dip
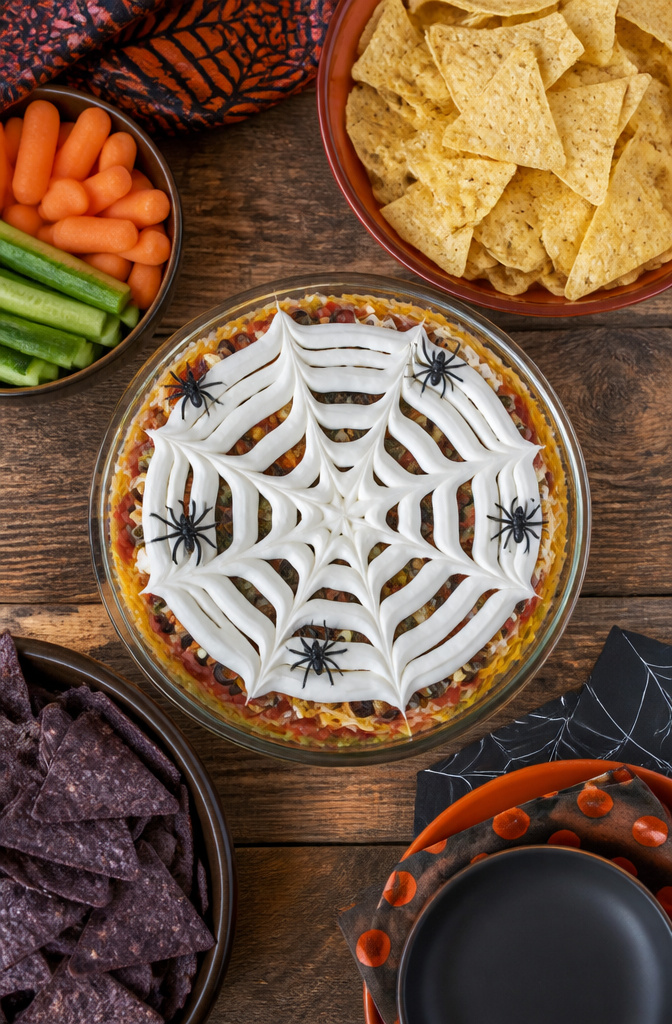
A sour cream spider web turns any layered dip into a Halloween centerpiece; pipe it in concentric circles, then drag a toothpick from center to edge.
Start by smoothing a solid layer of sour cream across the top of your dip, then transfer more sour cream into a plastic bag and snip a small corner.
Draw lines from the center out, like spokes on a wheel, then connect them with one curved arc between each spoke.
Work from the outside in or the inside out, but keep the curves shallow; too deep and you get a spiral, too flat and you lose the web shape.
This works on a classic 7-layer taco dip or on something lighter like hummus if you want a healthier option. For dippers, set out sturdy chips or vegetables that can handle the layers without cracking.
A few plastic spiders on top finish the look.
6. Candy Corn Pizza
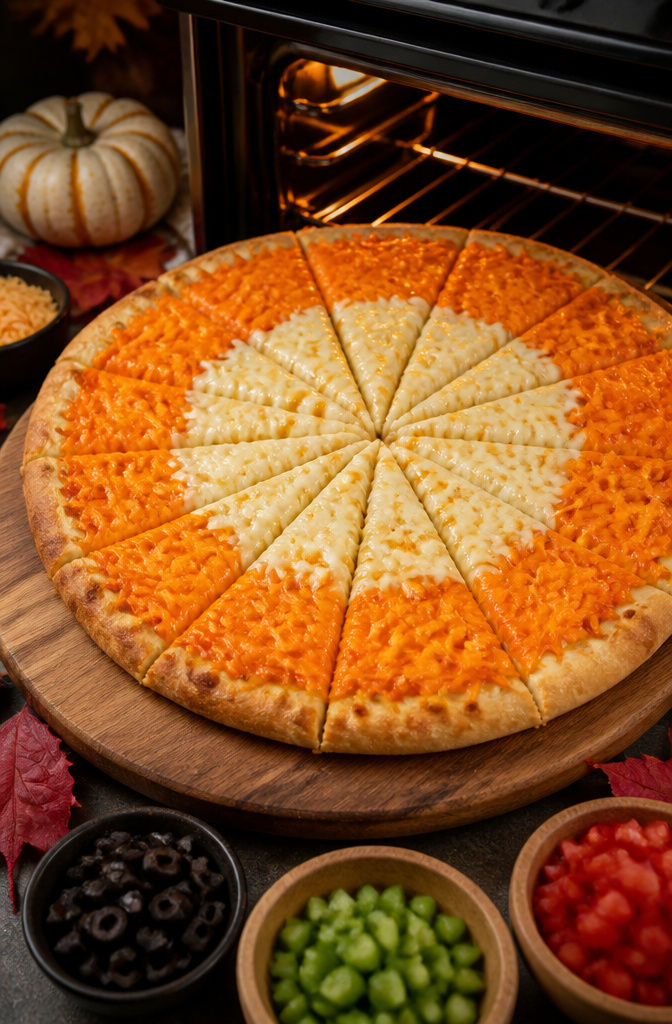
Plain cheese pizza works best here, so you are not fighting sauce color against the cheese.
Spread the dough with a thin layer of olive oil or a very light brushing of sauce, then build the cheese in two rings: shredded cheddar around the outer edge and mozzarella in the center.
The white center, orange middle, and pale crust edge give you the three candy corn bands once you slice.
The temperature matters more than you might expect. Too hot and the cheeses melt into each other before the structure sets, too cool and they brown unevenly.
Four sources converge on this: bake at about 400°F to 425°F, which is hot enough to melt and bubble but controlled enough that the cheddar and mozzarella stay in their lanes.
You want the cheddar to soften into a distinct orange band, not bleed outward into the white.
Slice into wedges before serving so each piece points toward the center like a single candy corn triangle. Kids tend to spot the resemblance faster if the slices are narrow rather than wide.
7. Halloween Snack Mix
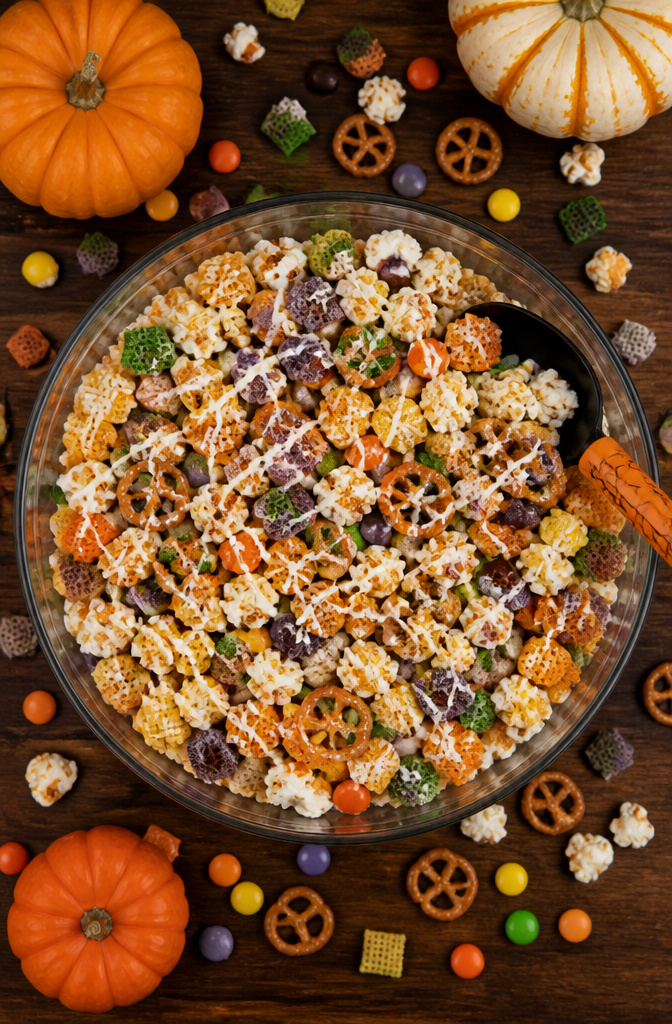
A Halloween snack mix built on popcorn, Chex cereal, pretzels, and candy lives or dies by its ratios.
Go heavy on the candy and the bowl reads as dessert; overload the pretzels and guests tire of the salt before the movie starts.
Aim for roughly equal parts popcorn and cereal by volume, half that amount of pretzels, and candy sprinkled in as a accent rather than a main player.
White chocolate binds it if you want a coated version, though a dry toss keeps the mess down for younger kids.
Meaningful Eats notes this mix disappears fast at parties and scales easily for a crowd, which tracks with the four-quart yield from Taste of Home’s similar version.
Bag it in cellophane with ribbon if you need party favors, or just leave it in a bowl with a scoop. The coated version holds for several days in an airtight container; the dry mix keeps even longer.
Either way, make it ahead. The night-before assembly is one less task when the party starts.
8. Pumpkin Cheese Balls
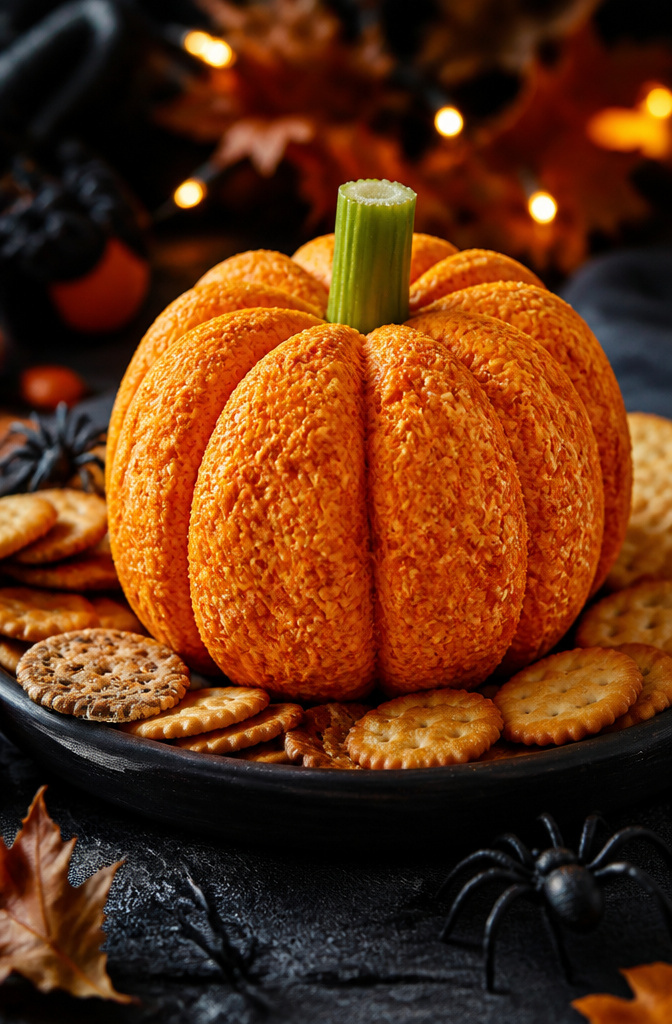
A cheese ball already looks round and slightly lumpy, so shaping it into a pumpkin takes about thirty seconds.
Pack the mixture into a tight ball, then drag the back of a spoon from top to bottom in five or six lines to make the ridges.
Press a bell pepper stem or a piece of celery into the top for the handle.
Paprika coats the outside far better than food coloring because it adds a matte, dusty orange that reads as actual pumpkin skin, not as wet orange cheese.
The spice also gives you a faint smoky flavor that works with cheddar or cream cheese bases. Food coloring would tint the mixture inside, turn your hands orange while you shape, and leave the surface looking artificially bright.
Roll the finished ball in a thick layer of paprika and pat off the excess so it does not dust your serving plate.
The ridges help the coating stick and catch light in a way that makes the shape read instantly as pumpkin, even from across the room.
9. Dirt and Worms
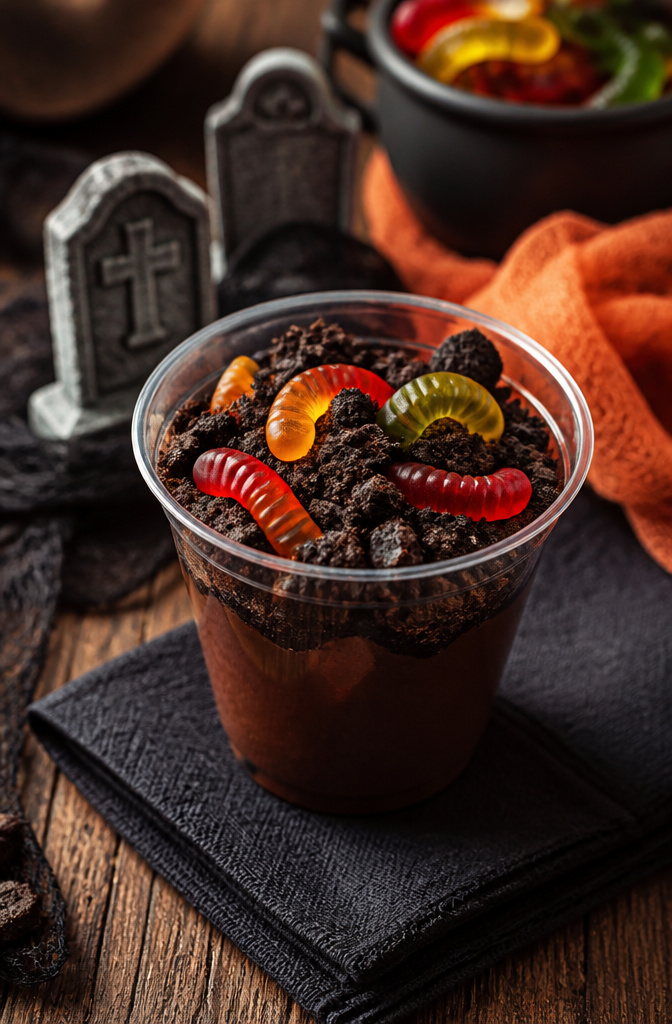
Chocolate pudding topped with crushed Oreos and gummy worms is the Halloween party snack that practically named itself, but the order you build it in keeps the whole thing from turning into a gray mush before the kids even circle the table.
Pour the pudding first and let it set fully before you add anything on top.
The cookies need to stay dry until the last minute, so crush them and keep them in a separate bowl until right before serving, then scatter them over the surface like loose soil.
The worms press in after that so they look like they’re actually emerging.
Store-brand chocolate pudding works fine here, but the worms are where people cheap out and regret it.
The bottom-shelf gummy worms at most grocery stores are basically flavored rubber, so spend the extra dollar or two for Trolli or Albanese, both of which actually taste like fruit instead of plastic.
If you’re feeding a crowd, the bulk bags from Walmart or Target run about three dollars for enough to cover a full sheet pan of cups, and they hold their shape at room temperature for a couple hours.
10. Apple Monster Mouths
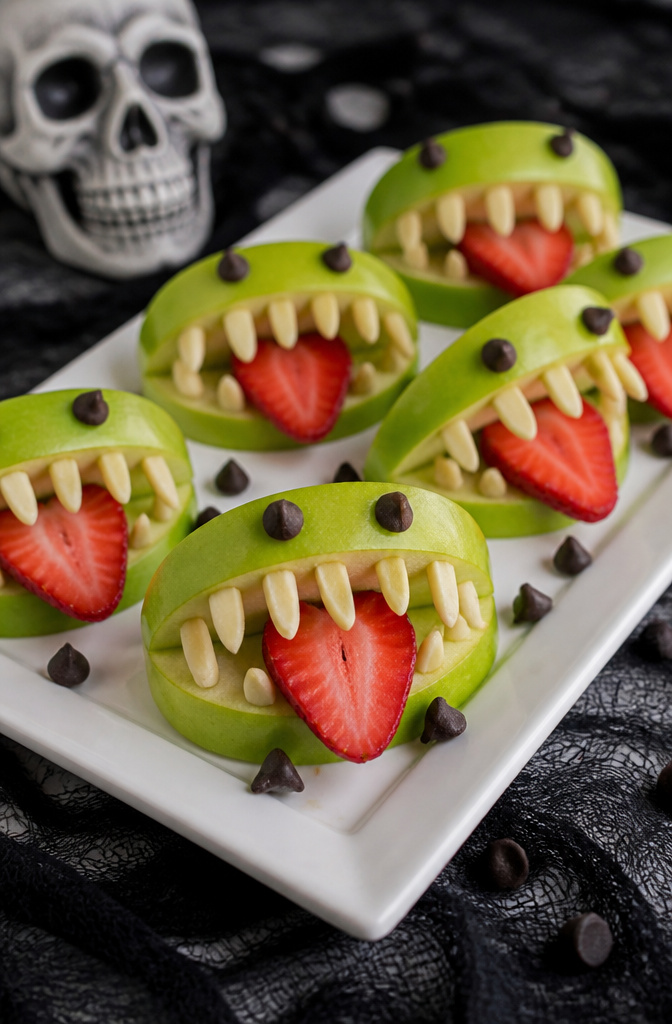
You will find these under two names depending on which site you land on: Monster Jaws or Apple Monster Mouths. They are the same snack.
Quarter the apple and cut a wedge from the skin side to open the mouth. A dunk in lemon water keeps the flesh from browning while you work.
Green apples hold their shape best after slicing; the firmer flesh does not soften or weep the way a Red Delicious will.
Spread nut butter inside the wedge, then press slivered almonds or sunflower seeds into the top edge for teeth. A sharp point on the seed or nut helps it stay put.
A strawberry slice on the bottom makes a tongue, and you can attach candy eyes above the mouth with a dab of the same nut butter. Pretzel rods work in place of the strawberry if you want a different look.
Mini marshmallows are an option for the teeth too, though they slip more easily than almonds.
11. Eyeball Deviled Eggs
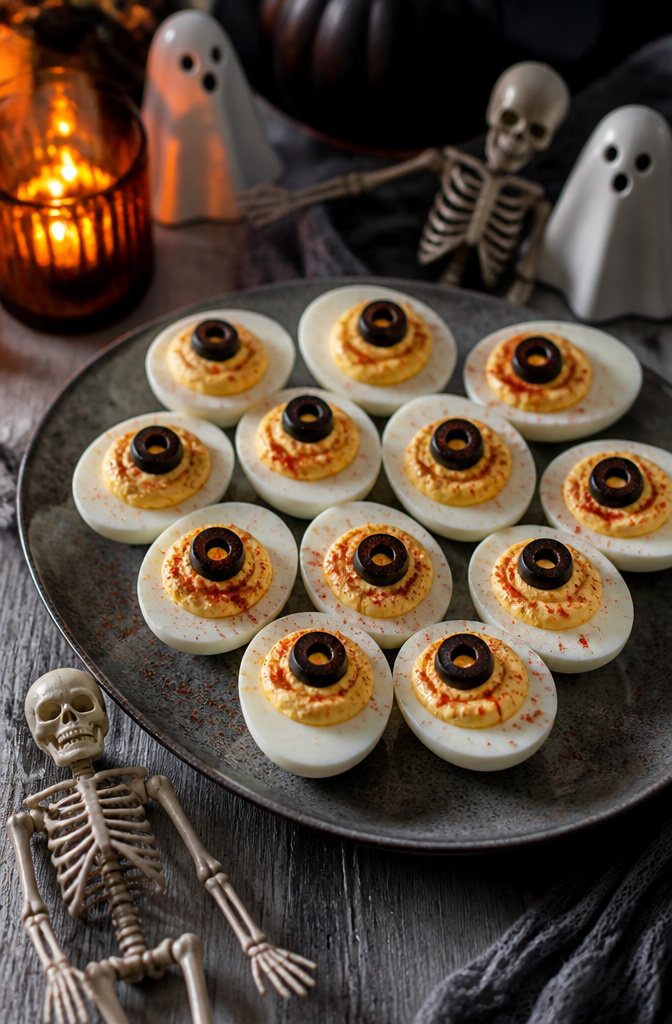
Deviled eggs are already a party favorite, and turning them into eyeballs is mostly about the topping.
Pipe or spoon your filling the usual way, then press a thin slice of black olive into the center so it sits flat on the yolk mixture.
The olive wants to slide, so nestle it while the filling is still soft and give it a gentle push so the mayo binds it in place. A caper in the middle of the olive slice finishes the pupil.
For the bloodshot look, dust the white of the egg with paprika, concentrating the color near the olive so it fades outward like irritated veins.
Red food coloring works too if you want a stronger streak, but paprika gives you the look without adding anything the kids won’t eat. The whole thing takes about 25 minutes for two dozen halves, and they disappear fast.
12. Witch Hats
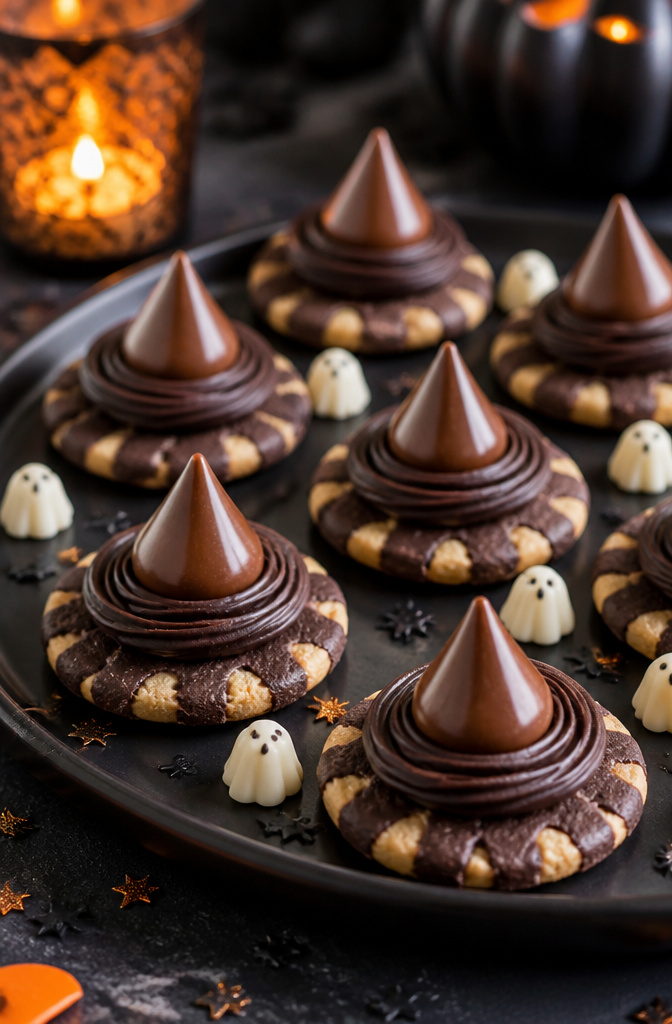
Fudge stripe cookies and Hershey’s Kisses are the kind of pairing you can assemble in the parking lot if you forget the party starts in twenty minutes.
Set the cookie chocolate-side up, pipe a ring of store-bought frosting around the base of the Kiss, and press it down. The frosting squeezes out to make the hat band, and you pipe a bow on after.
The real question is what keeps the Kiss from sliding off in transit. Frosting works short-term, but it stays soft.
If these are traveling more than across the kitchen, a dab of melted chocolate sets firmer and holds better through temperature shifts, though it takes a few minutes to harden.
The frosting wins only if you are serving immediately and want the bow detail clean.
13. Pumpkin Rice Krispie Treats
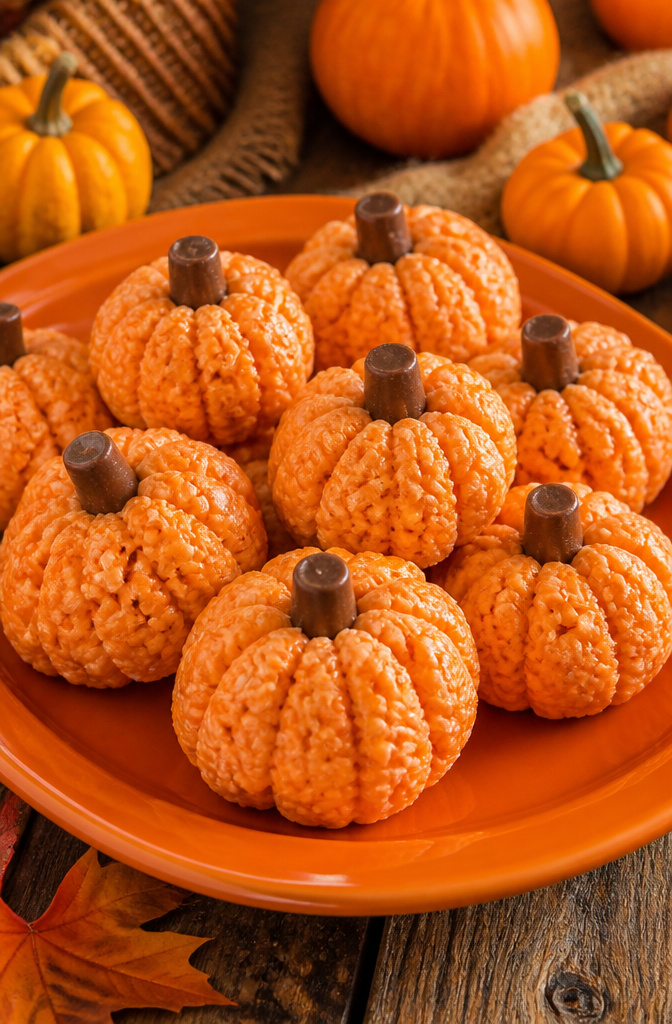
Orange food coloring turns a batch of Rice Krispie treats into something that reads instantly as pumpkin on the snack table.
Use gel coloring rather than liquid, since liquid throws off the texture and you will end up either too pale or too sticky.
Work it in while the marshmallow mixture is still warm; once it cools, you are shaping plain beige lumps and promising everyone they are pumpkins.
For the stem, skip the specialty-store run. A Tootsie Roll malleled into a short cylinder does the job, or if you already have green gummy candy or peelable licorice on hand, cut a small piece and press it in.
Even a thin strip of cucumber works, though it softens after a few hours and tastes more like a dare than a treat.
The Tootsie Roll stays neat longer and adds a second texture that keeps the bite from being one-note sweetness.
Make these the same day you plan to serve them. Rice Krispie treats harden noticeably after about 24 hours, and by day two the chew is closer to stale than festive.
If you must get ahead, shape them morning-of and store airtight with wax paper between layers. They will hold the pumpkin shape fine, but the pleasure is in the pull.
14. Creepy Eyeball Tarts
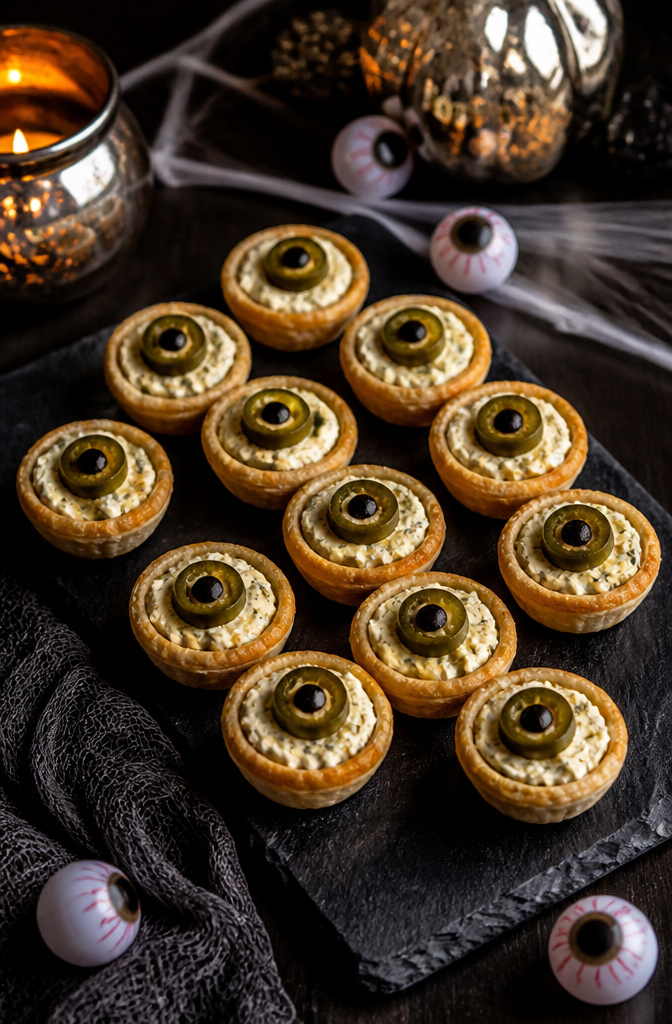
Jalapeño poppers already look a little like eyeballs once you stuff them, which makes them the one item on this list that can actually hurt someone.
The heat lives in the seeds and the white membrane inside, and if you do not remove both cleanly, you will have guests coughing into their napkins halfway through the party.
Wear a disposable glove or two layers of plastic wrap over your fingers, slice the pepper in half lengthwise, and scrape the membrane out with a small spoon. Do not touch your face until you have washed your hands twice.
For the tart version, press a square of puff pastry into a mini muffin tin, fill it with an herby cream cheese mix, and set a halved jalapeño on top cut-side down so the rounded back becomes the eye.
A dot of sweet chili sauce in the center finishes the look. If you want less heat, skip the chipotle in the filling; the cream cheese already tames the pepper considerably.
One batch makes about 32 pieces, and each runs roughly 133 calories if you are counting.
15. Frankenstein Guacamole
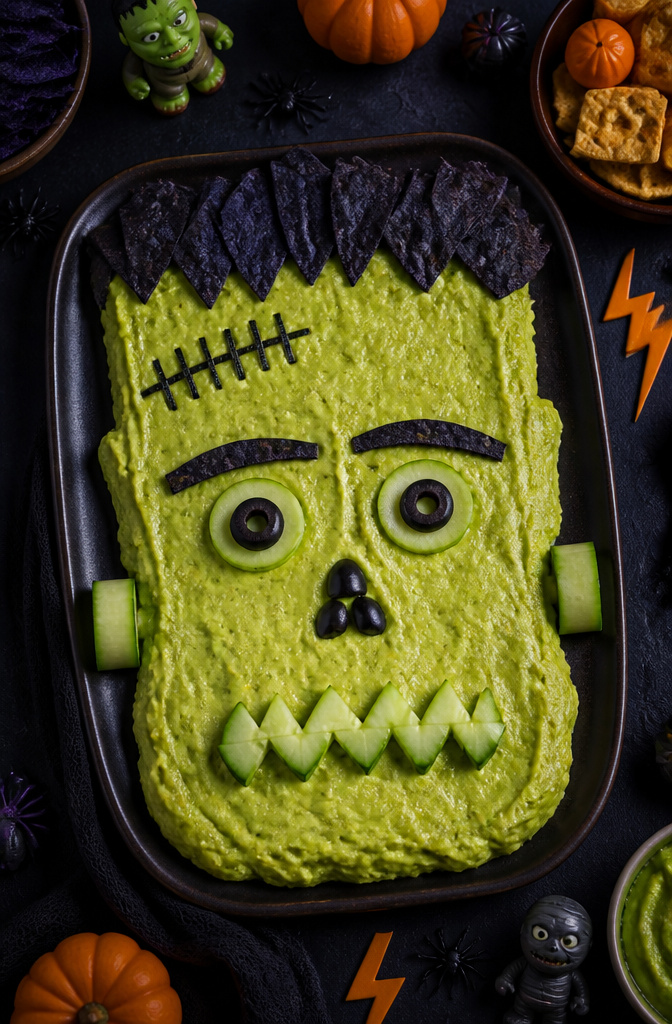
Spread the guacamole in a flat rectangle across a platter or shallow dish to make Frankenstein’s face.
Black olives work for the eyes, nose, and the bolts on his neck; slice them in half if you want the bolts to sit flat.
For the mouth, cucumber or red pepper cut into a jagged line does the job, and the contrast against the green actually reads from across the room.
The mistake that turns this brown before guests arrive is making it more than a couple of hours ahead. Guacamole oxidizes fast, and no amount of lime juice fully stops it.
If your party timeline demands prep, make the base up to two days ahead and press plastic wrap directly onto the surface, then add the vegetable features right before you set it out.
The olives and pepper hold fine; the guacamole underneath does not.
16. Chocolate Cherry Mice
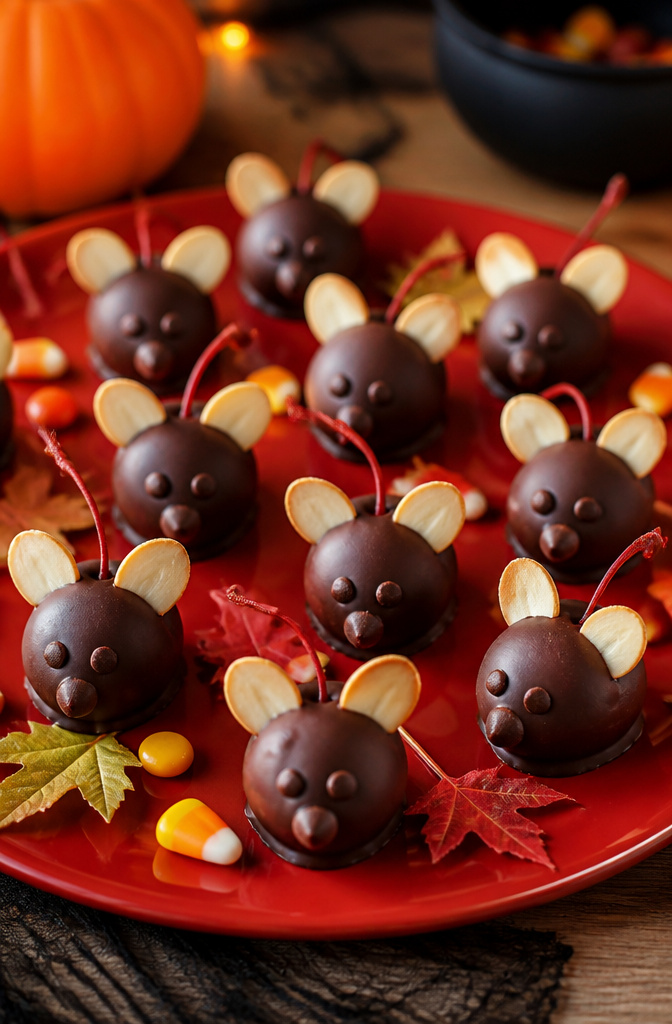
Maraschino cherries dipped in chocolate make a convincing mouse silhouette, but the stem is where most versions fall apart.
Most jars sold today do not come with stems long enough to grip, so plan to buy a specific stem-on variety or accept that the tail will be short and stubby.
Let the cherries drain, then dry them thoroughly with paper towels before dipping; any syrup left on the surface will make the coating seize and spot.
For the ears, slivered almonds look right only if you attach them while the chocolate is still tacky, not wet.
Press them in at a slight angle so they sit forward like real ears, then hold them for a few seconds until the chocolate firms enough to keep them upright.
Wait too long and the chocolate hardens before the almonds will bond; rush it and they slide down the side.
Add a chocolate-chip nose and small candy eyes once the body coating is semi-dry, and you will have the face in place before the surface sets hard.
17. Oreo Spiders
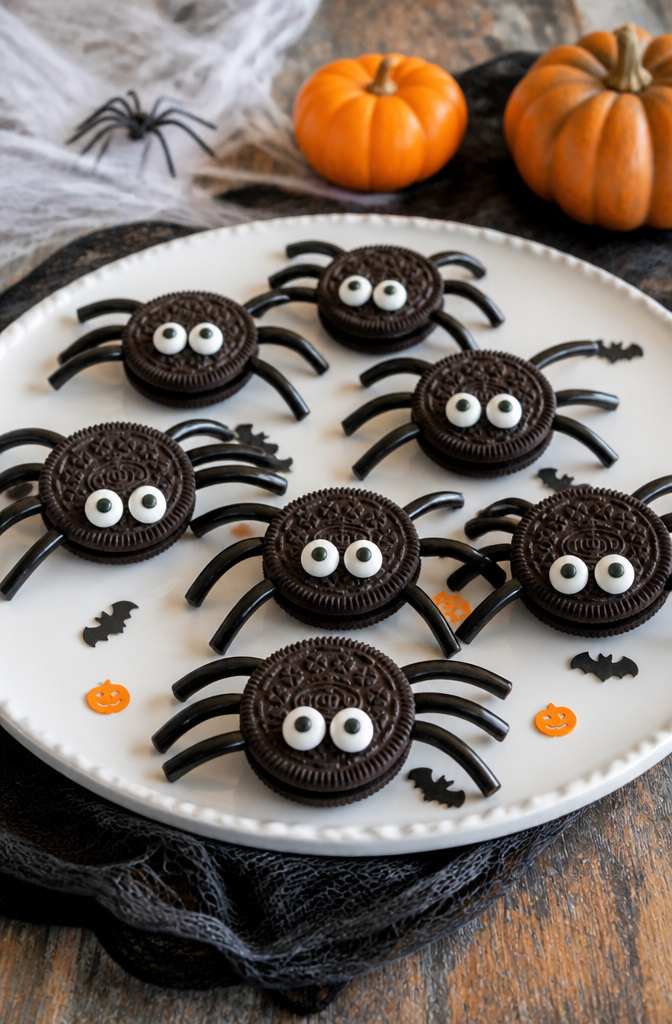
Oreo spiders are the kind of Halloween project you can hand off to kids without hovering, which matters when you are trying to get the rest of the food out.
Twist the cookie open, press eight pieces of shoestring licorice into the white filling, add two edible candy eyes with a dab of cookie icing, and press the top back on.
No baking, no knife work, no sticky fingers on your good bowls.
The legs are what make or break the look. Shoestring licorice is getting harder to find on regular grocery shelves, so if your store does not stock it, Twizzlers Pull-Apart candy splits into thin strands that hold the same shape.
Regular Twizzlers do not; they are too thick and heavy, and they sag against the cookie within an hour. Even with the right licorice, plan to assemble these no more than two hours before the party.
The filling softens, the legs droop, and by the time guests arrive you are looking at eight-legged creatures that have melted into six or seven.
Make them right before people show up, or keep the components laid out and let guests build their own at the table.
18. Mini Pumpkin Cheesecakes
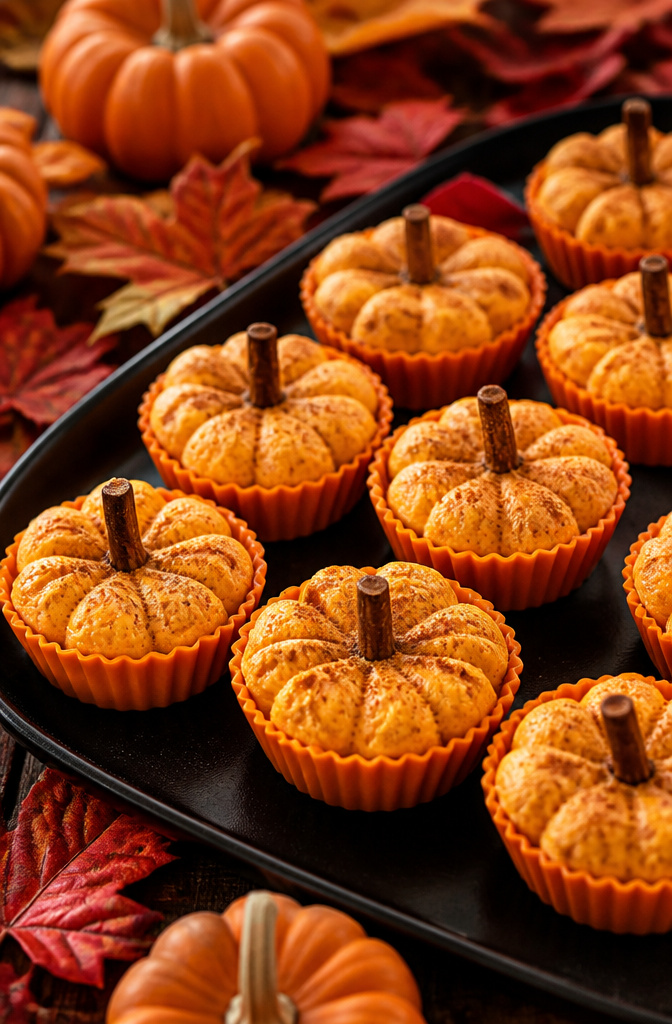
A muffin tin will not give you the pumpkin shape. The ridges that read as pumpkin segments come from a silicone mold with fluted sides, the kind sold for Halloween baking.
Without it, you are making round mini cheesecakes that happen to be orange.
The crust shortcut that actually saves time is using gingersnap crumbs straight from the food processor with melted butter, no baking beforehand.
Pressed into the tin while the oven preheats, they set firm against the creamy filling without a separate blind-bake step. The sugar in the cookies does the work a plain graham crust would need more time to achieve.
For the color, a spoonful of pumpkin puree in the batter beats food coloring. It adds moisture you will need to offset with an extra egg yolk so the centers do not weep.
Chill them overnight; the texture firms from slightly soft to sliceable, and the flavor loses its canned edge.
19. Chocolate Skull Cake
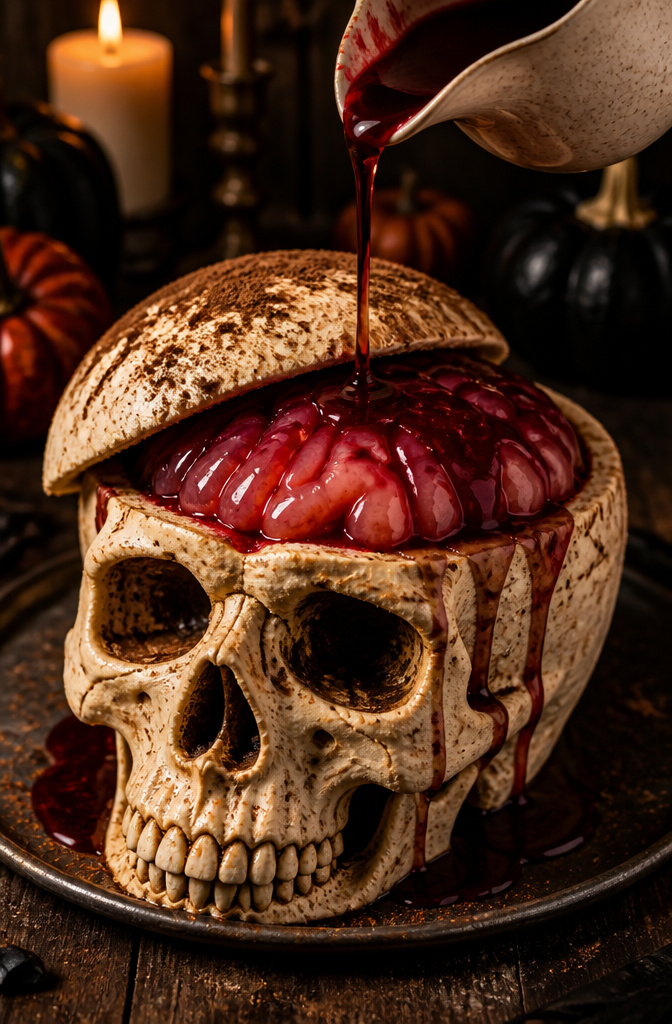
A chocolate skull cake lands harder than any flat sheet cake because the bone structure does the work for you. A skull mold helps, but a dome cake carved and iced white works just as well.
A standard 9-inch round layer cake and a small dome cake or even a trimmed muffin top give you the cranium and jawline.
Stack them off-center, carve a nose hollow and eye sockets with a paring knife, and the silhouette reads from across the room.
The frosting technique matters more than the shape. Start with a crumb coat in warm ivory buttercream, not stark white.
Real bone has yellow and gray in it, and pure white reads as plastic on a dessert table. Use a small offset spatula to drag vertical ridges from brow to chin.
Those slight uneven lines catch light the way sutures catch light on a real skull. Add shadow with cocoa powder dusted through a sieve along the temple hollows and under the cheekbones.
Hide a strawberry jello brain under a thin white chocolate skull cap and crack it open at the table. Pour a red velvet sauce over the top at the table, let the chocolate melt, and the brain slides into view.
It is more involved than opening a bag of candy, but the reaction justifies the ten extra minutes.
What to Make Ahead
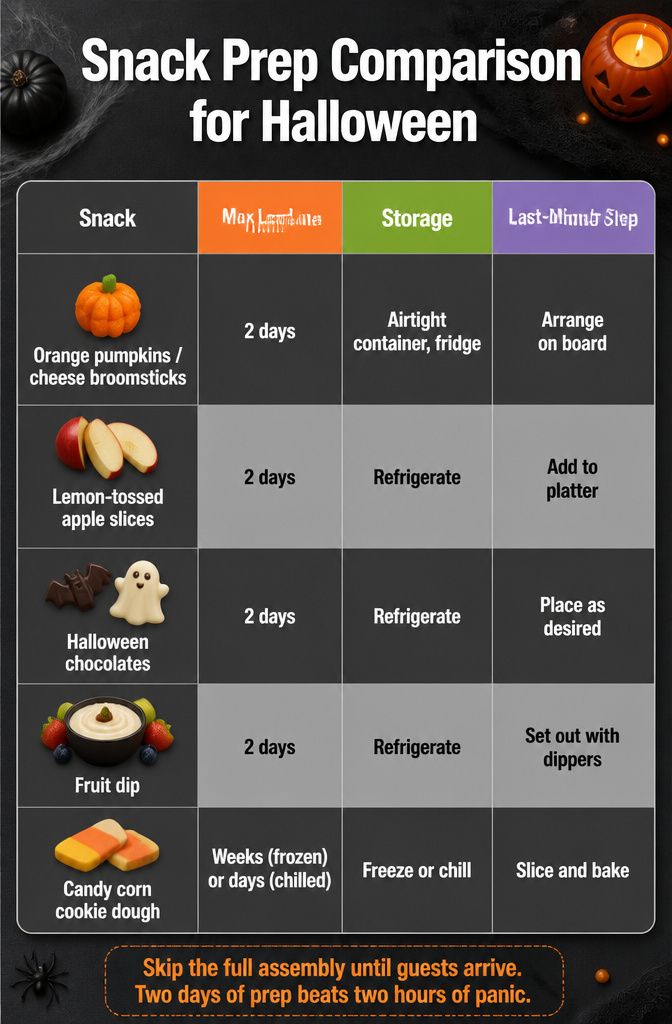
Some snacks hold up for days, while others fall apart if they sit too long. The orange pumpkins and cheese broomsticks keep in an airtight container in the fridge for up to two days without losing shape or texture.
Sliced apples tossed in lemon juice hold that same window if you refrigerate them, though they soften slightly at the edges. Fruit dip and homemade Halloween chocolates also make the two-day mark without issue.
Candy corn cookie dough is the outlier: shape and chill it days or even weeks ahead, then slice and bake when you need them.
That tricolor butter dough only needs the oven time, so it wins for the longest lead time.
Right-before assembly is where things break down. Anything with exposed cut fruit, dip on a platter, or dry and wet components touching should wait until the day of.
The board and bowls can sit out ready, but putting the pieces together is a last-hour job.
| Snack | Max Lead Time | Storage | Last-Minute Step |
|---|---|---|---|
| Orange pumpkins / cheese broomsticks | 2 days | Airtight container, fridge | Arrange on board |
| Lemon-tossed apple slices | 2 days | Refrigerate | Add to platter |
| Halloween chocolates | 2 days | Refrigerate | Place as desired |
| Fruit dip | 2 days | Refrigerate | Set out with dippers |
| Candy corn cookie dough | Weeks (frozen) or days (chilled) | Freeze or chill | Slice and bake |
Skip the full assembly until guests arrive. Two days of prep beats two hours of panic.
Frequently Asked Questions
What are some easy Halloween snacks?
Mummy dogs, banana ghosts, witches’ brooms, and clementine pumpkins all come together fast with minimal ingredients. Most of these need fifteen minutes of actual work or less.
Crescent dough, string cheese, and fruit do the heavy lifting so you spend less time in the kitchen and more time at the party.
How can I make Halloween snacks healthy?
Build your board around fruit and vegetables that already look the part. Clementine pumpkins, banana ghosts, and apple monster mouths use produce as the base instead of sugar.
String cheese brooms add protein, and a guacamole Frankenstein keeps the dip green without heavy cream.
What are some fun Halloween party food ideas?
Spider web dip turns any layered dip into a centerpiece with sour cream piped in a web pattern. Eyeball deviled eggs use olive slices and paprika for a bloodshot look.
Chocolate skull cakes carved from round layers make a bigger impact than flat sheet cakes, especially with a jello brain hidden underneath.
What are some easy Halloween party appetizers I can make ahead?
Orange pumpkins and cheese broomsticks hold for two days refrigerated in an airtight container. Sliced apples tossed in lemon juice match that same window.
Candy corn cookie dough keeps even longer shaped and chilled, ready to slice and bake when you need it.
What food do you have at a Halloween party?
A balanced table mixes savory and sweet, hot and cold, make-ahead and last-minute.
What to give besides candy for Halloween?
String cheese brooms, clementine pumpkins, and apple monster mouths hand out without the sugar crash. Savory options like mummy dogs and eyeball deviled eggs fill the same grab-and-go role.
For a take-home favor, bag the Halloween snack mix in cellophane with ribbon instead of loose candy.
What are the top 10 Halloween foods?
Each one balances visual impact against actual effort, and most use grocery-store ingredients without specialty runs.